


Finding the Perfect Cheese Board
Anyway, to hopefully help me in this (first-world problems) decision making, I thought I’d share a few I’ve found and hope that someone comments and sways my mind in the right direction. Here goes...
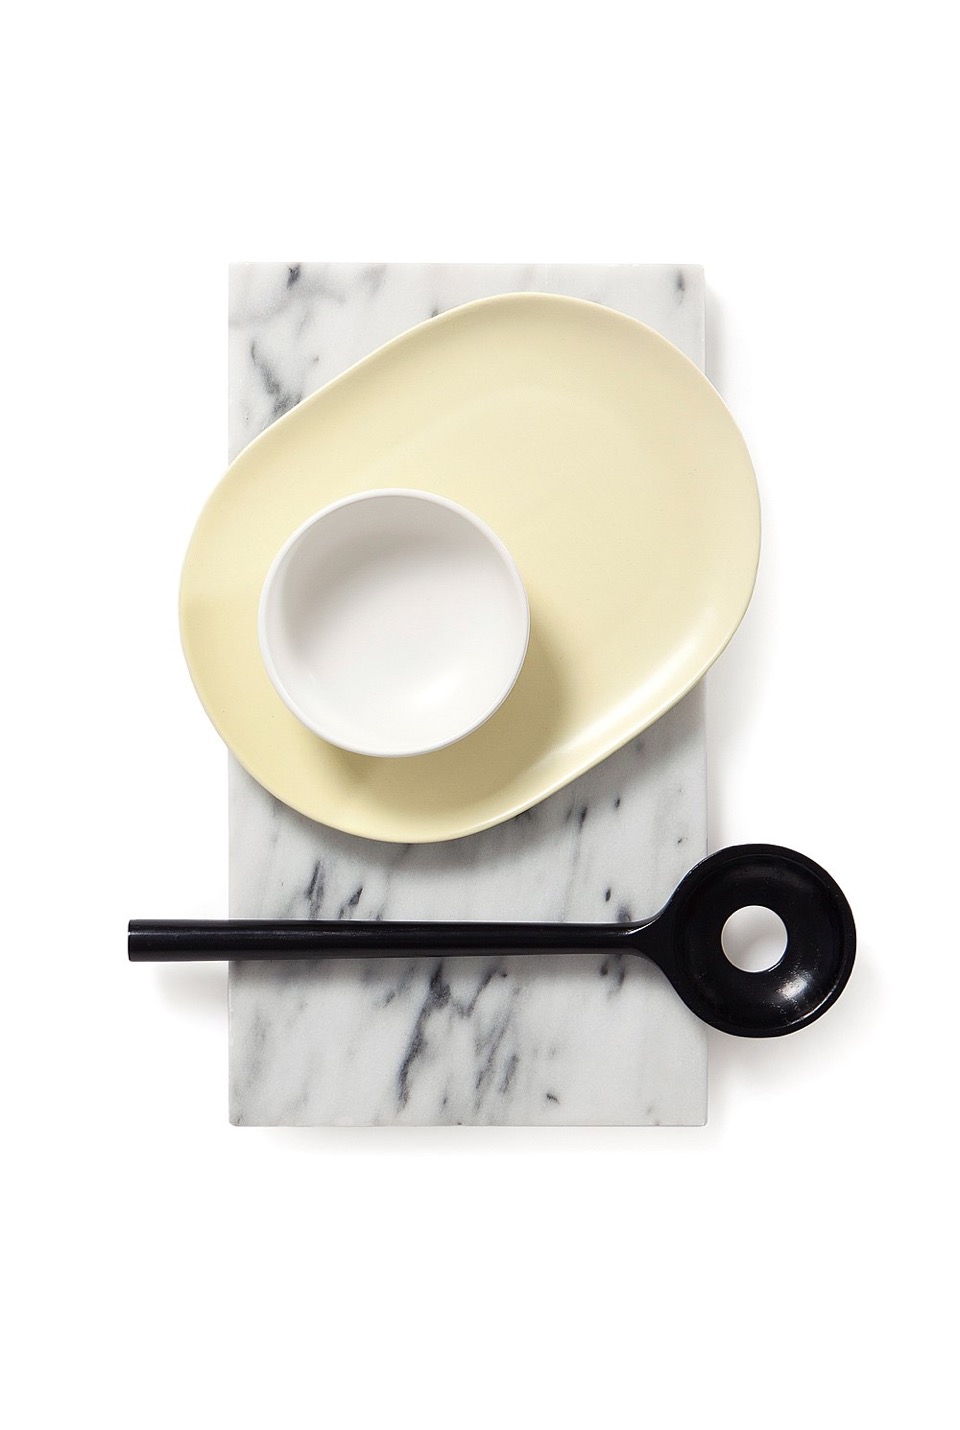
{Barton Marble Rectangular Board by Country Road}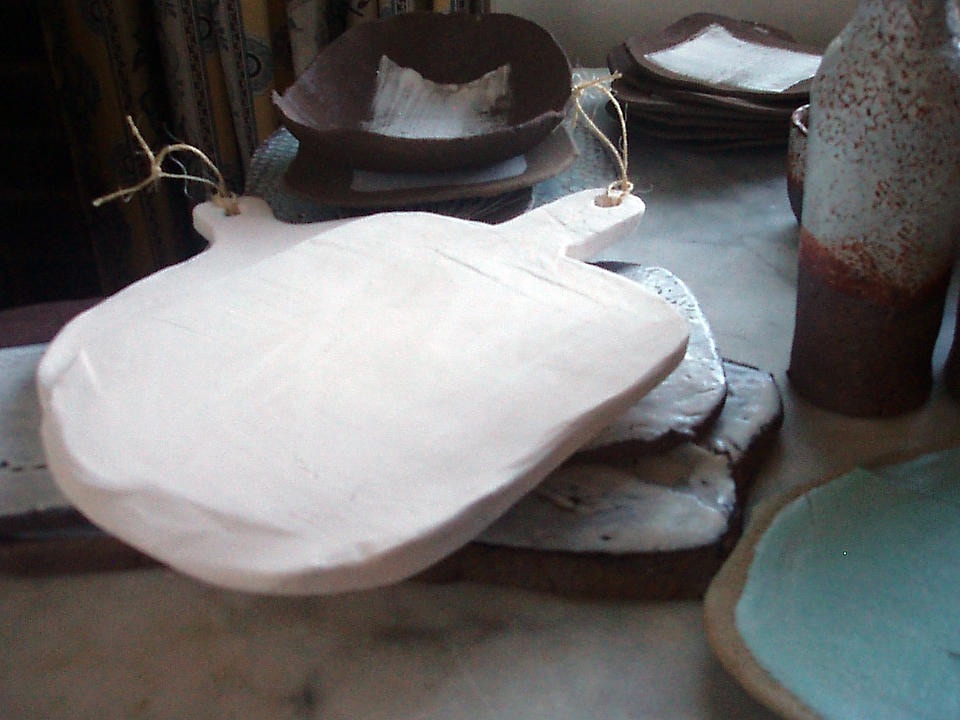
{Square porcelain chopping block by Slab and Slub}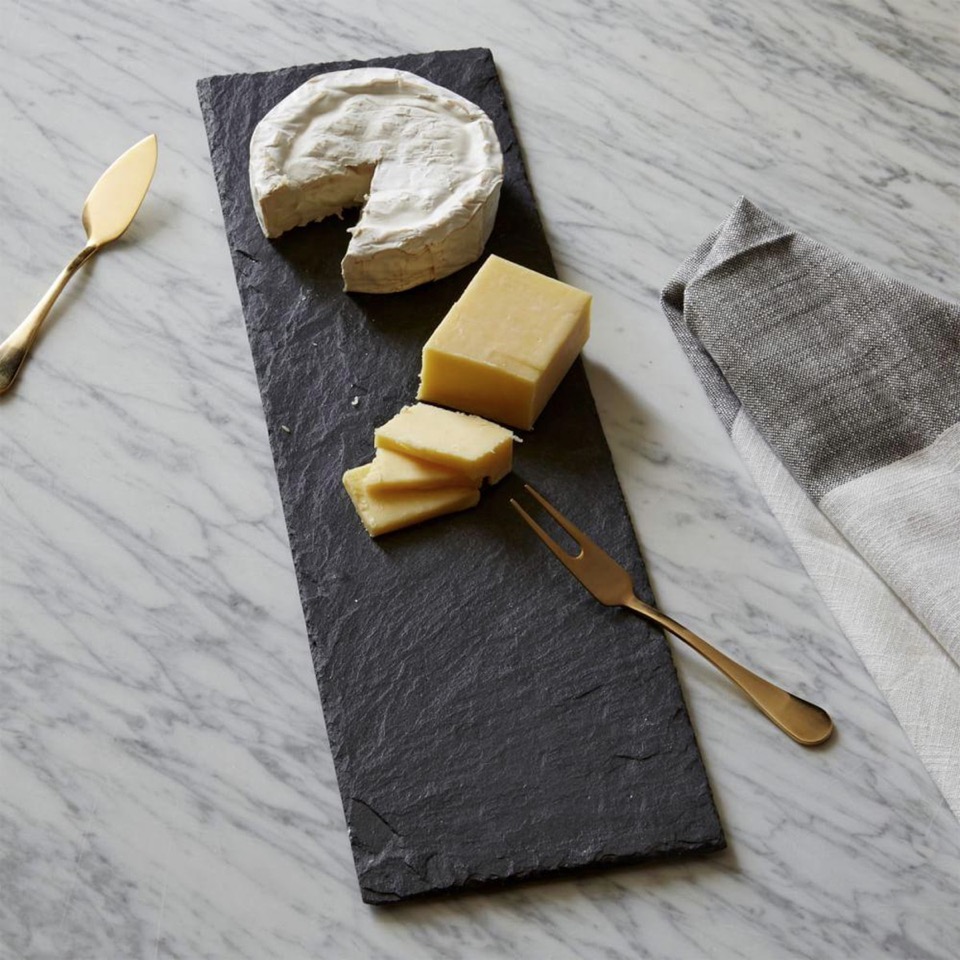
{Slate cheese board by West Elm}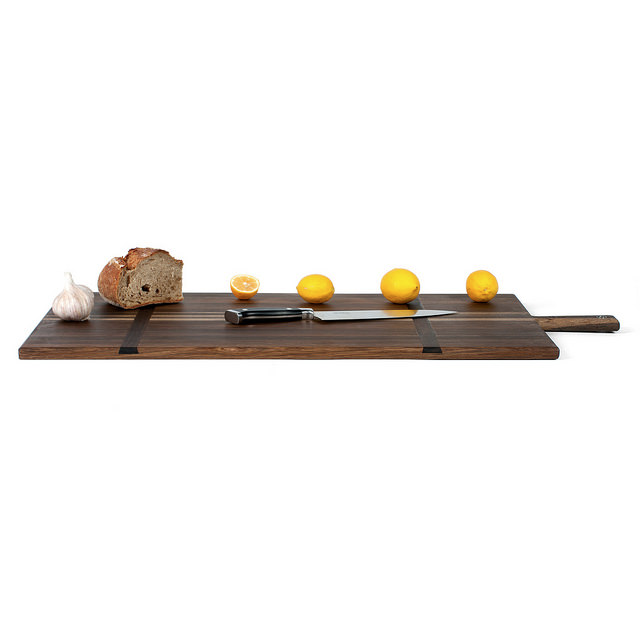
{Cheese Paddle No. 9 by Sands Made in Melbourne}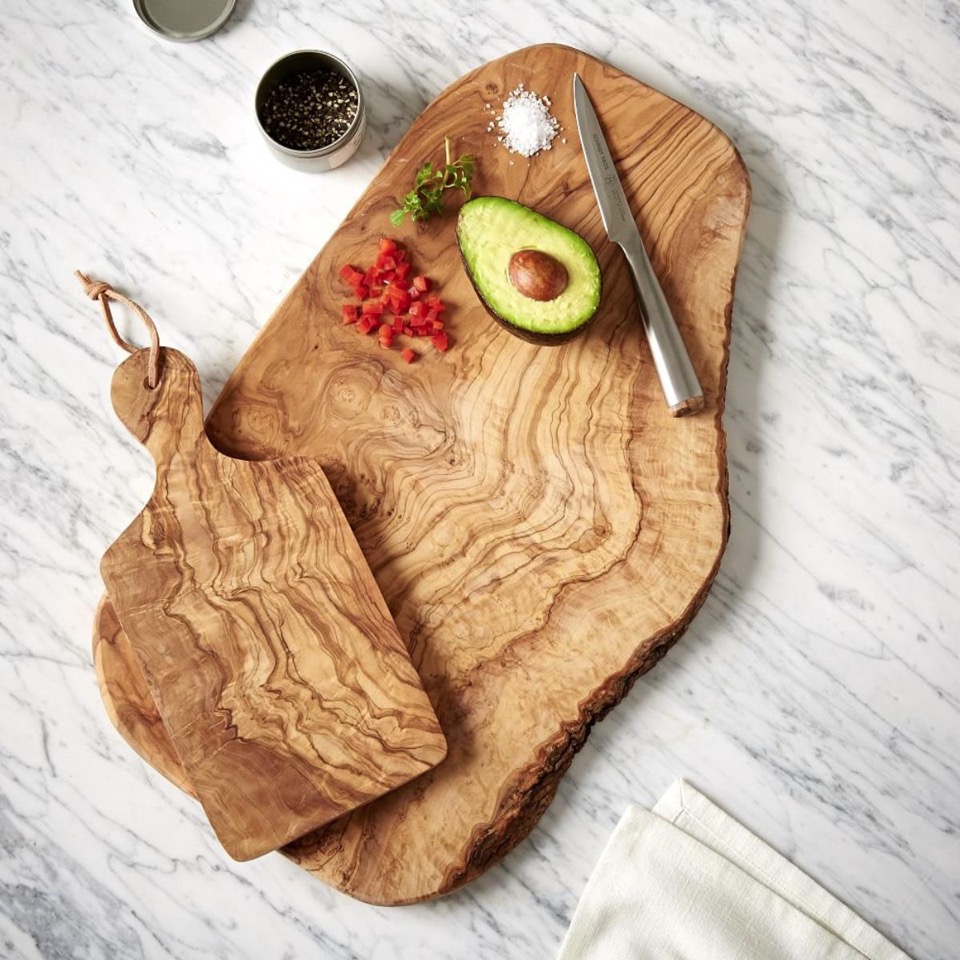
{Olive Wood Rustic Cutting Board at West Elm}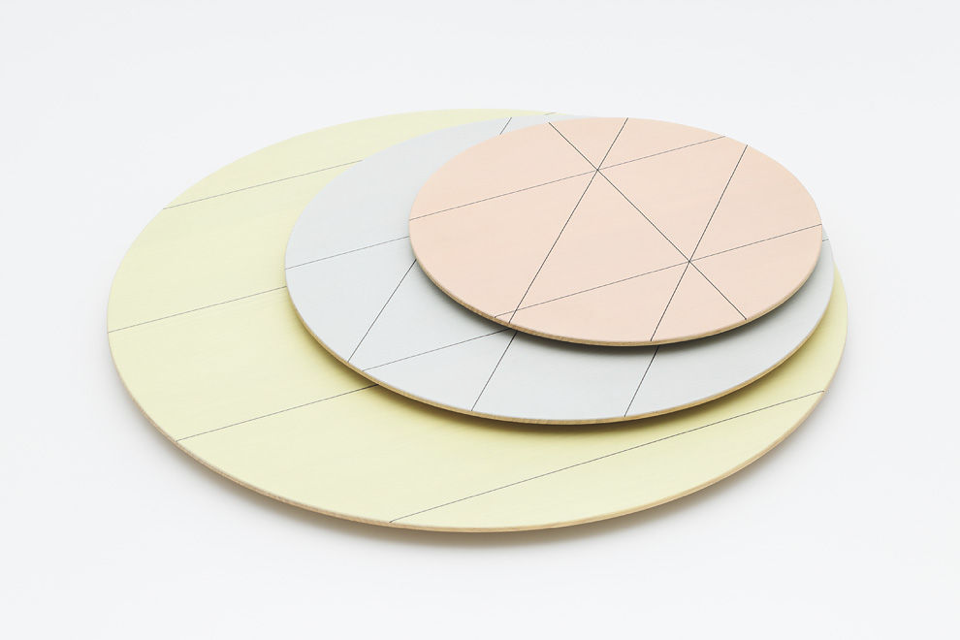
{Colour Platter by Karimoku New Standard available at Stylecraft}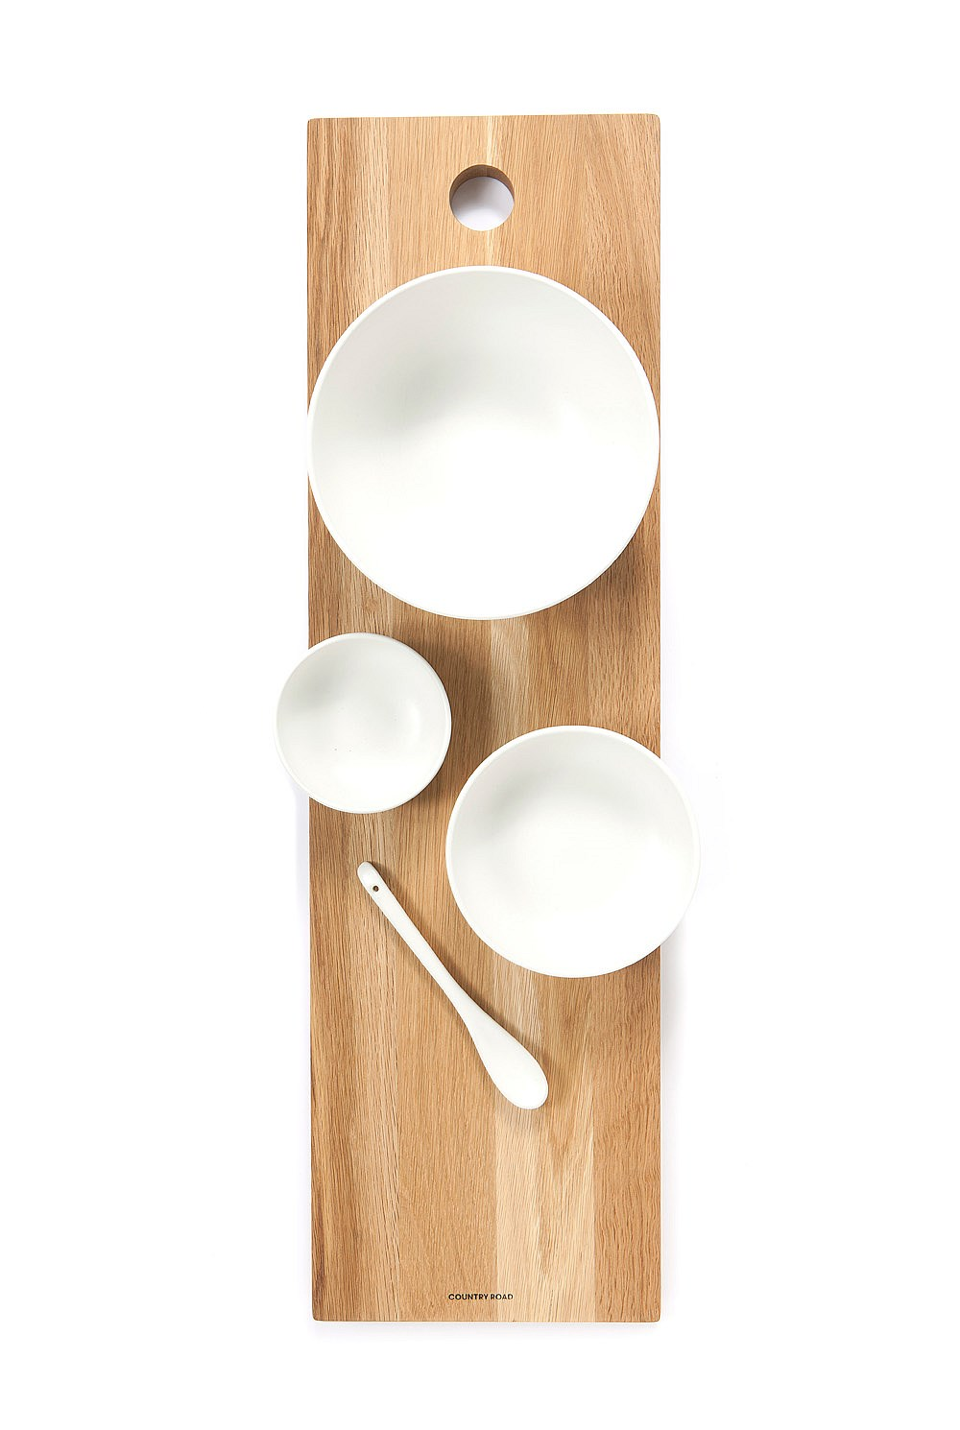
{Barton Long Board in Oak by Country Road}
{Cheesy Boards Hello - I love their burnt pun-tacular boards from their etsy store}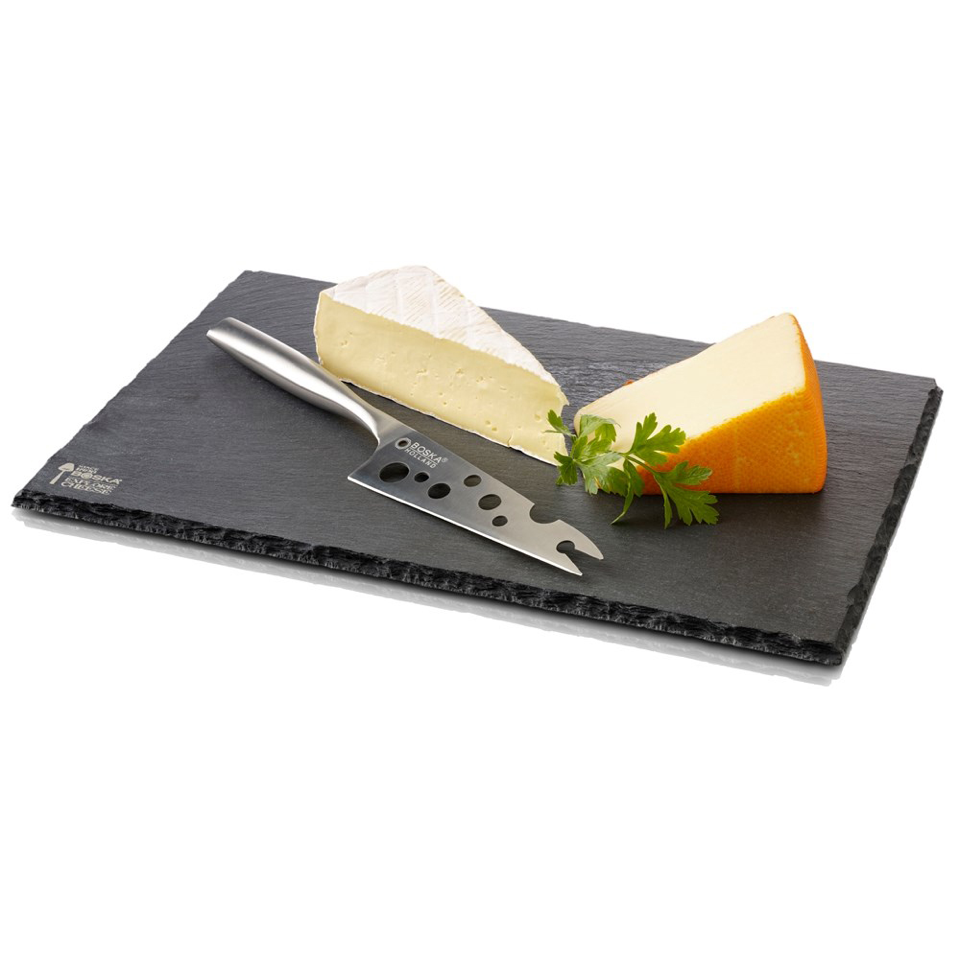
{Monaco Cheesy Cheese Slate board by Boska at Peter’s of Kensington} 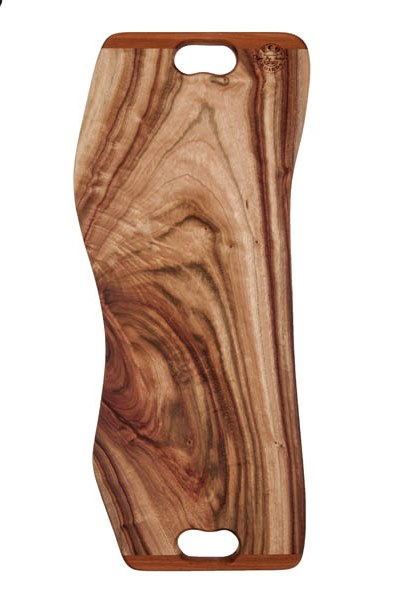
{Coorabel chopping board by Eco Chopping Boards in Byron Bay from local Camphor Laurel timber} 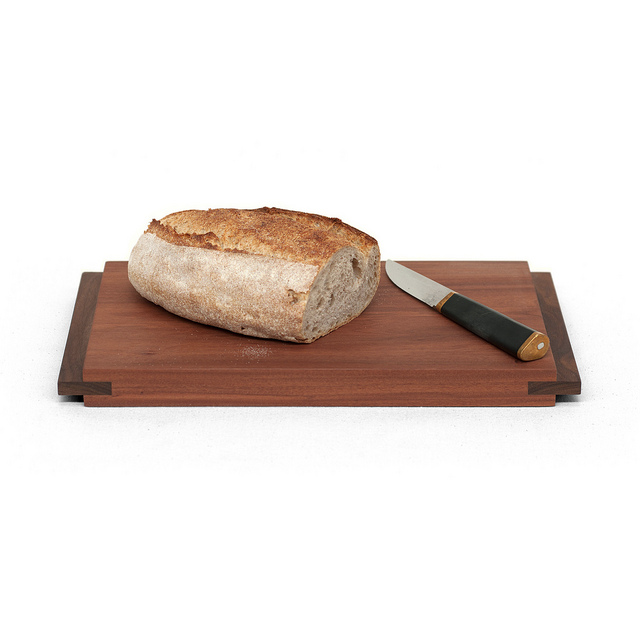
{Kitchen Board No. 1 by Sands Made}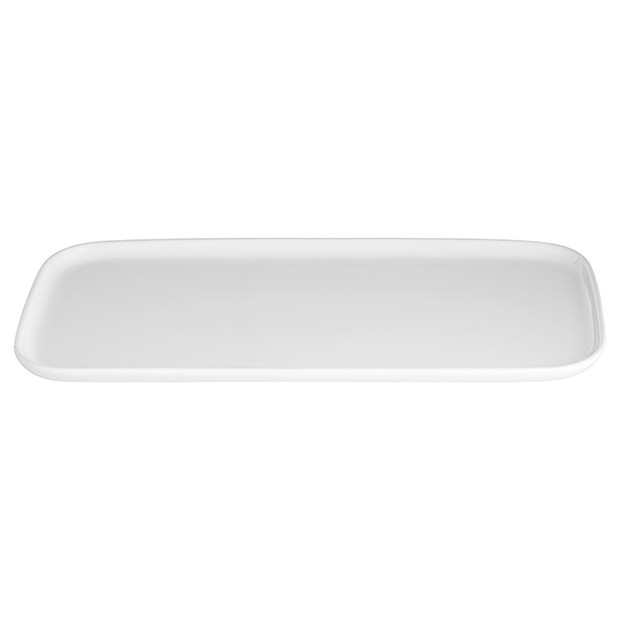
{Even considering just getting this smooth flat porcelain serving plate in the Life range from Target - only 10 bucks!}
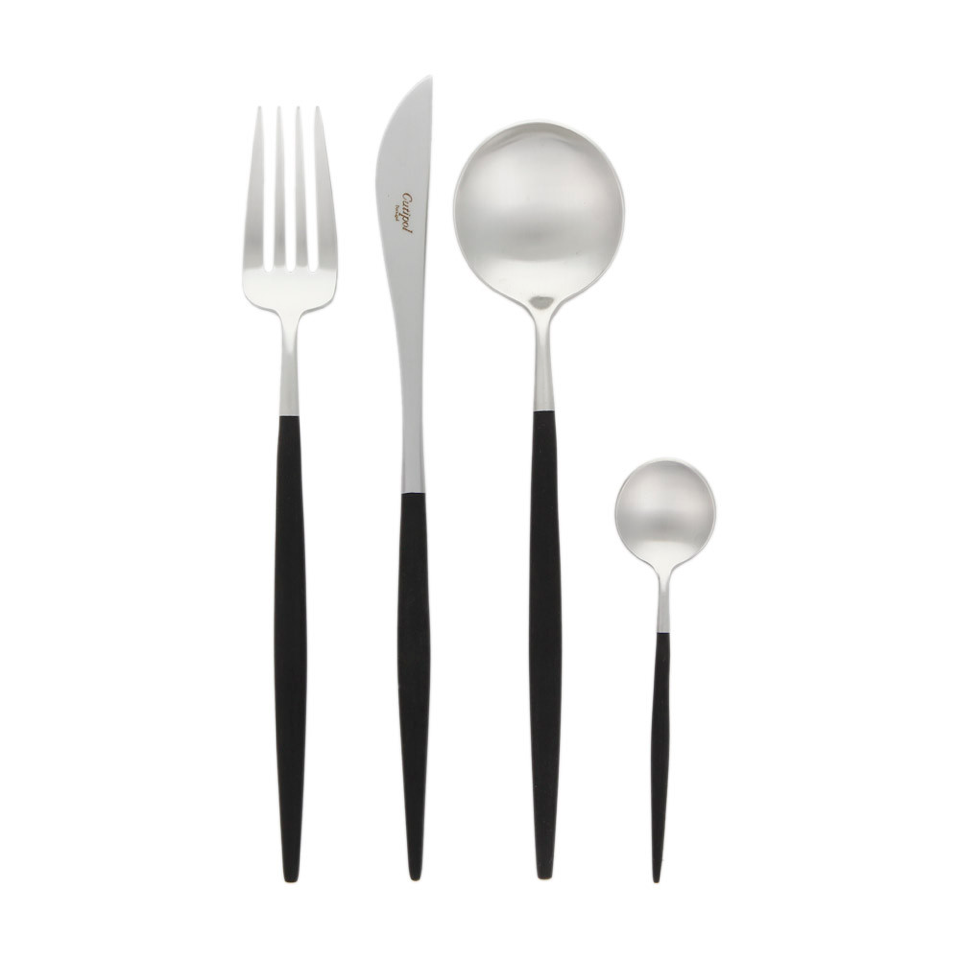
PS. here are my Goa range Cutipols ![]()
What do you think?
xo Romona![]()
The Dining Room Dilemma
I'm not a ridiculous spender. In fact I am quite fiscally tight. But when it comes to my home, I want quality. That doesn't have to cost the earth - I can happily sit on sturdy well-made chairs from a past era road-side collection that have been buffed back into shape. I just don't want to give in to the fast and frequent flashes of 'Vintage replicas' all over my screens and junk mail pages.
Currently we have four of my favourite white Eames Eiffel based DSRs. You know the ones that you probably see everywhere, as that filthy filthy word 'REPLICAS'. Yuck! If I am to accept crap, it at least has to be original crap! Don't mass produce someone elses hard work and (previously) inimitable creativity and flog them off at $39 a pop. It just shits me.
I'll admit to owning two *shudder* replicas at one stage. I had my four beauties from Living Edge and on moving from an apartment to a house, and bringing two kids into the world, needed at least two more chairs. I succumbed. But boy did they grate on me. Every time I walked past the room those ugly shiny plastic things glared at me. Sure, no one else could tell the difference - apparently - but I could. And I had given in to the mass marketing of these cheap charlatans riding on the coat-tails of others.
So when I could stand them no longer, when I'd had enough of moving them to the most unused corner of the room, when I had scrubbed at dried Weetbix (that seemed to wipe easily from the others) one time too many, I made the decision. Those puppies went straight onto gumtree. The respondents came fast and eager - even though I assured them that they were… *ewww* replicas. I got the same price I had paid for them originally back in my hands, along with my now relieved conscience.
But now we only have four chairs again.
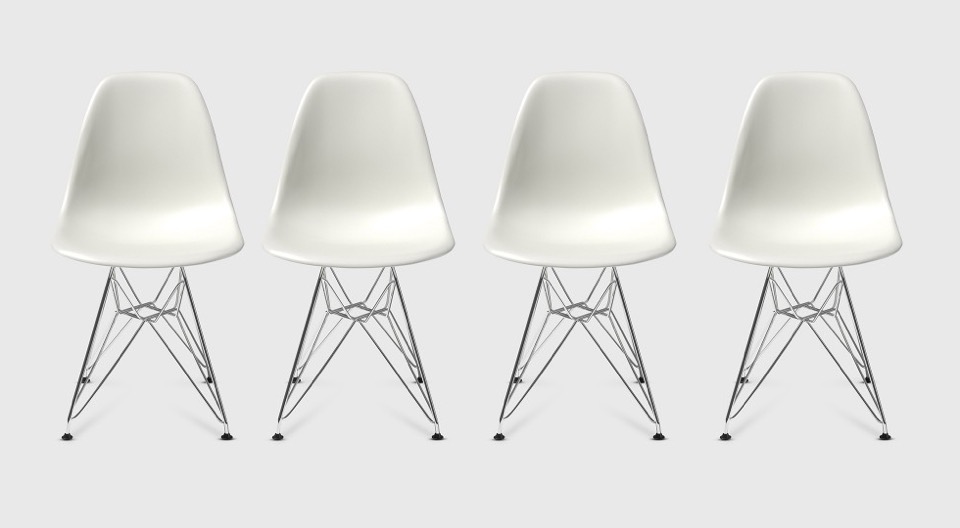
{Eames® Moulded Plastic Side Chair Eiffel Base (DSR) from Living Edge}
Hello Perth!
Miss me?
Sorry for the big delay. Massive changes in our lives at the moment. We sold the house (see previous post Home Open); packed up the house; moved from Melbourne to Perth; went on holiday sans-kids to several Asian nations; found out our belongings were not delivered due to company liquidation and therefore not on their way; rearranged delivery while overseas via email (with some worry and stress); eventually received goods and moved them into the folks’ shed (luckily for us super-builder-dad has large and multiple sheds!); moved ourselves and the kids into the parents’ house; begun unpacking essentials; and now to start looking for land/house/new home… Phew!!!
I have a lot of ideas for the next few posts, and now that I have my computer back (Thank God!) I can get back to work and share some wonderful finds, designs and goodies with you. In the next post, I hope to bring you just a few (of the millions) of the pics from our holiday to Myanmar, Cambodia, Sabah and Malaysia. I hope they inspire you to travel, explore, design and create as much as they have us. Here’s just a taste with more very soon.

xo Mo
![]()
Home Open
Before I get too soppy, the main reasons for this post were to give you some cheap update ideas for your home, a few tips for simple styling for sale and giving you a sneaky-peak into our lives and home. Enjoy.
Here are some simple tips for refreshing your home before sale:
1. Keep colours neutral.
You may love neon pink or cobalt blue but not everyone will - and not everyone has the imagination to see past it if they don’t like it. You don’t have to avoid colour, just stick to colour in flowers, soft furnishings and artwork.
2. Keep spaces bright.
I do love a good moody Abigail Ahern or Kelly Wearstler room, but I think this belongs in a space that you are going to inhabit for the long term. If you want to maximise the range of interest, keep it light, bright and airy. Lighting at many different levels adds interest - think combinations of candles, table lamps, floor lamps, overheads, wall sconces or whatever you have at your disposal.
3. Fresh flowers and plants (or even good fakes ones) are a must.
They bring colour, style and life (or appearance of life if faux) to your space, not to mention fragrance. Just don’t let the fragrance be too overpowering - air out spaces, keep water fresh and replace flowers if they start to get a bit droopy or pongy.
4. Decluttering is a given really.
Noone want to buy the house of a hoarder, who knows what else you might find after purchase. Pair back your living spaces and tidy display areas. That doesn’t mean depersonalise or make it impossible to live, but presenting the space how people would like to live (i.e. neat, organised, stylish) sells a lifestyle not just a house.
Feel free to disagree as every house has it’s own personality. Below are a few before and after’s of our own house to give you some ideas.
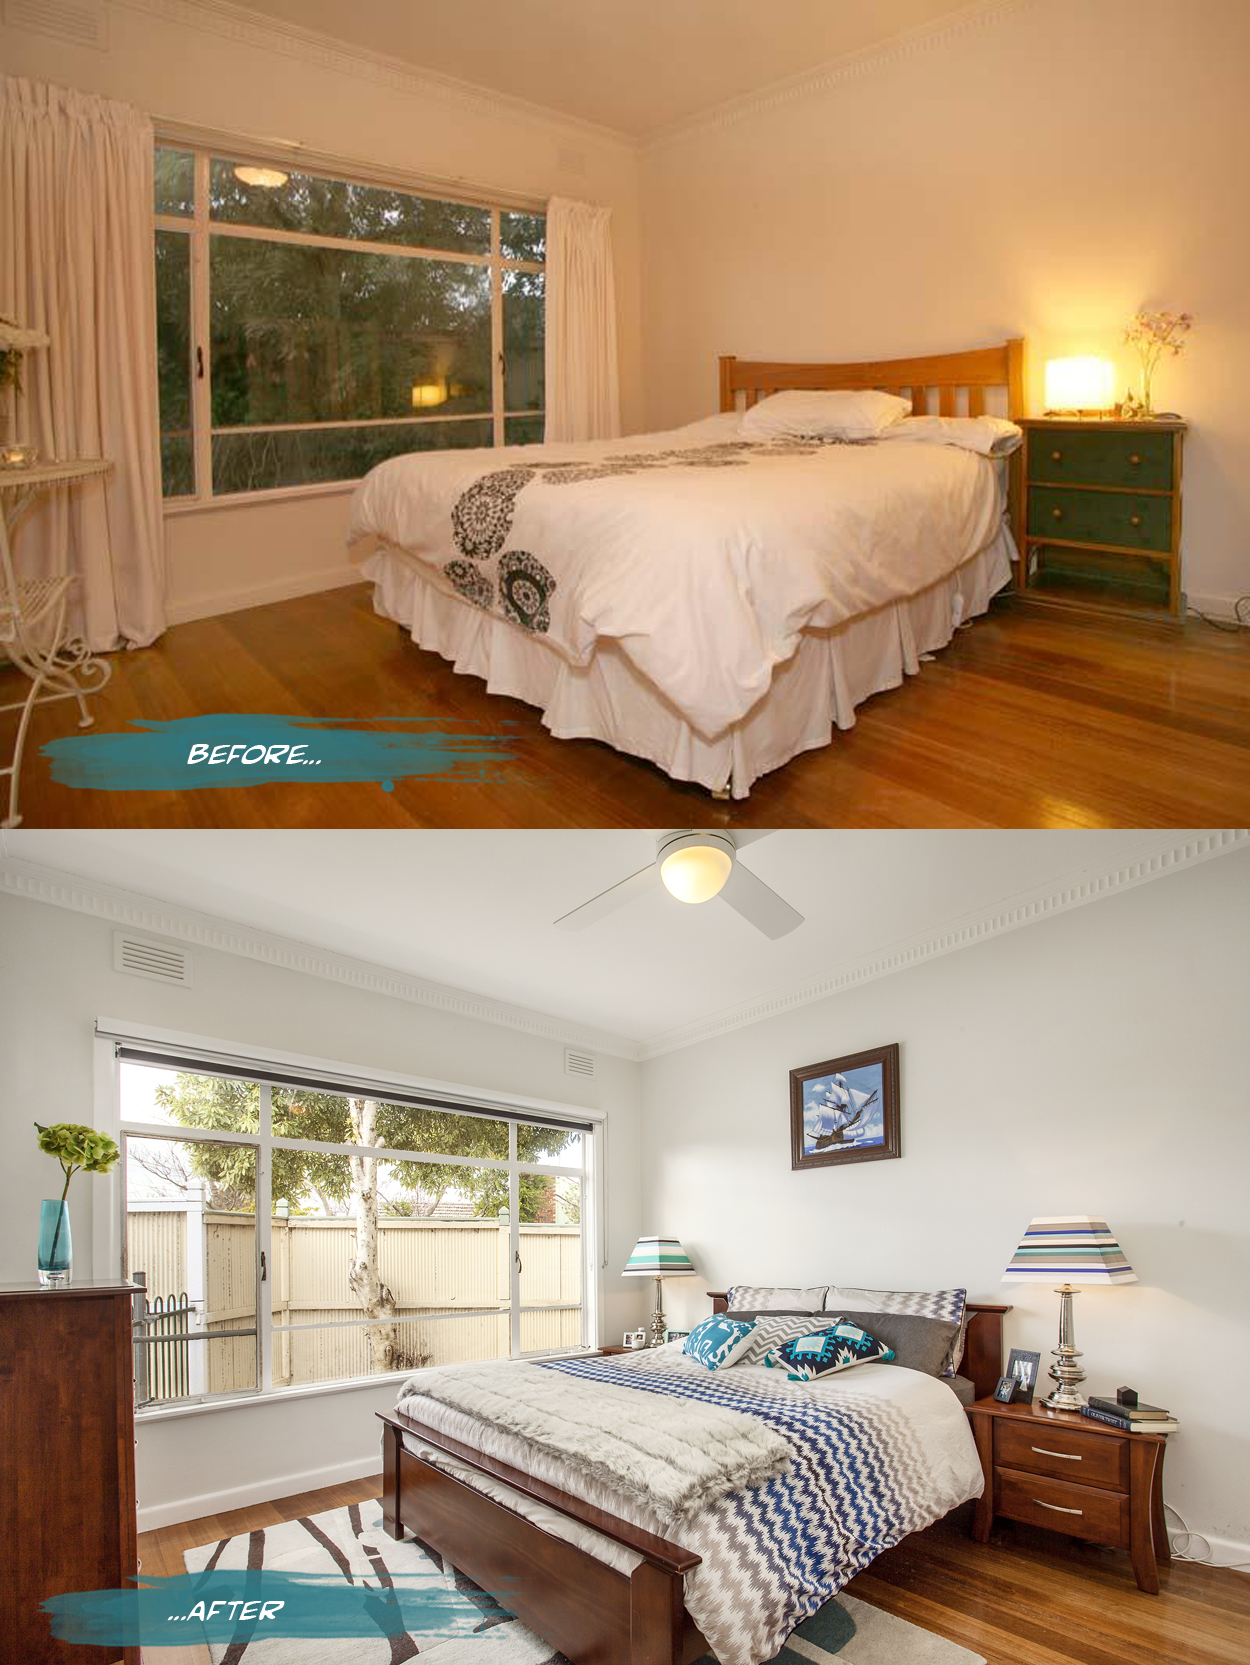
{In the master bedroom, all the curtains were removed from the house to bring more light into the spaces and reduce some of the heaviness of the rooms. Both block out blinds and sunshaders are in the bedrooms while just blockouts are in the living spaces. The walls are a pale grey, Nippon Nighthawk 1, and the ceiling light was replaced by a fan and light for much more comfortable summer sleeps. Adding a rug, cushions and throws for softness as well as customising my lamp shades makes it a bit more personal. Spaces can still have personality while being clutter free - just choose a few key pieces like books and photo frames to make the space feel lived in and not like a showroom}
Do you Adore?
For some insane reason, I forgot to take ‘before’ shots, so had to trawl through my databases for some random shots of the ‘back room’ aka Laundry aka office aka crap-dumping-space. Unfortunately the only before pics I could find show just how much crap normally surrounded me in the office space, but fortunately the tidy-up pre- and post-painting make the overhaul look like much more than it was.
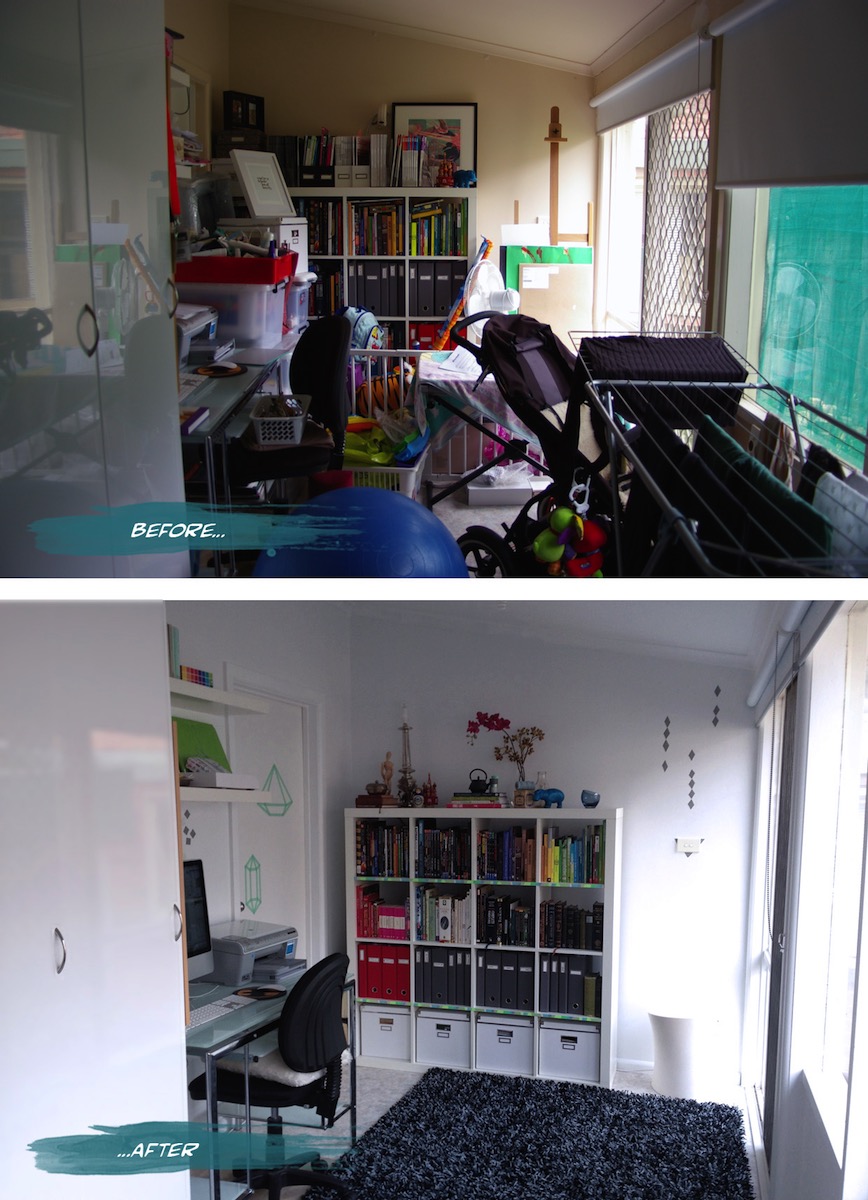
{Office before and after}
I had a bit of fun with Washi tape (and more since) after deciding against painting a decorative element and not being able to find a decal I liked. The basic tutorial for the washi tape jewel idea on the door was from Objects & Use. I’m waiting for more washi colours and patterns from etsy to go even crazier.
Bathroom... After
Work started early on a Monday morning. Dad, hubby and I got stuck into ripping off the wall tiles. As with most old houses (with the added bonus of previous owners who have attempted DIY renovations themselves) the wall structure was no longer (if ever) level or square. There was also the unhelpful surprise of most of the wall sheeting coming off with the tiles. The flooring didn’t fare any better - also ripping half up with the tiles. Previous work scraps had been tossed in the wall cavity - I like to think for reuse as insulation - and a few little creatures had been making there nests around the bath supports. On Tuesday the plumber started his work relocating the bath, shower and vanity fixtures and putting in the pipes for the new toilet (yay!). Once that was completed, we could start on sheeting and patching up the walls, floor and front of bath. Waterproofing was painted over all surfaces and allowed to dry (time for a well deserved bevie break). The rest of the week was spent cutting, tiling, painting and cleaning out dust and debris, in time for the plumber to finish up and fit off the following week. For a more visual step by step of the process, you can check out my Instagram page. You can also read more about the bathroom ‘Before’ the renovation here.
Drum roll…. the finished product! What do you think? We are very happy with it, of course, and I catch myself walking past the door quite slowly now just to admire the view. In fact on seeing this post, hubby commented that he can’t even remember the bathroom before, even though it was only two weeks ago. Purged.
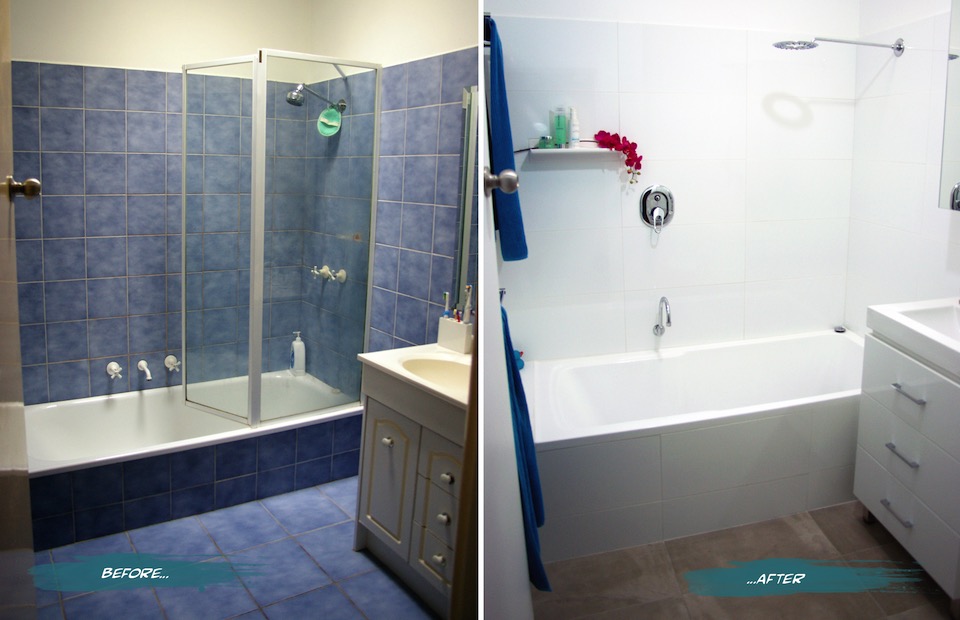
{The Sandon Bathroom - Before and After}

{Bathroom Vanity and Toilet - Before and After}
Here’s a summary of a few of the changes and features we have in the new and improved Sandon House Bathroom.
The vanity was moved closer to the bath to allow for the toilet, but still enough room for the much larger bath (we went from a 600mm to a 820mm wide - much more user-friendly). If we had an OH&S inspector in-house, they would definitely approve. You can read more about the troubles I’ve had with the narrow old bath in the previous post. The bath is not only wider, but taller. It took a few goes to get used to stepping over it, but it’s very handy with keeping small children from toppling over and into it. Plus during one of my habitual, long relaxing soaks, I don’t have to have the water full to the brim to actually be covered and stay warm.
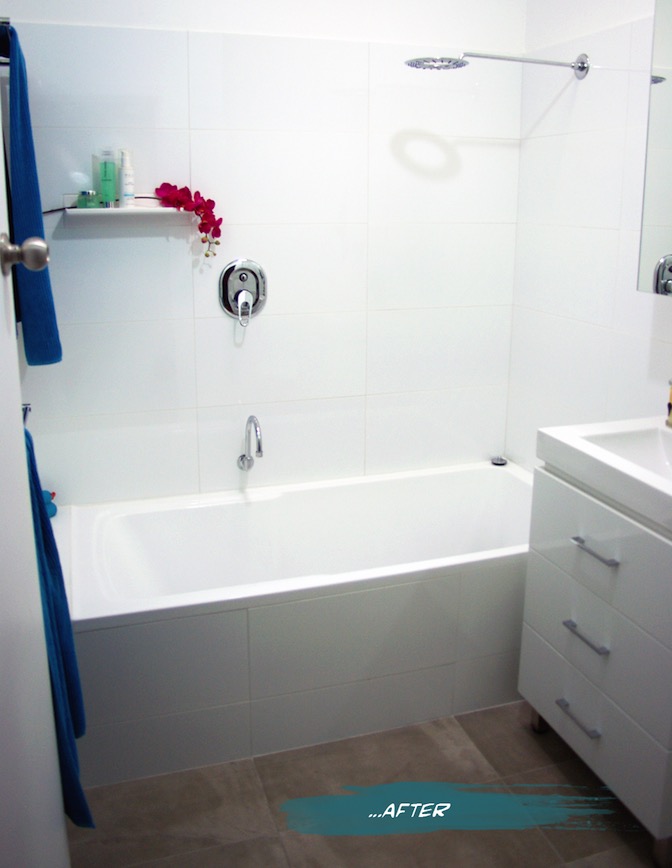
{The finished product}
Our second toilet - hooray! On plan it looked like a bit of a tight squeeze, but we have since found that there is more than enough room and it is quite a comfortable space. It’s still quite precious and we are not used to having the second option, but I’m sure that will end soon. The seat is soft-closing (the slowest we have ever seen actually - almost ridiculously so), which helps prevent slamming noises becoming a child wake-up-call in the middle of the night.
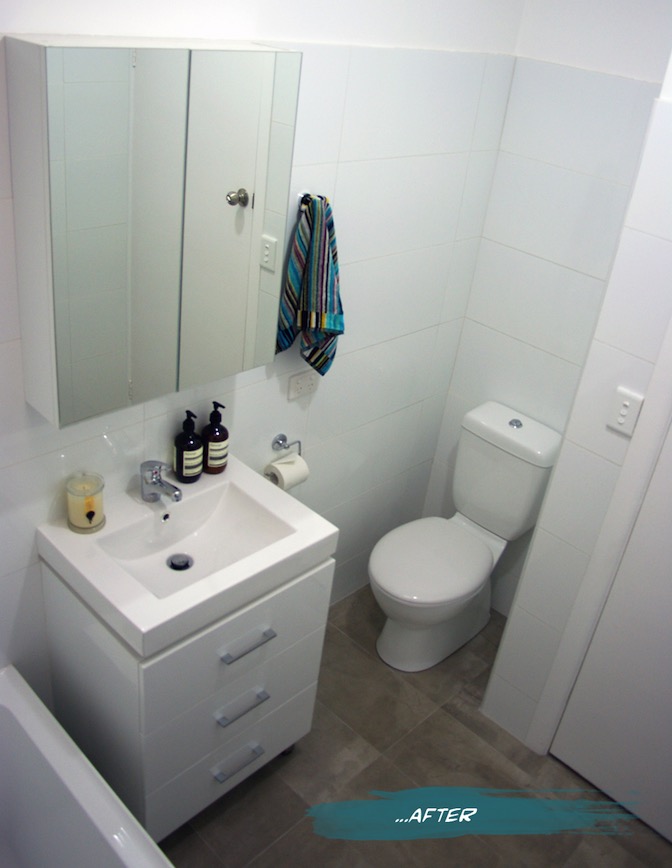
{New Mizu Vanity and Toilet from Reece}
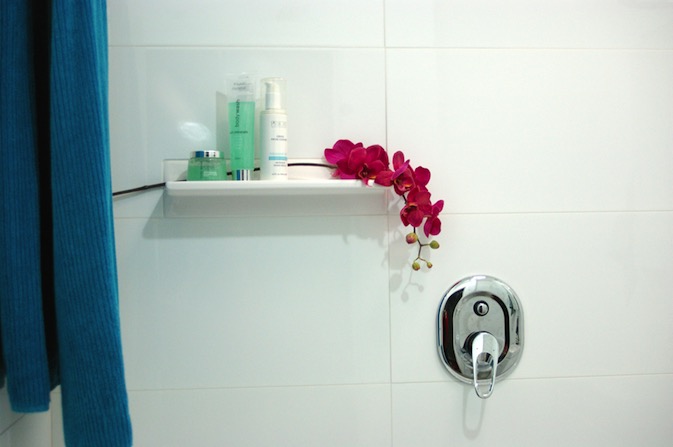
We added a tile shelf high enough to keep expensive shampoos from becoming very expensive bubble bath, as well as far enough away from the shower head to be a pool collector. I find them a great idea when you don’t have the building room to put in alcoves or set-in shelving. As long as you keep it simple, it allows the featured items to stand out without becoming a feature itself. We added an extra towel rail from before and made them double. Not necessarily for two towels, more for the aid in drying. My husband finally gets a towel rail of his own, as opposed to the hook on the back of the door where it never really dries. At the moment the kids towels hang on the back of the door, but we allowed space for another towel rail to be added if and when we need it (big enough to hang bath sheets because once you go up from towels to sheets, you can’t go back!)
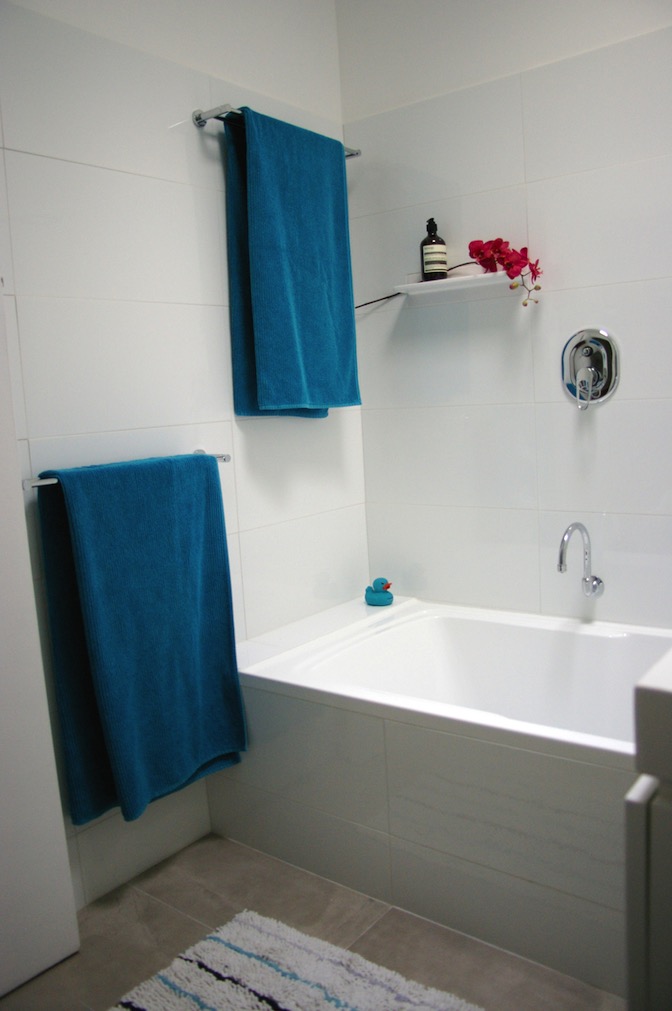
{New huge bath and surrounds}
I chose white wall tiles and a white vanity for brightness, simplicity and longevity. Even though we haven’t changed the skylight, the white reflects the light much more and creates a connection with the outside that belies its central location. The concrete-style grey porcelain floor tiles also give the space a neutrality that is much easier to style and change with soft furnishings and accessories. I had chosen a sleek minimal bath spout, but on further thought, we swapped it for a gooseneck swivel style so that we can run the bath and get it out of the way when the kids are in there, avoiding bumped heads. The Shower diverter mixer was placed far enough left that you can easily turn the water on without getting sprayed, and high enough that the kids shouldn’t be able to play with it for a little while longer. You may notice that I haven’t chosen very ‘designer-y’ fixtures. This bathroom for us is a family bathroom, and with two growing boys that will undoubtedly test the strength and endurance of the fixtures, we went to the budget end of the market. Fixtures are items that are easy enough to replace in a few years, so our money was directed more towards the items that are more difficult to change, such as the bath and tiles.
{Bright white large-format tiles allow us to play with colour}
Having said that, after years of low pressure and uncomfortable showers, the selection of the shower head was quite important. My husband wanted a good soaking while I wanted to make sure that it was still water-efficient. We found our compromise in the Halo shower head from Reece and so far soooooo good.
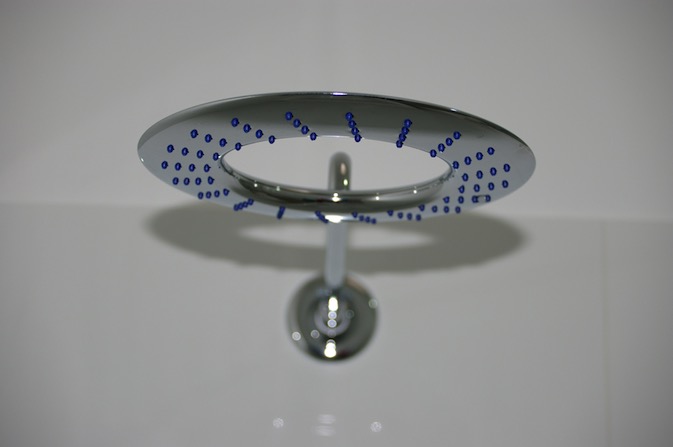
{Halo shower head from Reece}
If you would like me to post the plans, let me know - but photos are more fun, right? If there is anything that you want to ask about the project or specific products please do. I am more than happy to have conversations about it in the comments section below or over email.
FYI - Some of the items pictured and their sources:
- Bath, Vanity, Toilet and fixtures from Reece.
- Wall tiles from National Tiles
- Floor tiles, towel racks and hooks from Vision Bathrooms
- Hand towel by Missoni
- Aesop Resurrection Hand Wash and Balm
- Ecoya Metro Jar soy candle in Wild Frangipani
I hope you enjoyed this exciting little project with me. Time to plan the next one! (Sorry honey)
xo Romona
Bathroom Before…
First up, I would like to justify why we wanted to do this. It's not a cheap exercise and I think updating a bathroom for aesthetic sake alone can be costly, time-consuming and if not done correctly won’t give you the value-add you were expecting.
If you are going to rip it all out, take the time to assess what works and what doesn't.
What features you like and what you detest? What do the occupants need? Is your situation changing - will you need to accommodate growing children, elderly or disabled access? How easy it is to move around, do you bump into anything, are the towel racks too low, too high or too few? Do you need to update your fixtures and fitting to more sustainable, water-saving options? If you are thinking of selling in the future, what would appeal to the largest audience?
Obviously, the aesthetic update is always a big motivator. I love blue, but not this blue and not this pattern and not in this quantity, all over the floors and walls. Yes, of course, I have seen much worse in my travels, and if there were not other issues with the bathroom we could have easily put up with it for a few more years or until we moved on elsewhere. So here are a few of the glaring issues that we have had in our years with this bathroom.
Problem One - The Bath
The existing bath was just that. A Bath. Not a shower bath. Definitely not something that any person (let alone an occasionally pregnant person) should be standing up in. The narrow 600mm wide rounded-bottom bath has always been a bit of a nightmare to shower in. Elbows knocking into glass panes, tiles and fixtures, knees knocking while attempting to stay upright with splayed feet on a narrow curving base. Nothing to hang on to that wouldn't go down for the count with you. I learnt the hard way that you should back out rather than turn around to get out while heavily pregnant - hint - you get stuck… really stuck! An embarrassing few minutes can be spent deciding whether to soap or scream your way out of it.
Problem Two - The Vanity
While admittedly the rest of the house isn't level either (a problem made even more apparent while dad cursed his way through a lot of the refurb), the vanity was especially tilted. Angling towards the back wall to create the perfect ecosystem for a rainbow collection of mould and nasties. Although we wiped it down often, it wouldn't take long to fight its way back and I definitely would not have wanted to see a swab of that cultivated and rising out of a petrie dish. The chipboard doors were also moisture damaged, splitting from their nasty cream laminate.
Problem Three - The Toilet (or lack there of)
A husband, two rapidly growing boys (one starting potty training), friends with numerous young, interstate family and guests that stay with us, and an inexplicable need to all go to the toilet at once meant that our single sad little toilet was not meeting expectations. A second toilet - never thought that would be a major player on my wish list. No longer having to hold it while others day dream or read or check emails or whatever it is that some seem to do on the toilet for so long. The privacy. The convenience. Oh, could it possibly ever be true?!
Originally there was also the problem of icky dirty beige-cream walls, ceilings, doors, frames, everywhere (throughout the house not just the bathroom) but this has been slowly rectified. Vivid White is over all doors and frames, and a soft grey (Nippon Nighthawk) covers most walls (except wet area, which have moisture resistant Vivid White paint on all surfaces). I must admit that the simple few coats of white paint over the walls and ceiling in the bathroom made it much more tolerable and bought us some time to save.
Here are a few before pictures to visualise what we were dealing with.
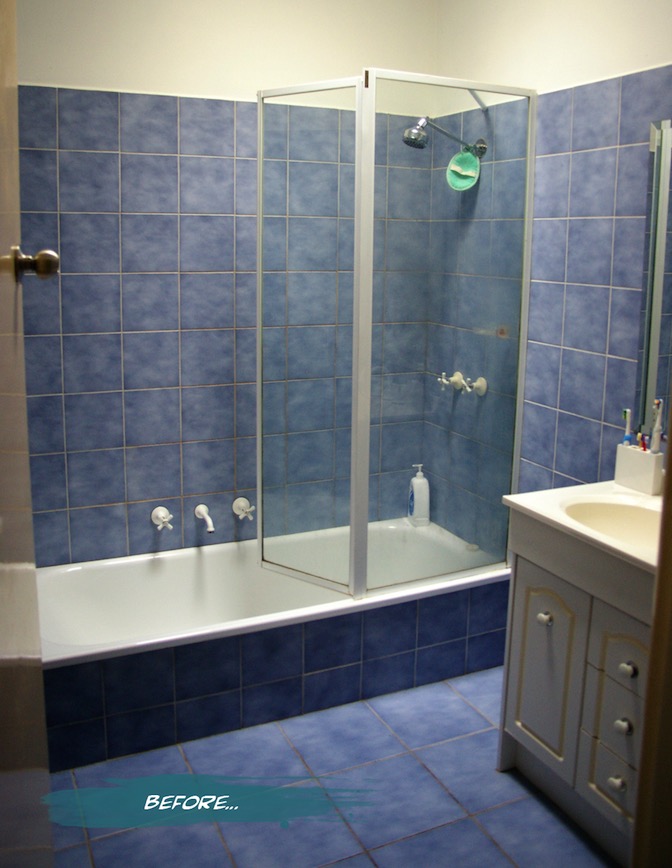
{Before: The bright blue mottled tiles on the walls and floor, too-narrow bath and far-from-level vanity.}
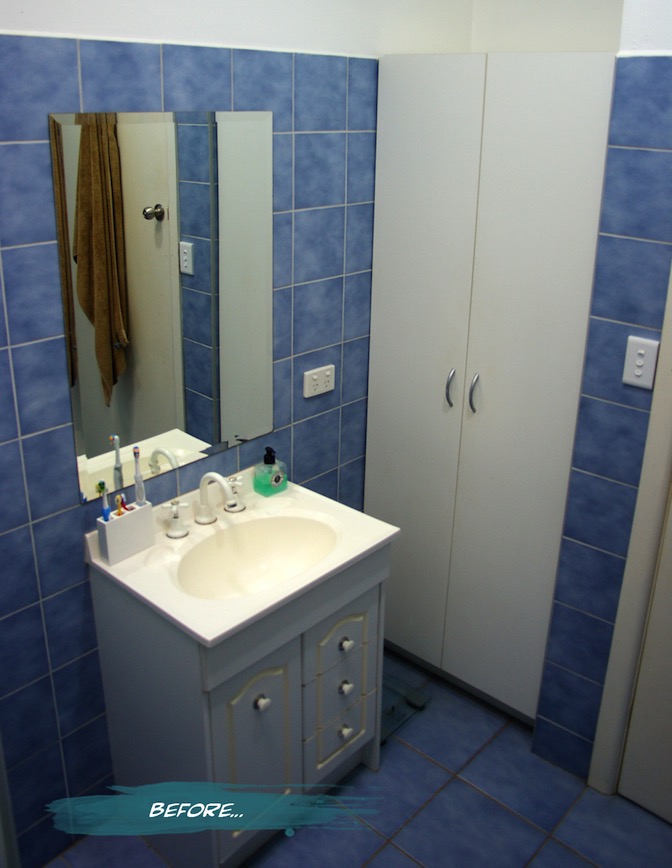
{Before: The falling apart vanity and flatpack cupboard taking up valuable floor space}
I realise that it doesn’t look that bad from a distance. It was the details and the functionality that really cemented the idea of renovating. Some of you may have noticed, if you follow me on Instagram or Twitter, that we have nearly finished the transition from old and shabby to sleek and modern. Although Dad and Hubby did their parts super quick, and the plumber has been very obliging with his time, we still have a few things that we are waiting on (shower screen and a few finishing touches). I’ll pop some pics and deets of the finished results up very soon. Stay tuned…
xo Romona
![]()
Let the Demolition Begin
Just a quick note to let you know that I will be a bit absent over the next week or two - demolition starts on our one and only bathroom on Monday, and work will be speedy to fit in with my wonderful parent's visit to help (all the way from Perth). Dad's a builder, so I am very much relying on his instruction, knowledge and old-school builder attitude of getting in there and doing it right. I will hopefully have time to take lots of pictures and put together a before-and-after piece once it’s finished. Since I've put it in writing now, I really hope that it turns out great!
Hopefully with the parents over I might also get a little babysitting and have time to put together another post or two - bonus!
Until then, hope you have a happy and colourful weekend.
xo Romona
PS. Stay tuned to my Instagram for occasional progress updates
Rug update
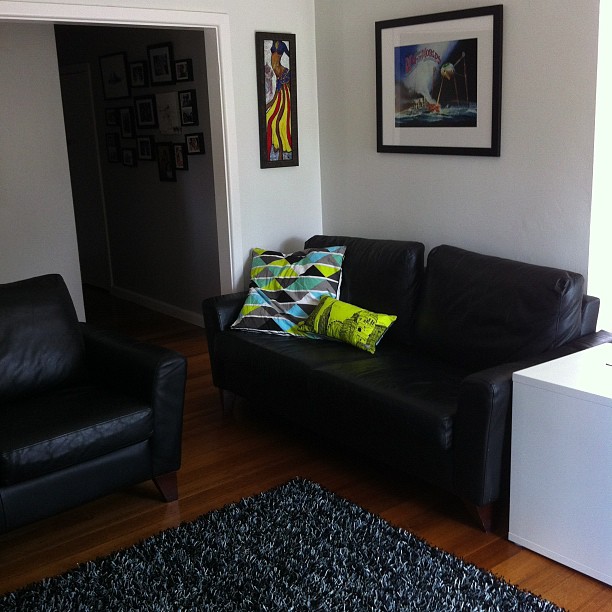
{Black and Grey Noodle-pile Artizen Rug from Carpet Court, in its new home}
Inspired by the new floor dressing (and big red sale signs), I had to nab a few new cushions to brighten the space and add a pop of colour. Glad I found these two (pictured above) at Adairs, combining the latest trends of geometry and neon, with an architectural twist, in Home Republic’s Sketchbook collection. Love it. Bye for now.
xo Romona
![]()
Rug luck
While work at Woodhead in Perth was very rewarding in most ways, it also paid off with an employee of the month prize, giving me my first official free rug. A delicious turquoise shag rug. This rug is quite famous among family and friends. It has travelled the world. Tufts and strands and small samples of it were found in Paris hotels, Russian bars, our previous apartment’s lobby in Docklands, all around Perth and Melbourne and Sydney and Brisbane. Hitching a ride on shoes and suitcases and anything it can get on. Somehow, with all the fluff that we found around the place and in the vacuum cleaner, it still managed to survive and look quite fresh. Now ten years later, he has since moved on to another good home courtesy of Gumtree and is hopefully still managing to get in some travel.
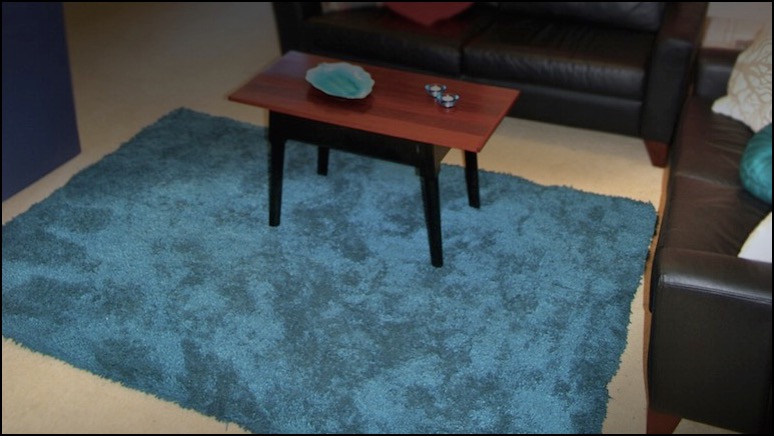
{First of the freebies: Turquoise Shag rug and Upcycled Coffee Table}
The next rug in the saga I am still desperately in love with. A competition entry (of which I am sure by now you have realised I am quite fond of) lead to me winning this beautiful rug from Designer Rugs’ Saffron Collection. I went to the showroom in St Kilda to pick her out. The smoky greys and stand-out teal of the Bowral (in cement) spoke to me. Loved the Asian and botanical influence in the pattern, without being too in-your-face florally. Although I am sure, if the budget of the prize had allowed, I would have gone for one of their stunning Akira Isogawa collaborations, but the quality and look of this rug is exceptional.
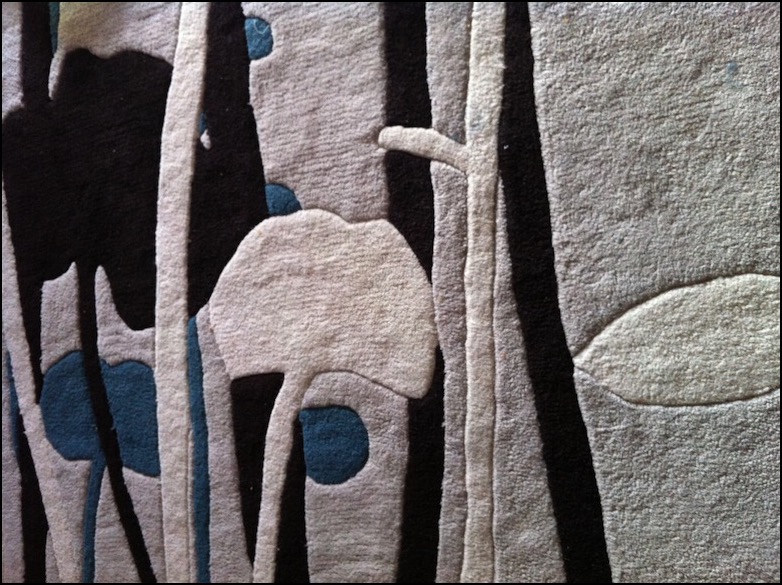
{Designer Rugs Bowral in Cement - close up of my baby}
Now to my recent win (yes I am a lucky b.arch when I see it summarised like this). Carpet Court’s love the look competition let me pick from their Artizen collection. It looks hardy and family friendly, without sacrificing style. With a two year old and a bub just starting solids, cleanability is a big plus. The below image is from their page, but I’ll post one in situ once I get it.
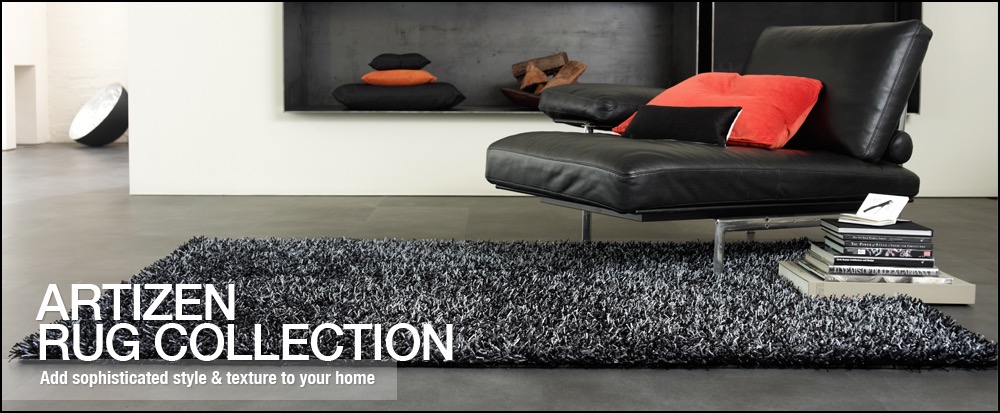
{Image courtesy of Carpet Court}
In revision, it reads like a brag board, all “look at me, how lucky am I”. But the point I was eventually going to make was that everyone can create style and beauty in their home without spending a lot of money. Sure, not everyone wins their furniture or accessories, but with bountiful resources out there like eBay, Gumtree and even curb-side pickups, there is no excuse not to be creative and have fun with your interiors. The gazillion tutorials on Pinterest and Youtube for DIY of Ikea and other similarly cheap starting blocks, means that anyone can now have a designer home.
The coffee table in the first photo with our since-passed turquoise rug was made from a found and refurbished hall table cut down to size, then re-topped with sanded, buffed, polished and varnished jarrah fence pickets. My eldest has a cool industrial hanger for his jackets (yes plural, at least ten that fit - he is a Melbourne boy!) from another curb-side pickup find, relieved of its rust and sprayed fire engine red. Our outdoor table is someone’s old dining table sanded and oiled, with legs painted a bright Santorini blue. Actually, looking at the photo again, I think its time to stain the top of that outdoor table - or stop ignoring the tired old decking and give them a good oil too.
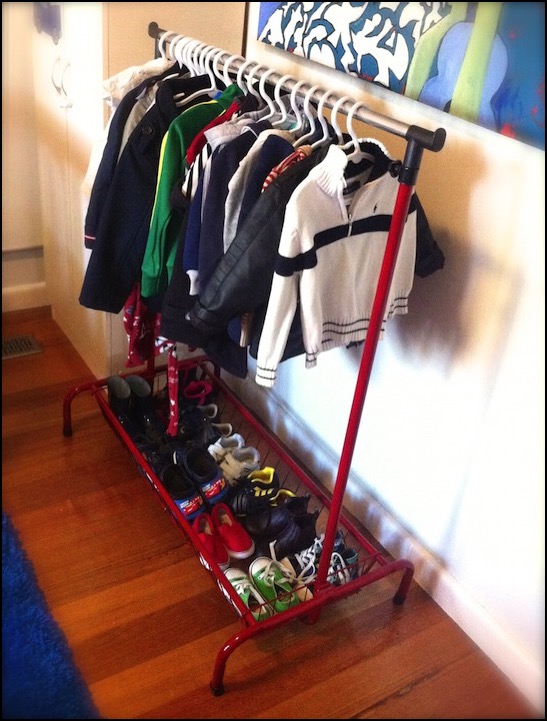
{Upcycled Coat Rack - Refurbished Road Side treasure}
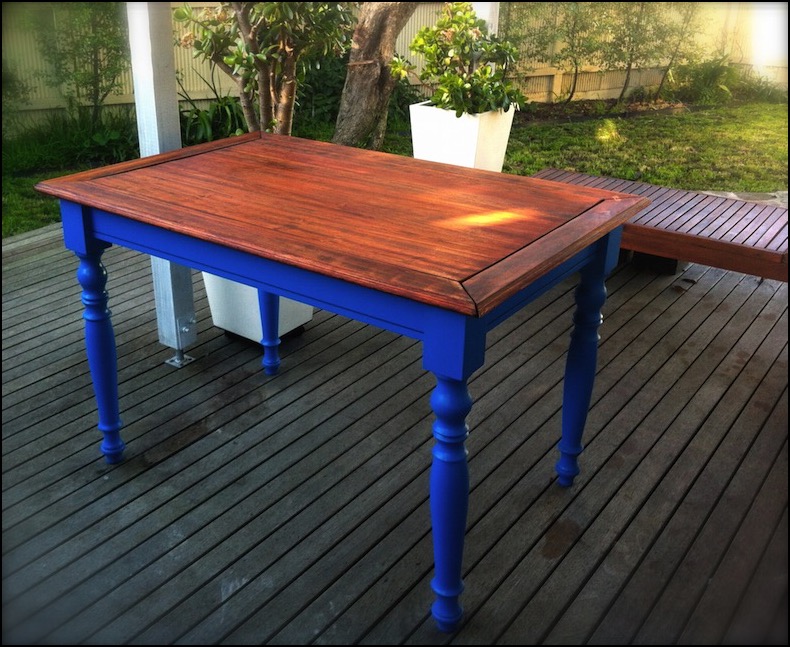
{Upcycled Outdoor table - Refurbished Road Side treasure}
With a bunch of cool finds, a little inspiration and a bit more perspiration you can create almost anything. Also, when you’ve paid nothing (or next to nothing) for it, you’ll be less precious about mixing it up and changing things around every so often.
And if all else fails, enter a few competitions and see how you go. You can’t complain if you don’t give it a go.
xo Romona
![]()
I'll be back
It’s been a little bit, and will still be a bit more, before another post, sorry. I’m transitioning between my current non-supportive program (won’t go into details — its reeeeeaally frustrating!) and a new program (not decided on as yet).
Just a small shout out this week: a big thanks to Carpet Court and their Love the Look competition. It is actually worth entering these things because, yes, you can win - I did! A gorgeous new rug soon to be delivered. Jealous? I am still holding onto the hope that I might win the grand prize of a $10,000 room makeover with fab Interiors Darren Palmer or Stacey Kouros. One can dream.
Just wanted to make sure that you, yes you, the three people reading this, still know that I appreciate you popping by and will endeavour to bring you much improved delights very soon. Until then, enjoy my Tweets, pins and FB posts.
Hope to speak to you from here very very VERY soon.
xo Romona.

![]()
Unearthing Treasures
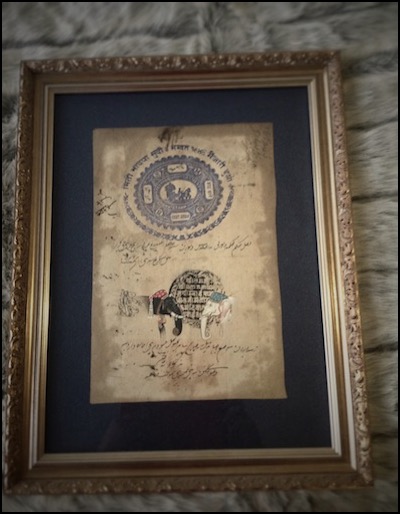
Inspired by Carpet Court’s new Love the Look competition (How hard is it to choose between team Darren and team Stacey!), I went rummaging through my boxes of trinkets and collected items from my travels and explorations. You know the ones - the pieces you’ll put up in your one-day house (the one with room to spare - a library, a sitting room, a chic powder room off the entry foyer, maybe even a gift-wrapping room à la Martha Stewart). The piece that caught my eye was right there on my bedroom wall. The exquisite hand-painted Indian wedding ceremony on a government stamped paper that I found in a market in Jaipur, India.

{Indian Government Stamp and painted Wedding Ceremony Artwork, from a market in Jaipur, India}
Another work from the same market is the black and white elephant heads (below right). Until I photographed them for this competition, I had forgotten how much I liked looking at all the scribbly detail in them.
{Indian Government Stamp and painted Elephant head Artwork, from a market in Jaipur, India}
They are totally out of place in my current bedroom. As it stands, it’s a mismatched explosion of objects - and not in a good way (thus the desire to refurb it, stat!) I love mixing vintage with contemporary, but the pieces have to be right and I feel it has to be done with a cautious hand and keen eye.
I had been meaning to reinvent my bedroom into a palace worthy of old Hollywood. Glamourous crystal and blinding chrome. Tufted velvet and mirrored lucite-legged vanities. All look but don’t touch. Now though, I am having to remind myself that yes, although I love the look of these in magazines, could I live there? Especially with two young boys (one who likes to crawl into bed with us after pushing most things off the dresser with his cars, and another that I’m sure will do the same as soon as he is able to get out of the cot).
I’ve decided to go back to basics. Firstly, I have to decide what, if anything, I want to keep from my current room or if there is anything that I already own that I want to introduce into the new room (such as an art work or armchair). I think I will be keeping more than I’d like to (budgetary reasons), but upcycling is under-rated, so I’ll see how I can change the items that I can’t afford to replace, to fit the new style. If you follow me on Pinterest, you may have noticed that my DIY folder is getting more of a work out lately than usual. With two kids, and without the disposable income that we had before them, I can hardly do the complete Jonathan Adler meets Kelly Wearstler that I’d like to.
Secondly, research images that attract and excite me, and define what it is about that image that gets me going. Is it the whole package, a particular furniture item, the colours - warm or cool, the scale, the layout, the fact that its tidy, what? Then see how it can be applied or worked into the canvas that is my room. Again, Pinterest and Houzz are wonderful resources for finding inspiration and products. Of course, its always fun flicking through drool-worthy magazines like Belle, Real Living, Sanctuary and Home Beautiful when you can find the time. I embrace my iDevices, but I am not quite ready to part with my monthly deliveries of hard copies just yet, thank you.
Luckily time is on my side. With a bathroom renovation due in October, it may be a few more months before I have the spare coin to put towards the fabrics or wall paper that will make it really worth doing. There’s nothing wrong with taking time to make sure that you really do love that particular pattern you chose, and not just because its on-trend or was used in that house by that guy in that magazine, you know the one! For now, I am just trying to remind myself to keep the basics somewhat neutral, so I can really go nuts on the replaceable items like headboard fabric or bedding or window dressing.
OK, so I think I have successfully gone completely off topic. Maybe one day I’ll be able to do it with the charm and imperceptible manner of Ross Noble or Billy Connolly. Until then, I will just say that I will revisit the idea of finding hidden treasures in your home when inspiration strikes. I’m hoping to also bring you a little introduction to our planned bathroom reno coming up - I look forward to some peer feedback if you feel like it. Ciao for now.
xo Romona
P.S. (again) Sorry that comments aren’t allowed at the moment. I really want to hear any feedback you have but iWeb is disagreeing with me and I need to find a new program. Excuses, excuses!
Please feel free to email/tweet/FB post me - would love to hear from you!
UPDATE: Hopefully comments should work now….
![]()
Planning + Procrastination
Being a scaredy-cat one is even harder.
I've been delaying this blog for some time now, determined to have at least a few months of posts planned, laid out and prettified. I had planned to post my thoughts and highlights of several Home shows, Decoration + Design, Furnitex, Green Building Conferences, Design Made Trade, Saturday In Design... using any trade event to get motivated to finally post my first entry. With two boys under three and running my own business from home this has been pretty unsuccessful, and I think missing the point of why I wanted to have this blog in the first place.
So what is my aim? I guess I am still trying to figure that out, but here's a start.
A record of my experiences and inspirations;
A gallery of my personal style, tastes and influences;
A silent venting arena for my design goals, successes and failures;
And an excuse to have at least a few minutes quiet-time away from my two little boys and one big one.
I'll try and keep it short and sweet although I am not really known for that, as you may already be able to tell. 'Be Succinct' was constantly in bold red pen on my high school English Literature Essays. Never quite mastered that.
I hope to bring you a little bit of design, colour and visual delight each week. I will try not to let my nerves get the better of me - with so many wonderful architecture, interiors, art, design and décor blogs out there, I doubt any one will be reading this little one yet anyway.
Next post – a quick highlight of my Saturday In Design runaround over the weekend, with a few happy snaps. Hope you enjoy.
xo Romona