


A Spot of Paint
The only problem I’ve found with this is the high VOC levels, a staggering 105g/L compared to low-VOC ceiling white paints that have around 5g/L.
Since a friend asked the other day, and I realised that not everyone has a background in Architecture and Sustainability, I thought I’d share a few simple tips for paint selection. The type, that is, not the colour - thats waaay too personal and subjective and depends on soooo many factors.
Its handy to know what to ask for when you get to the paint counter. Here are a few things to look out for:
Low or No VOC (Volatile Organic Compounds). I am astounded that this is not standard by now and you have to specifically look for it, but fortunately it is getting a lot easier to find. Apart from these products reducing your greenhouse footprint, they also provide instant benefits to you and your family, for example a decrease in asthmatic reactions and allergic sensitisation through less off-gassing, that nasty paint smell.
No Formaldehyde - yes that stinky stuff that they preserve bodies with (at least they did during my former life in the medical field, but have hopefully ceased using now) and is carcinogenic as well as thought to cause allergies, headaches and numerous other health issues. This can also be found in adhesives, particleboard (like MDF), linoleum, disinfectants, and some nail polishes - eek! Best avoided.
Here are some to keep your eyes open for:
* Any Dulux paint with the Eco Choice symbol on the label is low-VOC. This includes most of their Wash & Wear wall paints, EnvirO2 and ceiling white.
* Taubmans Pure Performance with Microban is a low-VOC, mould resistant Acrylic.
* Porter's zero VOC or low VOC paints
* ecolour’s entire range
* Resene’s Environmental Choice approved paints
* Wattyl interior design i.d Paint System using Ecotint for colouring.
When in doubt, check out Ecospecifier for more responsible product selection. Greenpainters also have this (a bit long) vid that explains low VOC paints, if you want to know more.
A few cool bits of paint tech and terminology I can’t resist throwing in there:
* Thermochromic paint - Changes colour with the temperature. I think I could have endless fun pressing up against the wall like a hyper colour t-shirt.
* CoolColour - reduced Total Solar Reflectance (TSR), that is, the colours work by reflecting energy in the near and far infra red region of the spectrum even though they absorb strongly in the visible region. Put simply, dark colours reflect more light than normal but look the same, so you don’t have to stick to white for most reflectance.
* SolarPaintTM - a solar paint that may be printed onto plastic, integrated into tinted windows and other building materials, making the whole structure itself a source of power. How awesome!
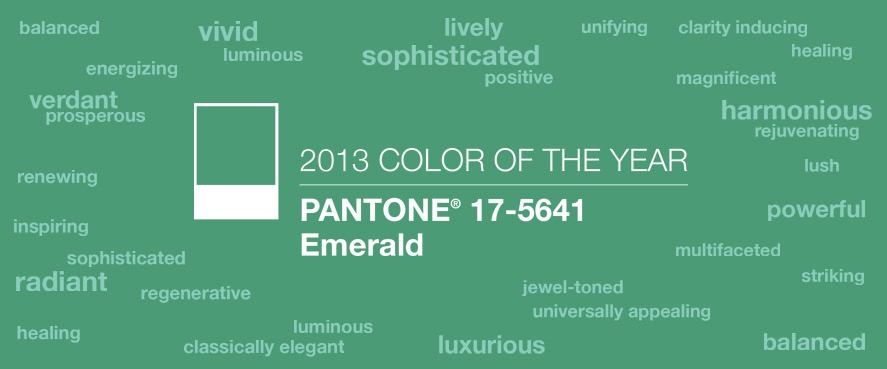
And I realise I said I wouldn’t touch colours, but in honour of Christmas and the end of the year, why not have a bit of fun and paint Pantone’s colour of the year for 2013, Emerald 17-5641, somewhere in your house.
We are on break for a bit, so this will be my last post until the new year. Merry Christmas, Happy New Year, and all the other reasons in the world to celebrate with family and loved ones.
Cheers and Go nuts!
xo Romona
![]()
Spotlight on Australian Designers | Catherine Martin
Catherine Martin really needs no introduction. Costume Designer. Production Designer. Set Designer. Art Director. Oscar, AFI, BAFTA and Tony Award winner. Wife to the equally talented Baz Luhrmann. Mum. This chick does it all!
As if that wasn’t enough, design collaborations are now a regular occurrence for her, in the form of wallpapers for Porter’s Paints, rugs for Designer Rugs, textiles and bedding through Anthropologie and I’m sure the list will continue for this extremely talented Australian.
I had to think long and hard about which were my favourite pieces of Catherine’s. I could easily put down every rug in her multiple collections, and the majority of her wallpapers, but have forced myself to narrow it down to just a few.
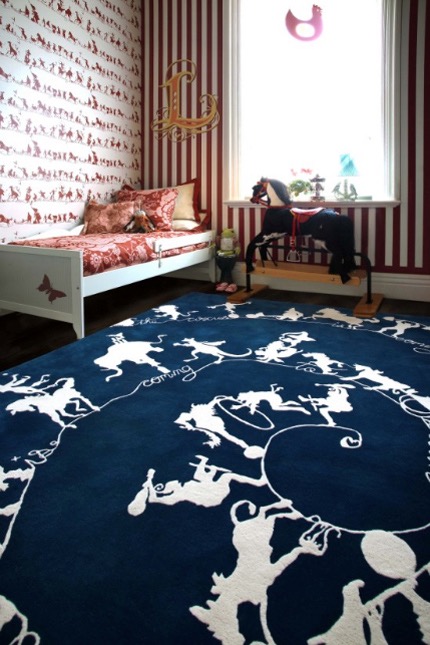
{Circus Silhouettes by Catherine Martin. Rug for Designer Rugs. Wallpaper for Porter’s Paints}
The first should be one that I was coveting for years (in preparation of my first baby’s room, while pregnant). Expectedly highly theatrical, the navy Circus Silhouettes would have been a dramatic and stylish addition to my baby boy’s room, encouraging movement and fun. Of course, budget and the fact that I would HATE to get any vomit or other baby-nasties on this beauty ceased the purchase, but its still on the ‘One-Day’ list - I think the energy and whimsy in this is ageless and definitely is not restricted to kids rooms. The walls in the image above also feature her complementing design for Porter’s Paints.
{Night Bird rug by Catherine Martin for Designer Rugs}
{Black Pearl rug by Catherine Martin for Designer Rugs}
Now let’s just say I love the entire Deco collection with Designer Rugs. I can’t wait to see them featured in Baz’s The Great Gatsby in May 2013. If I HAD to pick a favourite, it would probably be the magic, flow and art deco romance of Night Bird, although Black Pearl comes a very close second. Hmm... Maybe tied first. It would certainly upgrade a bedroom into a Boudoir. And how about this custom stair runner adapted from her Lace rug design - to die for!
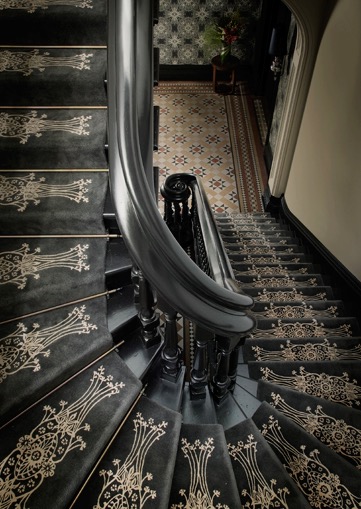
{Lace stair runner by Catherine Martin}
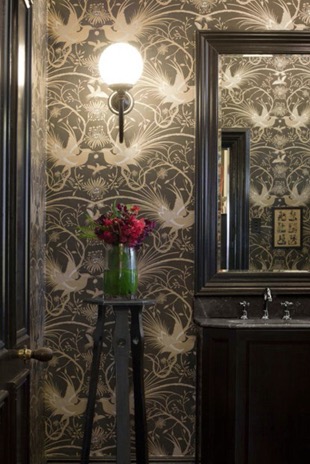
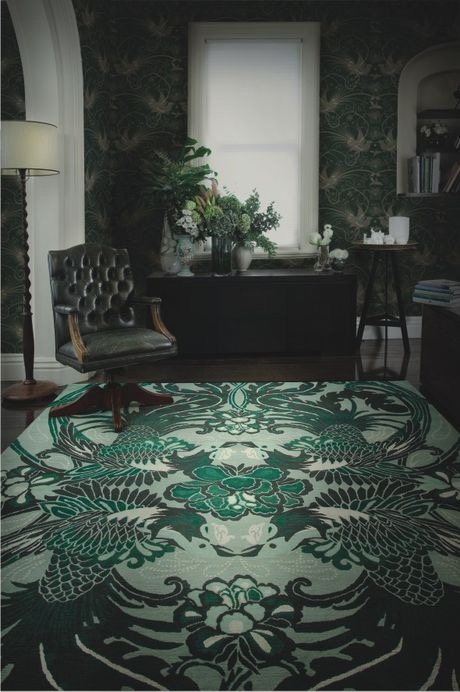
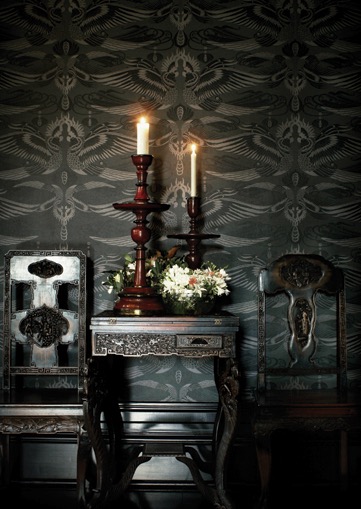
{Imperial Pheasant wallpaper by Catherine Martin for Mokum Porter’s Paints. Shown here in Lacquer}
{Cockatoo wallpaper by Catherine Martin for Porter’s Paints. Shown here in Black Neutral}
Most of Catherine Martin’s wallpaper range links in with the rug designs, as a complement or feature in its own right. Mokum Imperial Pheasant comes in a range of colourways, my faves being the Ming Blue or Vintage White (seen at Grand Designs here), or for something dark and dramatic but still linking to home and Fauna Australiana, the Cockatoo wallpaper in Black Neutral is divine.
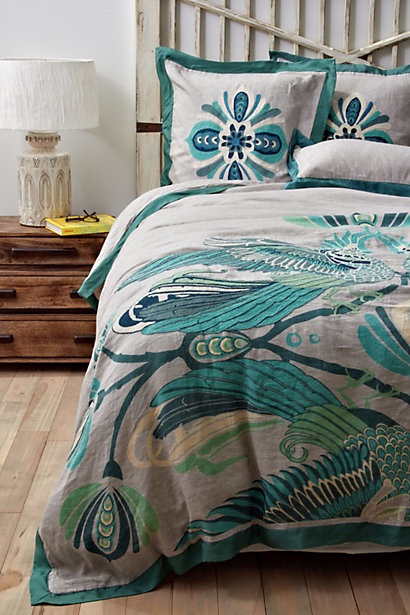
{Cockatoo Bedding available through Anthropologie}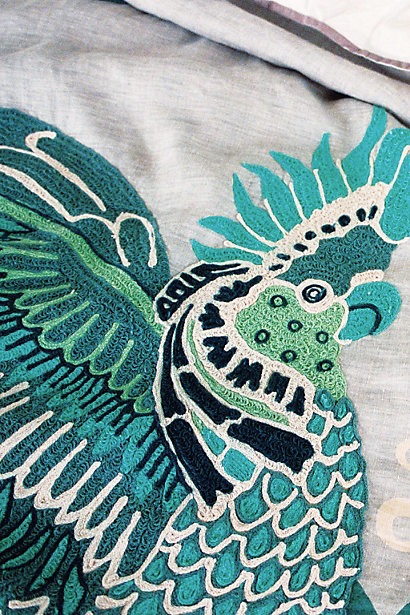
{Cockatoo Bedding Detail, Anthropologie}
To add more products to her arsenal, there is this gorgeous duvet and pillow covers in shades of green, teal, aqua and navy (my absolute favourite combo!) on a neutral grey backdrop with her signature Australiana in the form of giant Art-Deco-meets-Arts&Crafts-Movement Cockatoos. Detailed and divine.
As usual, follow the links to enjoy the rest of her collections, and I’m sure get lost in the other millions of perfect products and design collaborations that are on offer at these companies.
Now after all this exciting designer eye-candy, I’m off to Magnolia Square for some more arty goodness. Will try and lock up my cards and cash, but somehow never seem to succeed. If I can stop the retail therapy long enough to take some pictures, I may do a post about. Alternatively, it’s on all weekend so check it out yourself. Be warned. You will spend. Good luck.
xo Romona
![]()
Spotlight on Australian Designers | Volker Haug
I have already revealed my Design-crush on Volker when I saw his work again at Grand Designs Live (here) and not just for his edgy but stylish Germanic good looks. His incomparable and innovative lighting showcases his skills with material manipulation and design, creating not simply feature lighting but stunning works of art.
“Haug is a scavenger of sorts, taking his material inspirations from junk shops to salvage yards. He synthesises the used and unexpected into ingenious sculptures: pendants, lamps and wall lights, which find themselves at home in commercial and residential spaces alike”. If you are lucky enough to see some of his work at design and trade events, you will find that he is very approachable, both passionate and down-to-earth. I encourage you to have a chat and a close look at the detail in his work.
Here are but a few of my favourite pieces of his, all available in Australia. I love them all, but hey, this is supposed to be just a tasting plate.
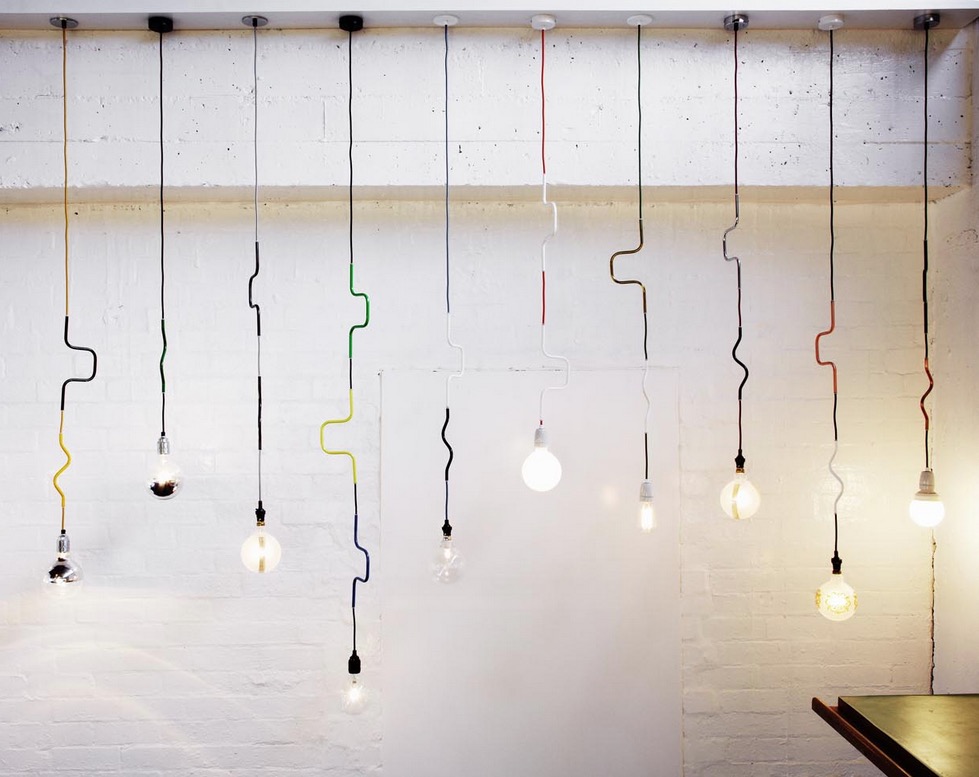
{Cable Jewellery}
Cable Jewellery is a pick-and-mix lighting system. The ability to customise colours, shape and length, through arranging the U or S shaped components, means these lights can become what ever you want them to. Just like every girl, every home needs a funky statement piece of jewellery. The Wall Jewellery, Table Jewellery and Floor Jewellery are also quite stunning.
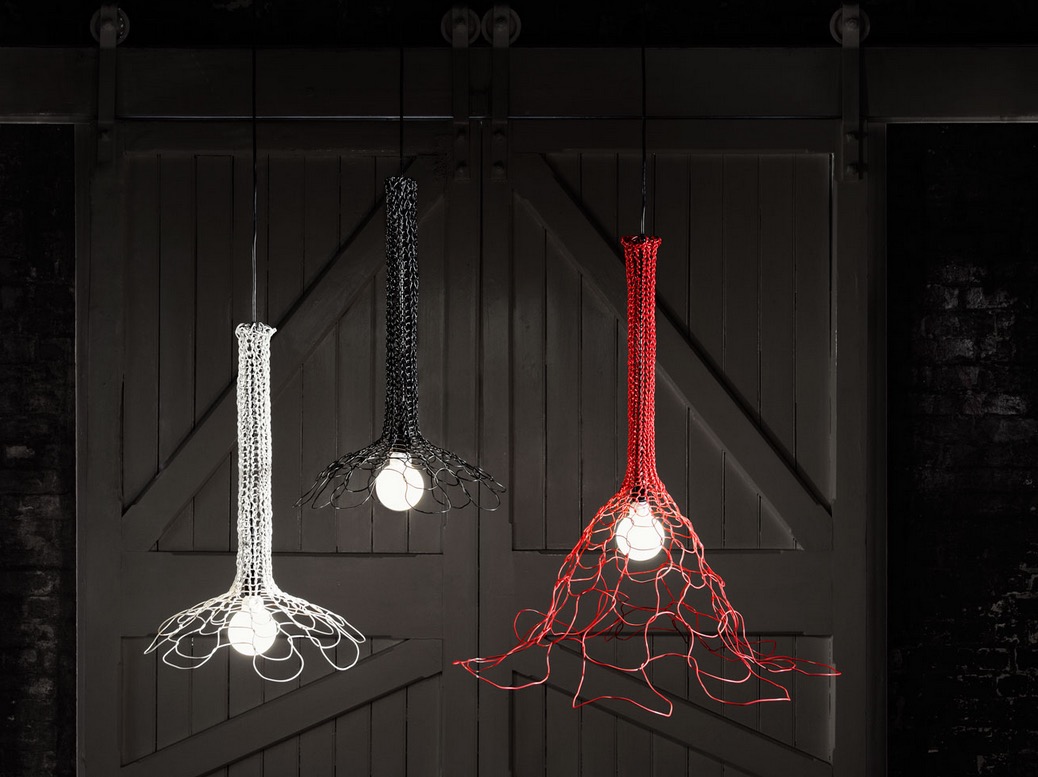
{Daisy}
Daisies are described best on the website: “Daisies could very well be the children of Star-Trek and Macramé. Electrical cable is hand woven to create these organic yet futuristic daisy-like shades”. As with most of his products, the names are charmingly witty - the smaller is Hello Daisy and the larger is Crazy Daisy.

{WOW pendant range}
Haug’s WOW range was one of the first products of his that I saw. In a multitude of eye catching colours and patterns, the inside surface of these massive pendants (ranging from 520mm to a full metre wide) is the unique point of difference - able to be customised to your preferred colours and patterns.
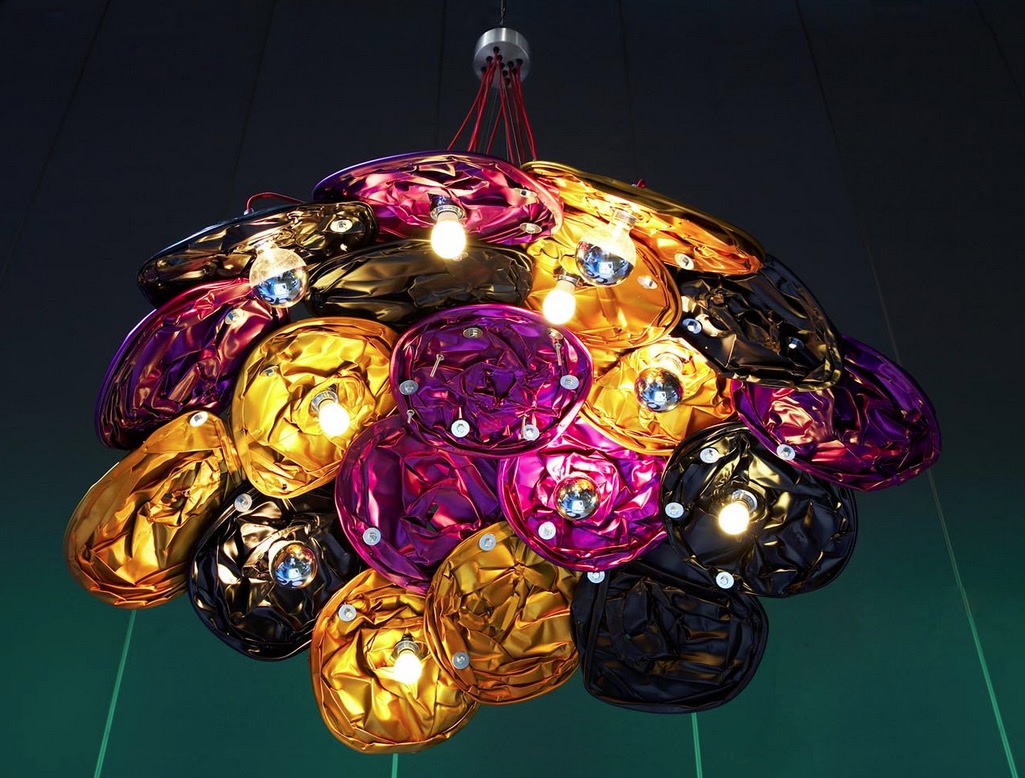
{OMG! Pendant}
The grand, industrial and aptly named OMG! pendant is created from reclaimed industrial shades and measures an impressive 1.7m wide. The anodised crushed recycled shades can also be customised in a wide range of colours. Talk about a statement piece! It also comes in a freakishly big wall design.

{Fire trees}
Fire trees are sledge-hammered aluminium tubing bent and twisted into fluid shapes, anodised in a bright spectrum of colours and then delicately wrapped with leather pieces. A definite work of art that would make a highly talked about table centrepiece. How yummy would the hot pink one pictured above look slithering down the centre of a long glossy black dining table.
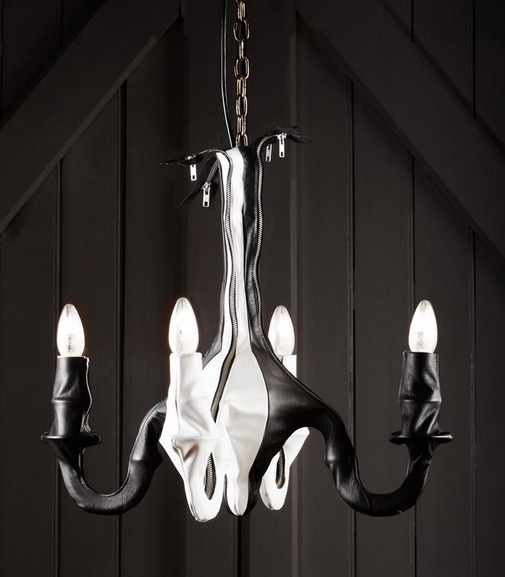
{Joker}
And last but definitely not least, the innovative and just a little bit sexy Joker. Collaboration with a shoe-designer friend lead to this stunning creation, enveloping the good ol’ brass chandelier in zipped up black and white leather. Makes me wish I had kept the god-awful ones in our old house before turfing them, and been a little bit more creative with upcycling.
Of course you can check out all of Volker Haug’s work, lighting and projects, at his uber-cool website here (where all of the above images are sourced from) or visit him at his East Brunswick studios in Melbourne. Happy browsing!
xo Romona
![]()
Bathroom... After
Work started early on a Monday morning. Dad, hubby and I got stuck into ripping off the wall tiles. As with most old houses (with the added bonus of previous owners who have attempted DIY renovations themselves) the wall structure was no longer (if ever) level or square. There was also the unhelpful surprise of most of the wall sheeting coming off with the tiles. The flooring didn’t fare any better - also ripping half up with the tiles. Previous work scraps had been tossed in the wall cavity - I like to think for reuse as insulation - and a few little creatures had been making there nests around the bath supports. On Tuesday the plumber started his work relocating the bath, shower and vanity fixtures and putting in the pipes for the new toilet (yay!). Once that was completed, we could start on sheeting and patching up the walls, floor and front of bath. Waterproofing was painted over all surfaces and allowed to dry (time for a well deserved bevie break). The rest of the week was spent cutting, tiling, painting and cleaning out dust and debris, in time for the plumber to finish up and fit off the following week. For a more visual step by step of the process, you can check out my Instagram page. You can also read more about the bathroom ‘Before’ the renovation here.
Drum roll…. the finished product! What do you think? We are very happy with it, of course, and I catch myself walking past the door quite slowly now just to admire the view. In fact on seeing this post, hubby commented that he can’t even remember the bathroom before, even though it was only two weeks ago. Purged.
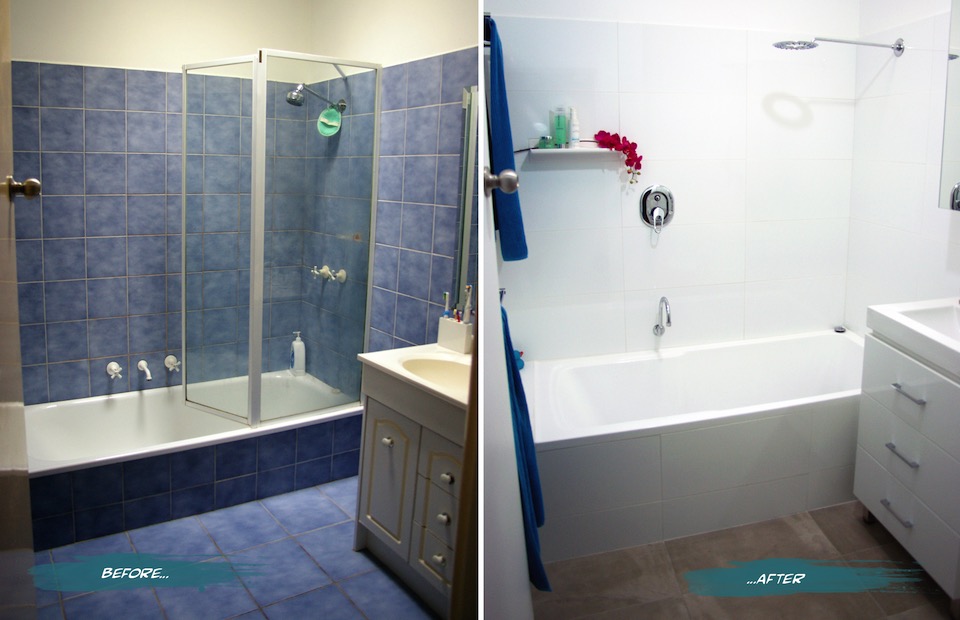
{The Sandon Bathroom - Before and After}

{Bathroom Vanity and Toilet - Before and After}
Here’s a summary of a few of the changes and features we have in the new and improved Sandon House Bathroom.
The vanity was moved closer to the bath to allow for the toilet, but still enough room for the much larger bath (we went from a 600mm to a 820mm wide - much more user-friendly). If we had an OH&S inspector in-house, they would definitely approve. You can read more about the troubles I’ve had with the narrow old bath in the previous post. The bath is not only wider, but taller. It took a few goes to get used to stepping over it, but it’s very handy with keeping small children from toppling over and into it. Plus during one of my habitual, long relaxing soaks, I don’t have to have the water full to the brim to actually be covered and stay warm.
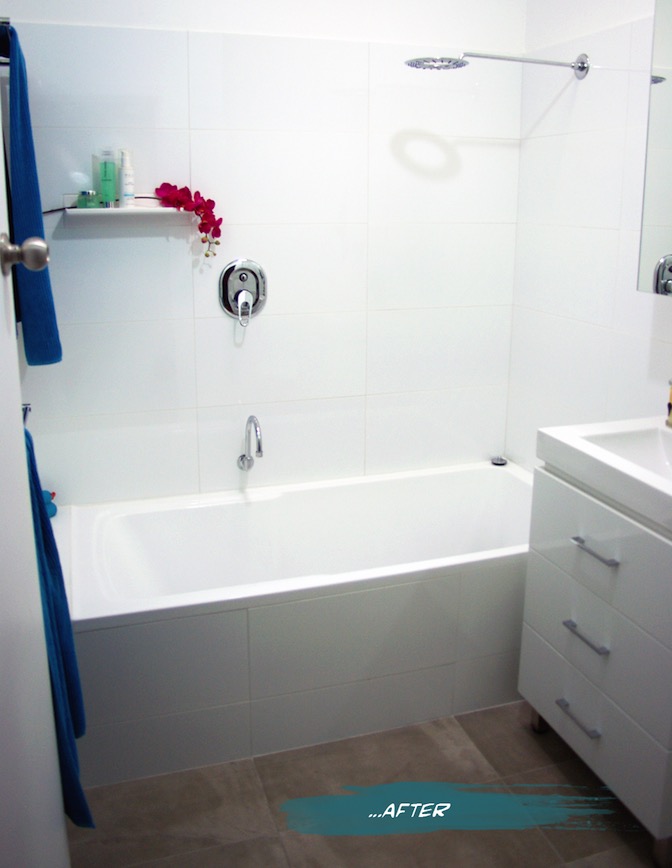
{The finished product}
Our second toilet - hooray! On plan it looked like a bit of a tight squeeze, but we have since found that there is more than enough room and it is quite a comfortable space. It’s still quite precious and we are not used to having the second option, but I’m sure that will end soon. The seat is soft-closing (the slowest we have ever seen actually - almost ridiculously so), which helps prevent slamming noises becoming a child wake-up-call in the middle of the night.
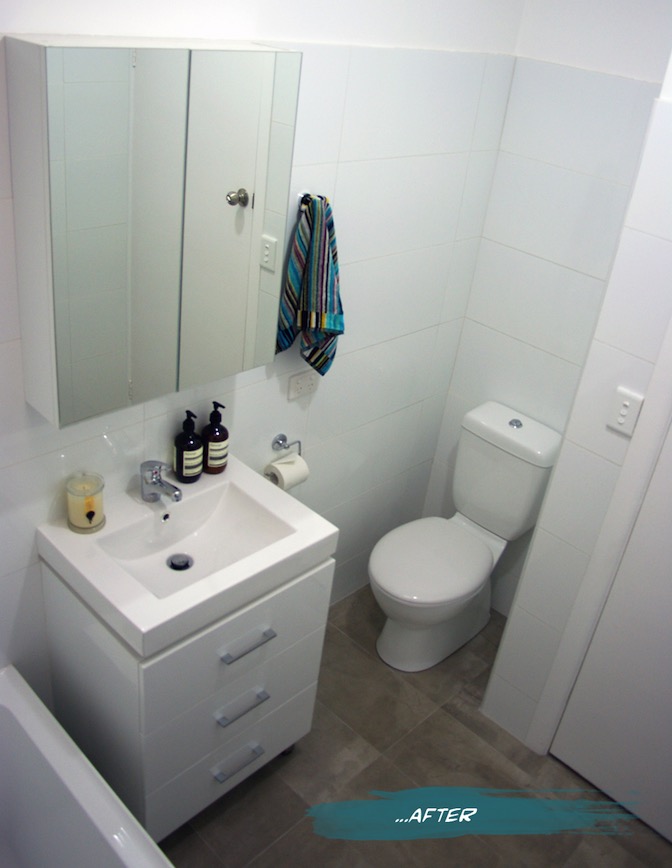
{New Mizu Vanity and Toilet from Reece}
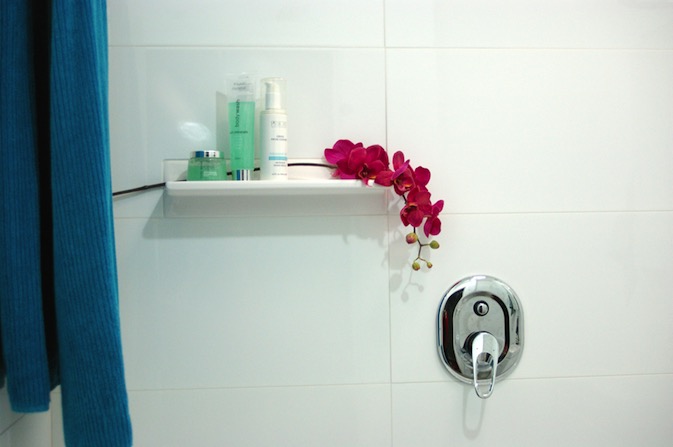
We added a tile shelf high enough to keep expensive shampoos from becoming very expensive bubble bath, as well as far enough away from the shower head to be a pool collector. I find them a great idea when you don’t have the building room to put in alcoves or set-in shelving. As long as you keep it simple, it allows the featured items to stand out without becoming a feature itself. We added an extra towel rail from before and made them double. Not necessarily for two towels, more for the aid in drying. My husband finally gets a towel rail of his own, as opposed to the hook on the back of the door where it never really dries. At the moment the kids towels hang on the back of the door, but we allowed space for another towel rail to be added if and when we need it (big enough to hang bath sheets because once you go up from towels to sheets, you can’t go back!)
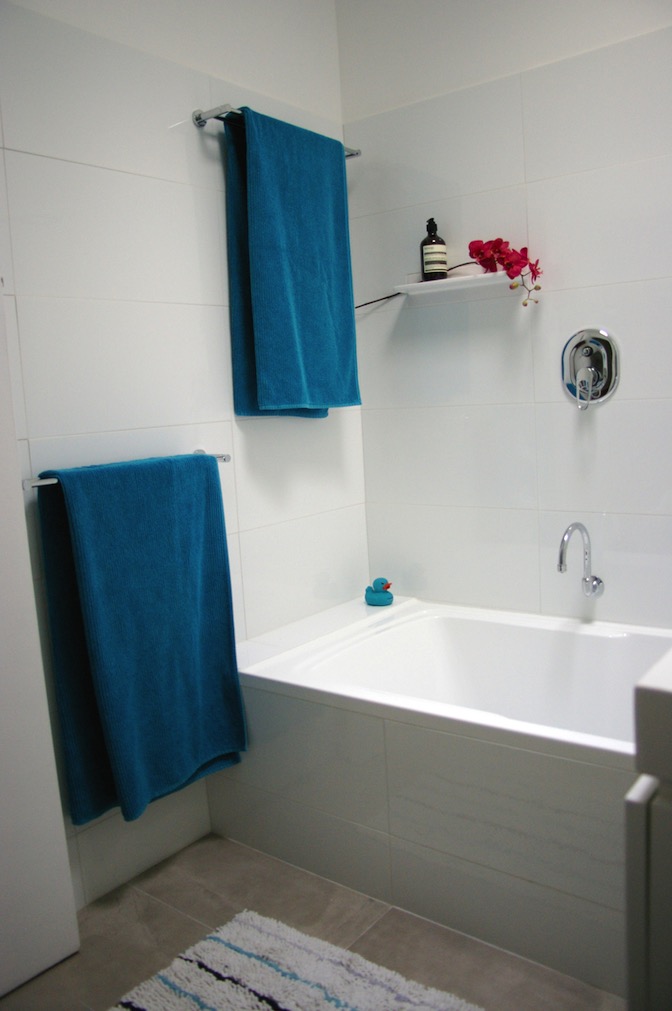
{New huge bath and surrounds}
I chose white wall tiles and a white vanity for brightness, simplicity and longevity. Even though we haven’t changed the skylight, the white reflects the light much more and creates a connection with the outside that belies its central location. The concrete-style grey porcelain floor tiles also give the space a neutrality that is much easier to style and change with soft furnishings and accessories. I had chosen a sleek minimal bath spout, but on further thought, we swapped it for a gooseneck swivel style so that we can run the bath and get it out of the way when the kids are in there, avoiding bumped heads. The Shower diverter mixer was placed far enough left that you can easily turn the water on without getting sprayed, and high enough that the kids shouldn’t be able to play with it for a little while longer. You may notice that I haven’t chosen very ‘designer-y’ fixtures. This bathroom for us is a family bathroom, and with two growing boys that will undoubtedly test the strength and endurance of the fixtures, we went to the budget end of the market. Fixtures are items that are easy enough to replace in a few years, so our money was directed more towards the items that are more difficult to change, such as the bath and tiles.
{Bright white large-format tiles allow us to play with colour}
Having said that, after years of low pressure and uncomfortable showers, the selection of the shower head was quite important. My husband wanted a good soaking while I wanted to make sure that it was still water-efficient. We found our compromise in the Halo shower head from Reece and so far soooooo good.
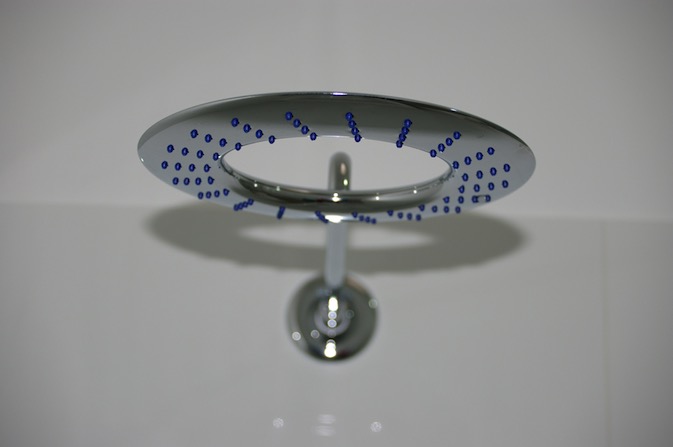
{Halo shower head from Reece}
If you would like me to post the plans, let me know - but photos are more fun, right? If there is anything that you want to ask about the project or specific products please do. I am more than happy to have conversations about it in the comments section below or over email.
FYI - Some of the items pictured and their sources:
- Bath, Vanity, Toilet and fixtures from Reece.
- Wall tiles from National Tiles
- Floor tiles, towel racks and hooks from Vision Bathrooms
- Hand towel by Missoni
- Aesop Resurrection Hand Wash and Balm
- Ecoya Metro Jar soy candle in Wild Frangipani
I hope you enjoyed this exciting little project with me. Time to plan the next one! (Sorry honey)
xo Romona
Bathroom Before…
First up, I would like to justify why we wanted to do this. It's not a cheap exercise and I think updating a bathroom for aesthetic sake alone can be costly, time-consuming and if not done correctly won’t give you the value-add you were expecting.
If you are going to rip it all out, take the time to assess what works and what doesn't.
What features you like and what you detest? What do the occupants need? Is your situation changing - will you need to accommodate growing children, elderly or disabled access? How easy it is to move around, do you bump into anything, are the towel racks too low, too high or too few? Do you need to update your fixtures and fitting to more sustainable, water-saving options? If you are thinking of selling in the future, what would appeal to the largest audience?
Obviously, the aesthetic update is always a big motivator. I love blue, but not this blue and not this pattern and not in this quantity, all over the floors and walls. Yes, of course, I have seen much worse in my travels, and if there were not other issues with the bathroom we could have easily put up with it for a few more years or until we moved on elsewhere. So here are a few of the glaring issues that we have had in our years with this bathroom.
Problem One - The Bath
The existing bath was just that. A Bath. Not a shower bath. Definitely not something that any person (let alone an occasionally pregnant person) should be standing up in. The narrow 600mm wide rounded-bottom bath has always been a bit of a nightmare to shower in. Elbows knocking into glass panes, tiles and fixtures, knees knocking while attempting to stay upright with splayed feet on a narrow curving base. Nothing to hang on to that wouldn't go down for the count with you. I learnt the hard way that you should back out rather than turn around to get out while heavily pregnant - hint - you get stuck… really stuck! An embarrassing few minutes can be spent deciding whether to soap or scream your way out of it.
Problem Two - The Vanity
While admittedly the rest of the house isn't level either (a problem made even more apparent while dad cursed his way through a lot of the refurb), the vanity was especially tilted. Angling towards the back wall to create the perfect ecosystem for a rainbow collection of mould and nasties. Although we wiped it down often, it wouldn't take long to fight its way back and I definitely would not have wanted to see a swab of that cultivated and rising out of a petrie dish. The chipboard doors were also moisture damaged, splitting from their nasty cream laminate.
Problem Three - The Toilet (or lack there of)
A husband, two rapidly growing boys (one starting potty training), friends with numerous young, interstate family and guests that stay with us, and an inexplicable need to all go to the toilet at once meant that our single sad little toilet was not meeting expectations. A second toilet - never thought that would be a major player on my wish list. No longer having to hold it while others day dream or read or check emails or whatever it is that some seem to do on the toilet for so long. The privacy. The convenience. Oh, could it possibly ever be true?!
Originally there was also the problem of icky dirty beige-cream walls, ceilings, doors, frames, everywhere (throughout the house not just the bathroom) but this has been slowly rectified. Vivid White is over all doors and frames, and a soft grey (Nippon Nighthawk) covers most walls (except wet area, which have moisture resistant Vivid White paint on all surfaces). I must admit that the simple few coats of white paint over the walls and ceiling in the bathroom made it much more tolerable and bought us some time to save.
Here are a few before pictures to visualise what we were dealing with.
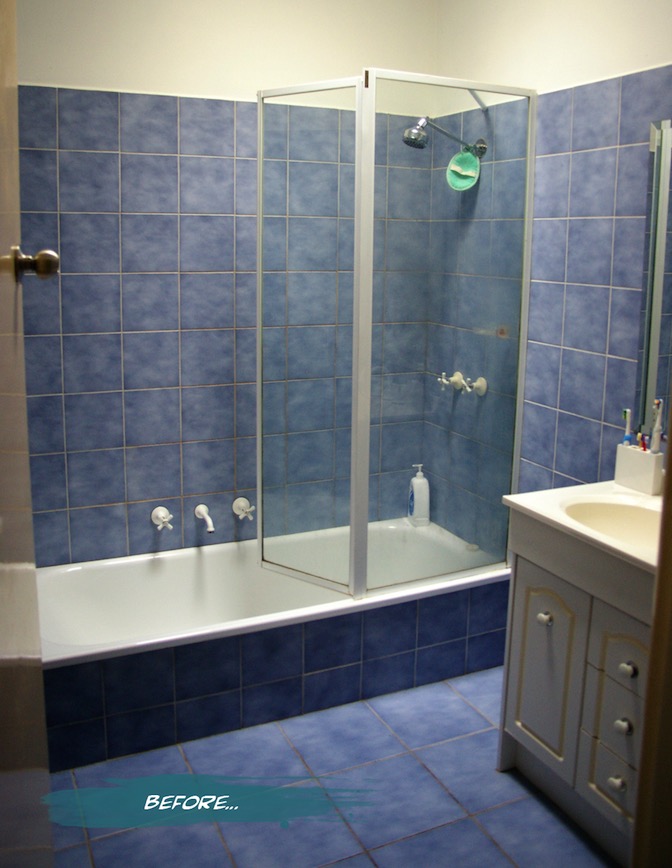
{Before: The bright blue mottled tiles on the walls and floor, too-narrow bath and far-from-level vanity.}
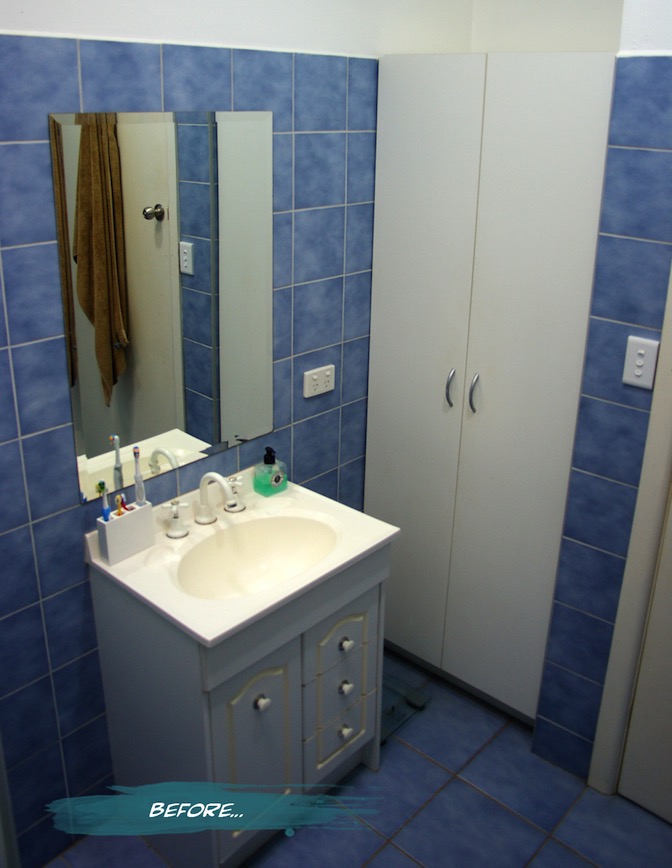
{Before: The falling apart vanity and flatpack cupboard taking up valuable floor space}
I realise that it doesn’t look that bad from a distance. It was the details and the functionality that really cemented the idea of renovating. Some of you may have noticed, if you follow me on Instagram or Twitter, that we have nearly finished the transition from old and shabby to sleek and modern. Although Dad and Hubby did their parts super quick, and the plumber has been very obliging with his time, we still have a few things that we are waiting on (shower screen and a few finishing touches). I’ll pop some pics and deets of the finished results up very soon. Stay tuned…
xo Romona
![]()
Let the Demolition Begin
Just a quick note to let you know that I will be a bit absent over the next week or two - demolition starts on our one and only bathroom on Monday, and work will be speedy to fit in with my wonderful parent's visit to help (all the way from Perth). Dad's a builder, so I am very much relying on his instruction, knowledge and old-school builder attitude of getting in there and doing it right. I will hopefully have time to take lots of pictures and put together a before-and-after piece once it’s finished. Since I've put it in writing now, I really hope that it turns out great!
Hopefully with the parents over I might also get a little babysitting and have time to put together another post or two - bonus!
Until then, hope you have a happy and colourful weekend.
xo Romona
PS. Stay tuned to my Instagram for occasional progress updates
Spotlight on Australian Designers | Christopher Boots
An added bonus, his projects are all hand made right here in Melbourne.
Below are a few of my favourite pieces, with many more on his website.
Like a glammed-up molecular model, BCAA shines with elemental simplicity. It reminds me of a simplified, clean-lined sputnik chandelier. I can picture it surrounded by Jonathan Adler furniture and would love this in shiny nickel in a grand bedroom setting.
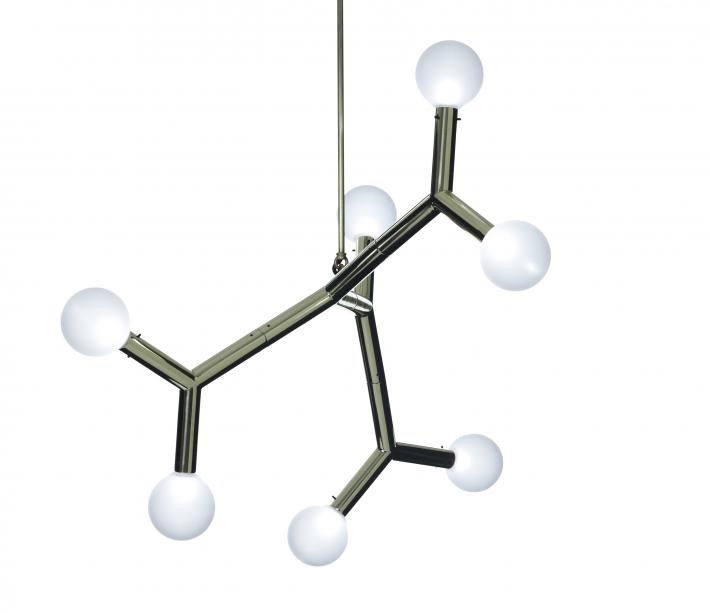
{BCAA}
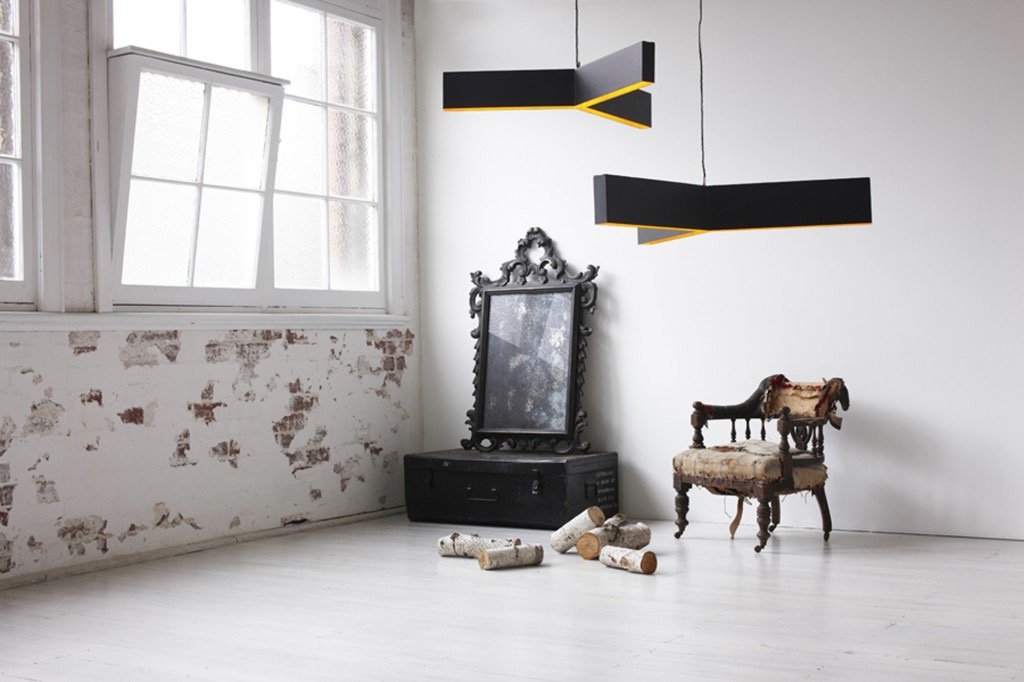
The impressive geometric form of Orp reminds me of impossible triangles and technical drawing classes on perspective. The large 1.5m long glowing pendant would create a stunning talking point for any high-ceilinged foyer or warehouse space, or as a low-hung sculpture on display.
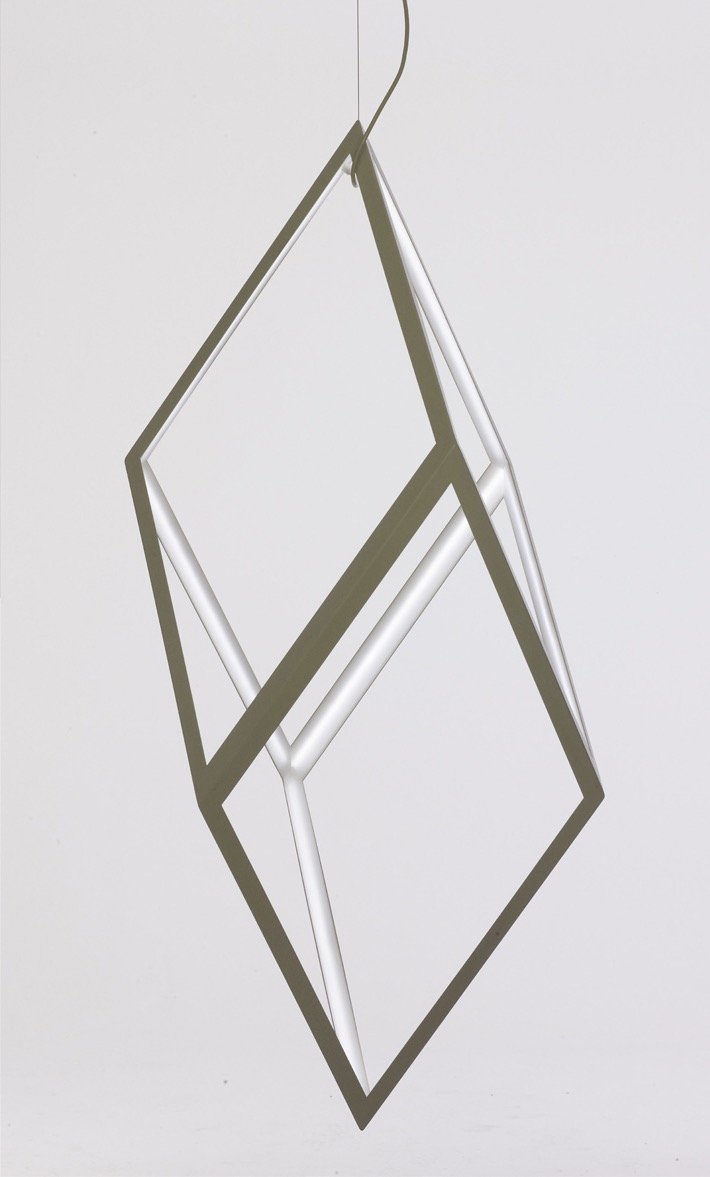
{Orp}
The Phasmida is a bronzed and gleaming arm, like a reaching branch or delicate stick insect sitting lightly in the space.
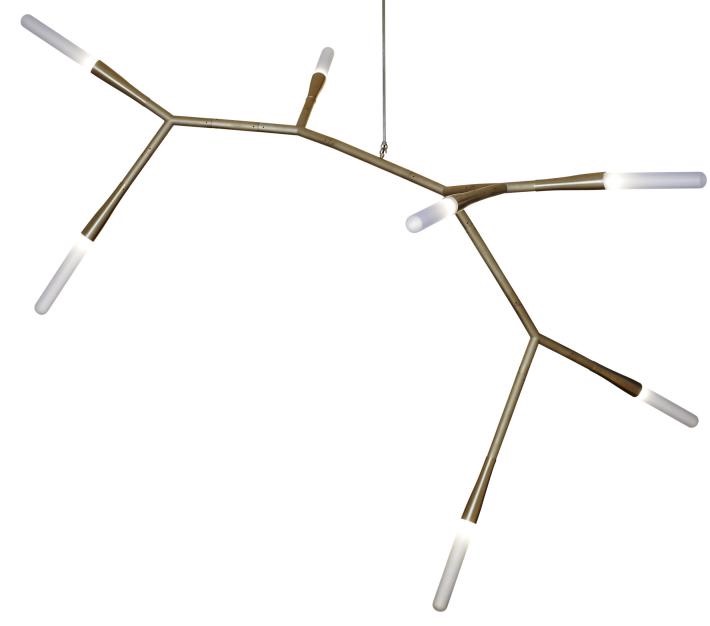
{Phasmida}
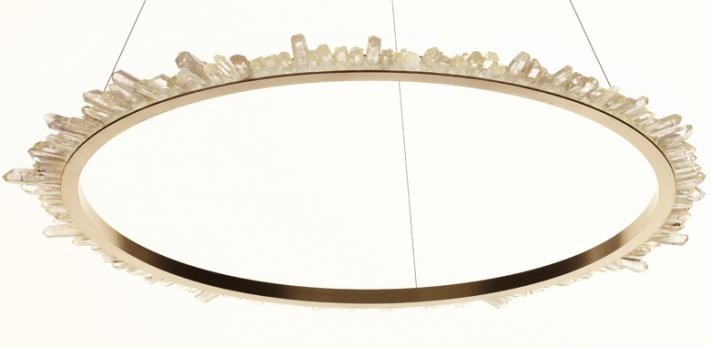
Quartz crystal, copper and gold form this stunning piece of architectural jewellery. Promethius III is very decadent and very luxe, without taking over an interior space.
Featured in the DQ Collective space at Saturday InDesign, Bucky is a thick, bold and black eye-catcher, like using a fat Artline texta on butter paper.
{Bucky}
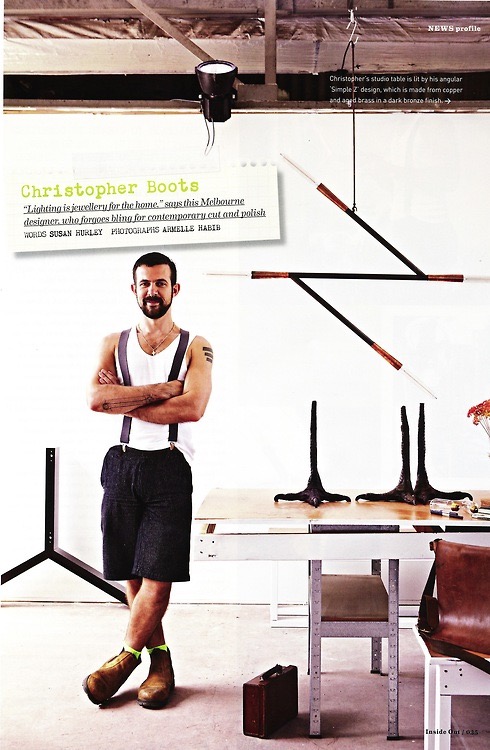
{His feature in Inside Out Magazine May/June 2012}
Which is your favourite?
xo Romona
![]()
Spotlight on Australian Designers | Simone LeAmon
Her literary contributions are a great read. Simone explores What is the Price of Creativity? And How Do We Value The Future of Australian Design? addressing succinctly the report Do You Really Expect To Get Paid? by economists David Throsby and Anita Zednik. Another piece by Simone in Indesign magazine explores What it is to be ‘Australian-Made’. Links to her other articles can be found on the webpage.
A true multi-disciplinarian, she has excelled in design in many forms - furniture, jewellery, product design, lighting, artworks, events, interior design and more. Here are a few of my favourite pieces of hers.
Named after the insect species, the Lepidoptera chair takes it form from studies of the anatomy of butterflies wings, folding fabric salvaged from automotive textile remnants. Bright, stylish and beautiful - both Simone and the chair!

{Lepidoptera chair, using Automotive textile remnants}
The Ricotta floor lamp is evocative of the making process of its namesake. Uniform lines and bright chartreuse powder coated steel make this an elegant and modern statement piece.
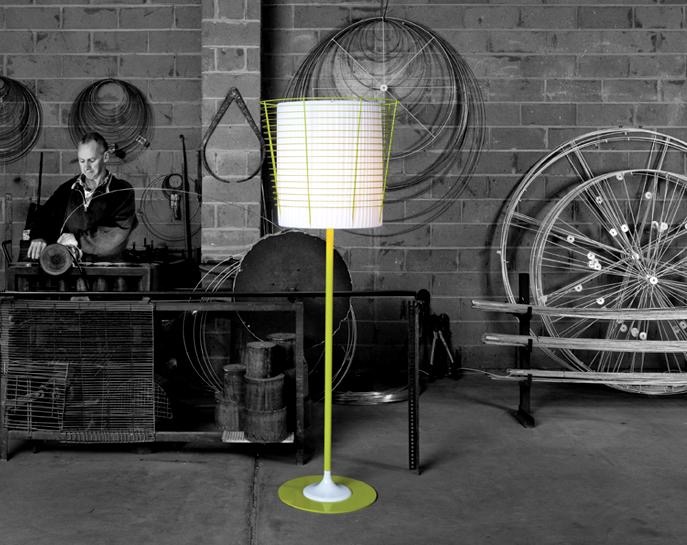
{Ricotta Floor Lamp, Simone LeAmon for Rakumba Lighting}
I am a sucker for statement jewellery. Anyone who knows me, knows that. You can never be too fat or skinny, too short or tall, too dark or light, for stunning high-impact jewellery. LeAmon’s Limited Over pieces are sleek and sculptural, crafted from Bronze and 316 Stainless Steel wax castings of her original Bowling Arm jewellery. The originals used leather waste from cricket balls. The two pieces in the collection, Grubber and Popper, are each named after a different bowling style in the game. I would have to defer to my husband to get any more information on that, or maybe consult with our old Test Match game.


{Limited Over, Grubber (left) and Popper (right) special edition jewellery in bronze and stainless steel}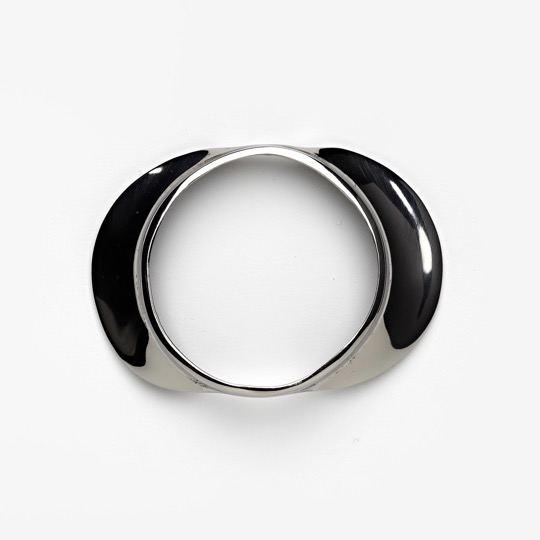
{Limited Over, Grubber special edition jewellery in 316 stainless steel}
Hope you enjoyed the second Spotlight on Australian Designers. I hope to bring you more soon - it’s a long list of lovelies!
Who are some Australian designers that you love or have influenced you in some way?
xo Romona
![]()
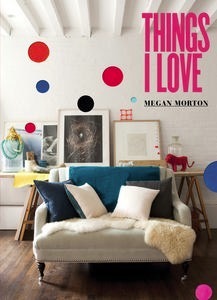
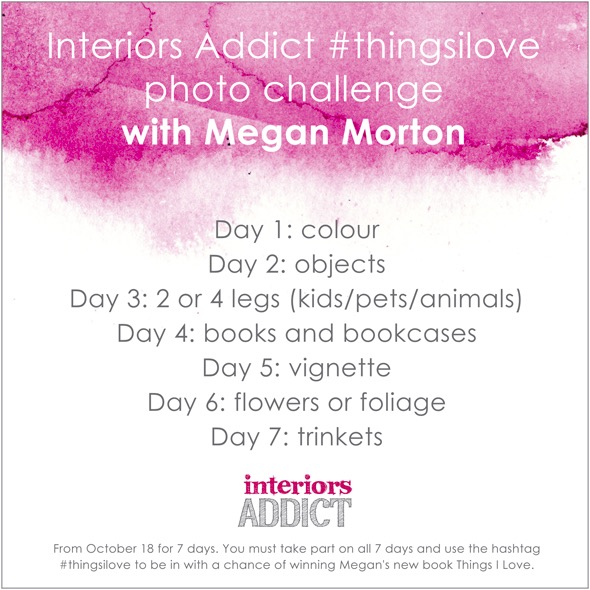
Things I Love
![]()
Vertical Green
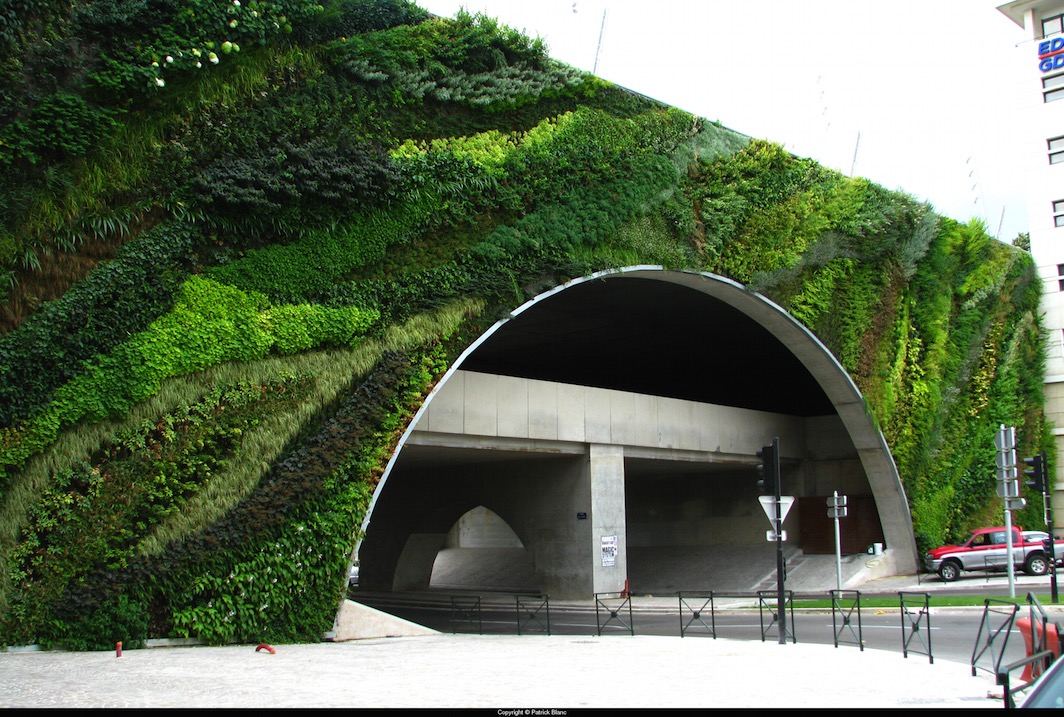
Since I went there, I have to display just a few examples of Patrick Blanc, the pioneer of Green walls in architecture and visual overachiever, including a few very close to home. While the scale is a little above domestic, take inspiration from his sculptural use of botany.
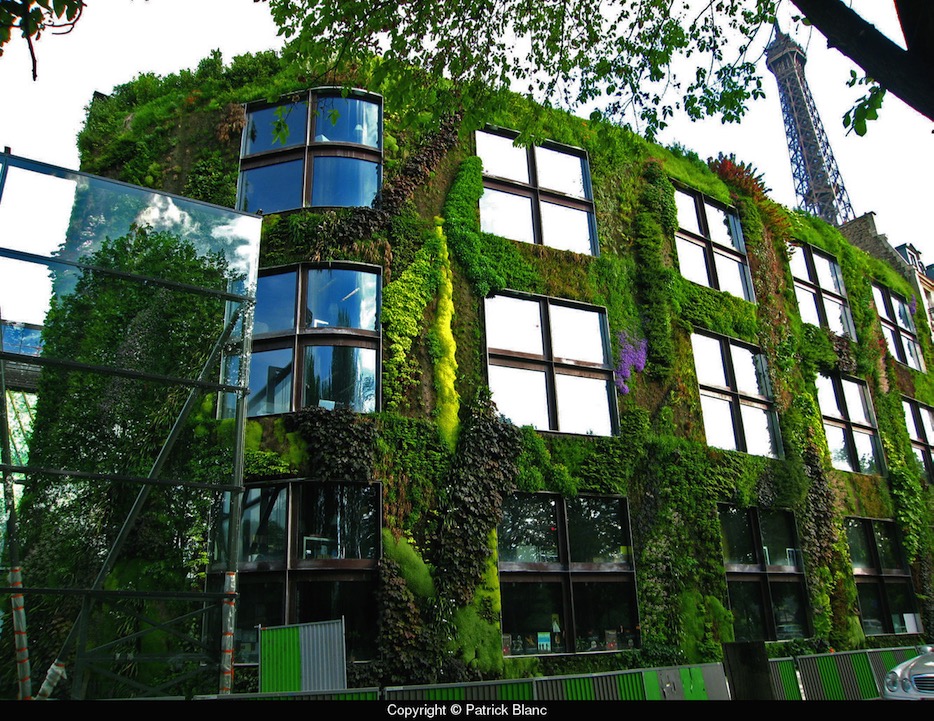
{Quai Branly Museum, Paris, 2005. Architect Jean Nouvel. Greenwall Patrick Blanc}
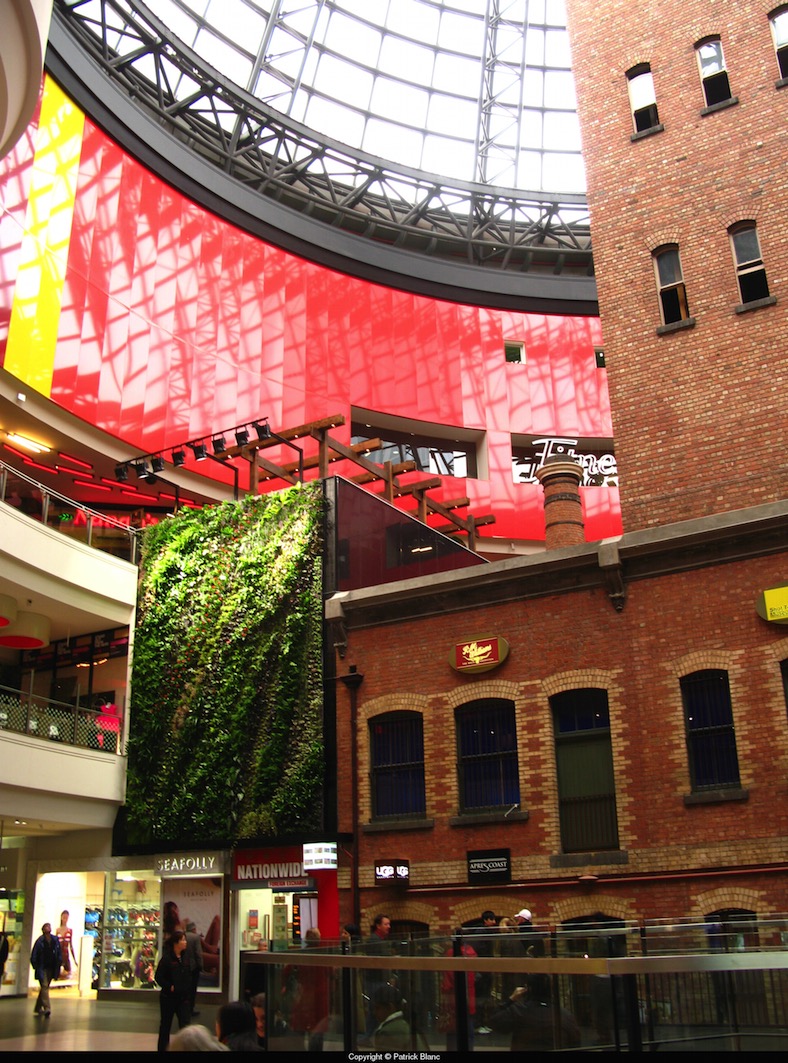
{Our own piece of Patrick Blanc at the Shot Tower, Melbourne Central, 2008}
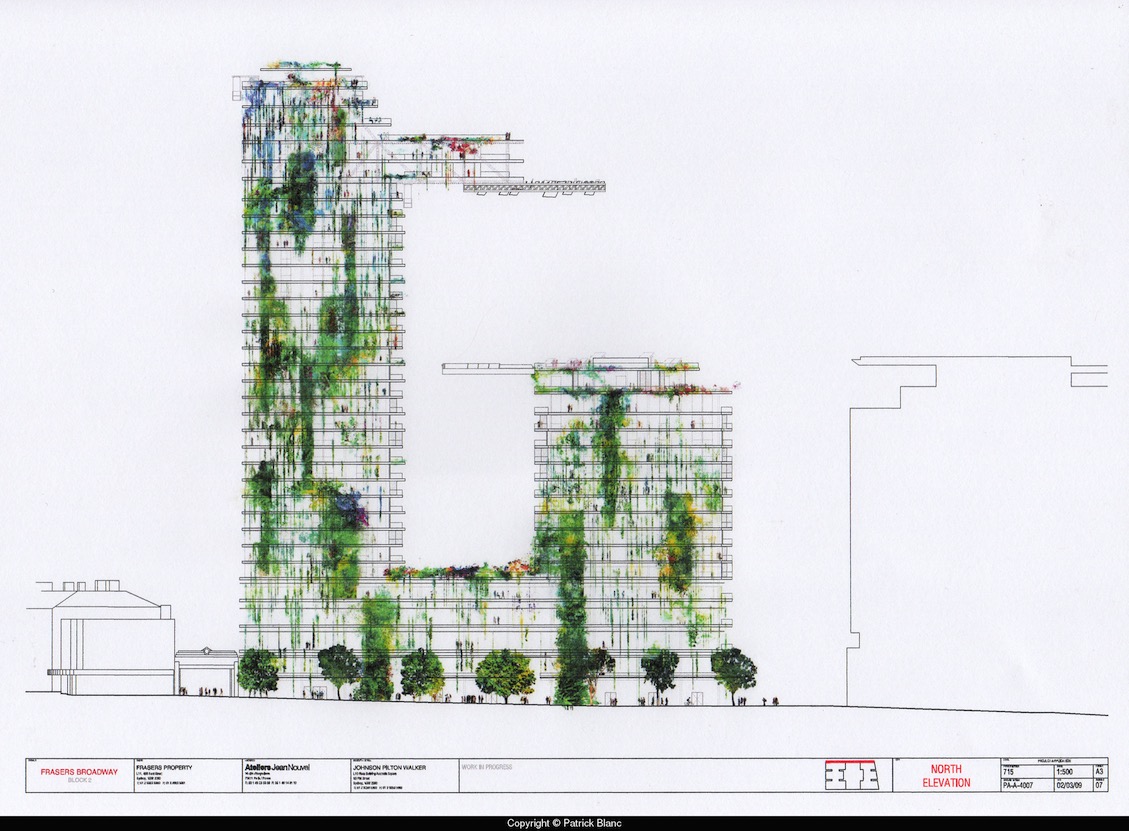
{One Central Park West, Sydney. Architect Jean Nouvel, Patrick Blanc. Due 2013}
I love that green walls have become a prevalent cafe and commercial decoration, and that most will now try and incorporate some functionality into it, with herbs and indoor veggies. Its great to see the new ways people can develop this old idea. I like this alternative to the usual terracotta and unpainted reo mesh of the signature Vertical Garden by Joost Bakker (as seen at Grand Designs). The simple white pots and white mesh offset wonderfully against the uniform dark succulents. Maybe it is just refreshing not to see the terracotta pots again. I think it’s like a popular song on the radio - you hear it so often that you can’t tell anymore if you love it or hate it, but still find yourself singing along.
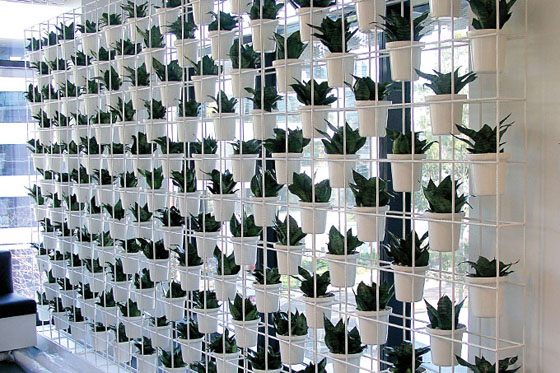
{Vertical Garden by Joost Bakker for Schiavello}
This smooth sculptural wall with rounded inserts for potted herbs suits the modern bright-white kitchen. Talk about easy access and great smells. I would love this in my house.
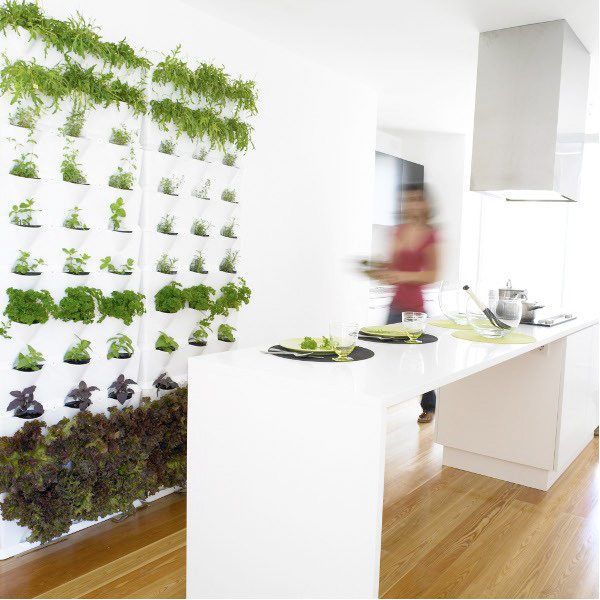
{Edible Herb garden wall complements this modern white kitchen. Source}
The simple draped Porthos between nine white pots on wall-mounted floating shelves are used to break up this double-height common wall in a warehouse conversion in Brisbane.
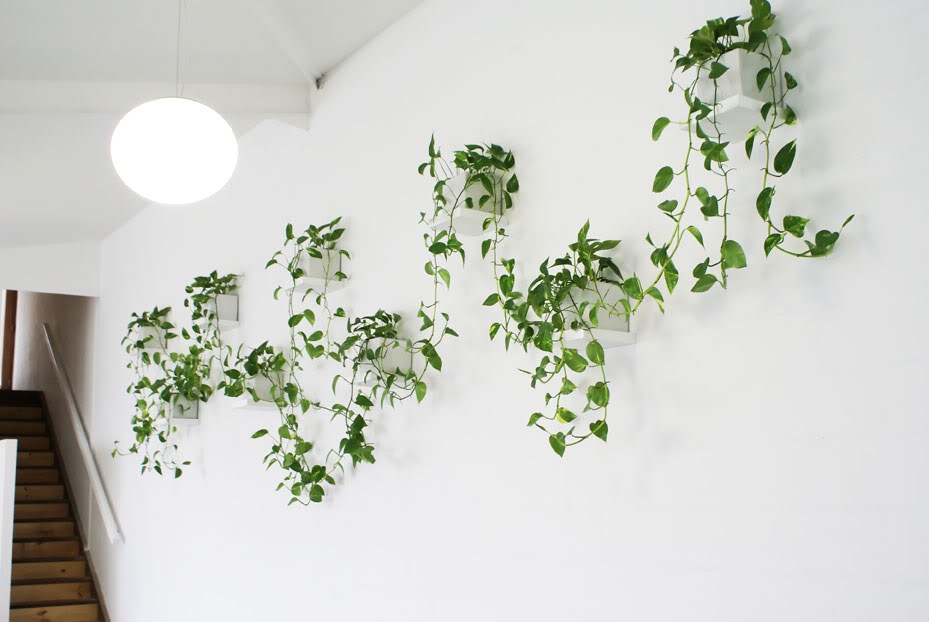
{Minimalist Vertical Garden by Lushe Urban Greening}
I couldn’t leave out the bright entry space to Fujitsu’s 6-star Green Star Docklands office (yes, mainly because it was worked on by yours truly while at Woodhead). The original designs did include using black mondo grass and having a dramatic monotone effect with the black glass walls, emphasising the Fujitsu red. I believe the black mondo didn’t survive too well so the bio-wall is now more in keeping with the bright greens of most green walls, but is still quite effective. The bio-filtration system used was designed by Umow Lai who worked with Woodhead on the project. The ground level foyer of the Gauge in Docklands, Victoria also sports an impressive green wall by The Greenwall Company
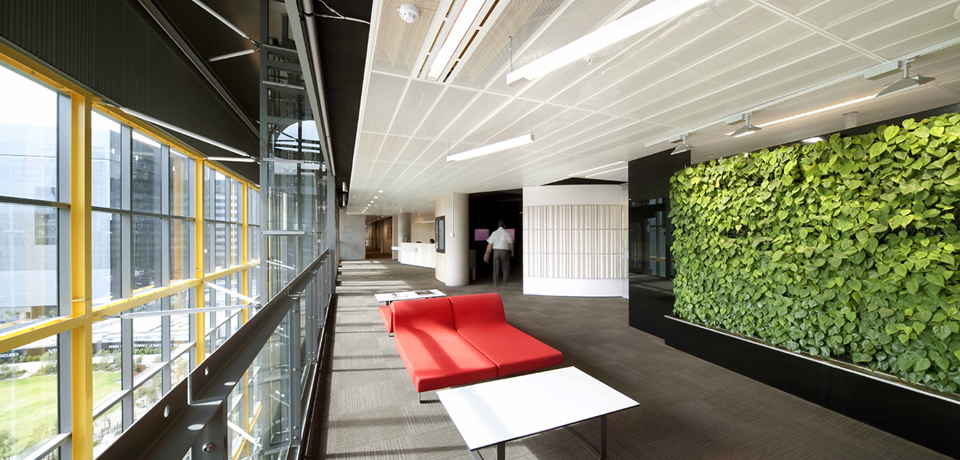
{Fujitsu Head Office, The Gauge, Docklands by Woodhead}

{Just a section of the massive foyer green wall, The Gauge, Docklands by The Greenwall Company}
There are more than a few products popping up that can be used for DIY green walls at home, ranging from the cheap and simple to the complex and often quite pricey. A few options are pictured below (or just type green wall or vertical garden into Youtube and go nuts!)
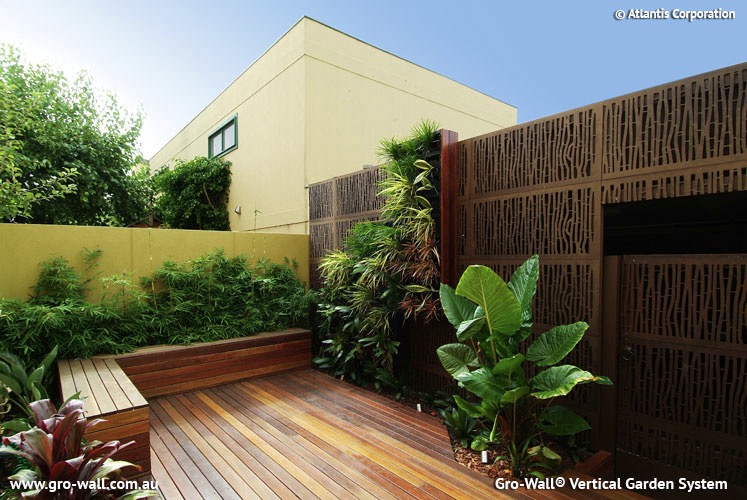
{Gro-Wall Vertical Garden System}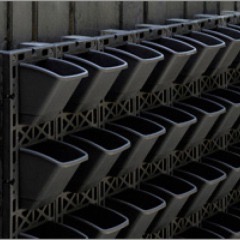
{Greenwall Australia’s Vertigro Home or Pro}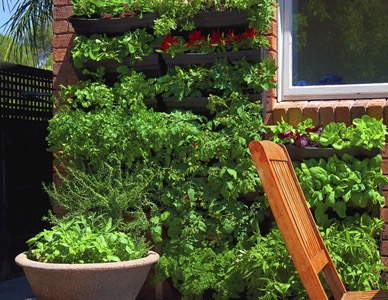
{Wallgarden’s DIY Vertical Garden, also available at Lushe}
Urbio Urban Vertical Garden is another Kickstarter project (like the previously blogged about LIFX globe). I love the simple design and the adaptability of this product. Swap out the plants for some magazines or books if they need a little outside time in the sunshine.
{Urbio Urban Vertical Garden on Kickstarter}
There are so many benefits to using green walls in design, including but not limited to:
▪ Improved air quality and reduction of odours; ▪ Improved well-being with the visual link to nature and the outdoors; ▪ Visual aesthetic of a living decoration; ▪ Supply of fresh, edible produce - herbs, fruit, vegetables, flowers; ▪ Protection from wind, heat and light; ▪ Thermal Insulation and shading; ▪ Noise buffering; and more I am sure.
Have you seen any green walls out there that blew your mind? Or used any products or DIYs for your own vertical green wall? Let us know below and share the love!
xo Romona
Spotlight on Australian Designers | Helen Kontouris
Her design ethos is perhaps best described in her own words. “We live & breathe a culture of dreams, process & creativity. Our approach to each project is an opportunity to discover, learn, evolve, simplify, interpret, innovate and create. Strong creative partnerships are formed through our commitment, value, contribution & growth of our clients businesses. Our role as designer is not to give you the safe or predictable result. We sometimes challenge & redefine the project to enable us to explore the possibilities we strongly believe in, whilst always respecting the client’s decision.”
“We believe ecology in design today, rests on the role of the designer as cultural architect, creating products with clear purpose, intelligent material appropriateness & function that arrest you with their beauty & promote a movement ‘against throwawayism’. You are emotionally attached enough not to discard it. When you no longer need it, give it to someone whom you know admires it or to charity for those who need it more now, than you."
I love that responsibility is taken as the designer to promote, encourage and even demand a holistic lifecycle approach to both the purchase and the retirement of their products. There is no reason that a product should not continue its life-after-you in one form or another, whether it is in perfect condition (go ebay or lucky friends), restorable (gumtree or second hand store), or completely decrepit (recycle those bits into something else or see what can be picked up for recycling by your council). Oh, how I miss the mass hard rubbish display around the neighbourhood at council collection time - it hurts to see people’s unwanted treasures now get picked up quickly and efficiently on individual basis, crushed into nothingness, when those poor items could easily have had another life or two. I digress.
She has a fun and informative website and blog, in which you get to read about her design processes and the happenings in the life of a talented designer, as well as peruse her many fabulous designs in detail, including the ones below. All images are from her website, which you can check out here.
Here are a few of my favourite pieces of hers.
The Penelope is a simple and classic steel and timber beauty, that was on display at Stylecraft during Saturday InDesign 2012. The masculine, honest structure of the legs complements the smooth streamlined timber top, allowing the polished woodgrain to feature.
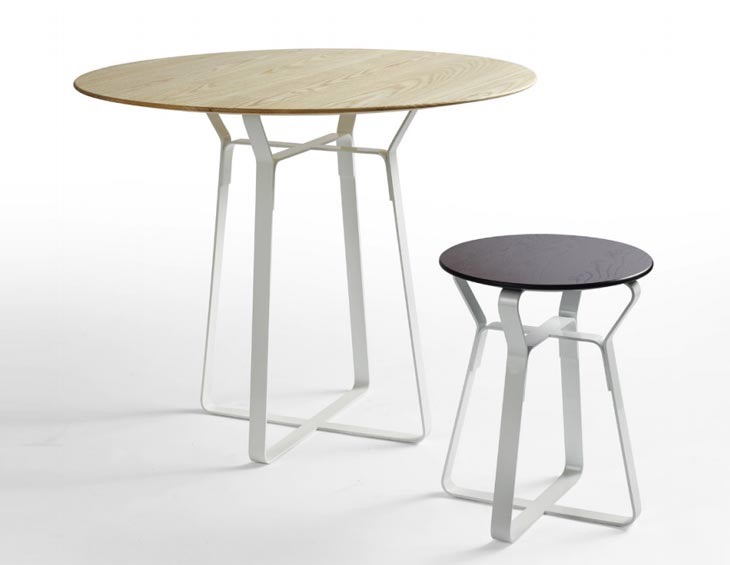
{Penelope Table and side table/stool - available at Stylecraft}
Her Scoop Egg Cup & Spoon collaboration with Alessi is a stand-out. What can I say - I am sure you have all seen this lovely, sculptural piece before. Beautiful but functional is epitomised in this lustrous and decadent egg cup. What a glamourous Sunday breakfast would be had with this baby. Puts my cheapo wire one to shame! It is now on the Christmas list.
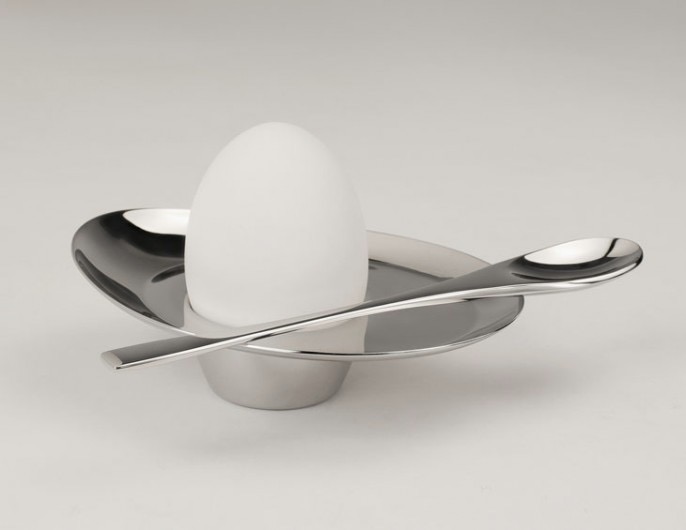
{Scoop Egg cup & Spoon for Alessi - Available at most department stores or online}
The La La Lamp is a floor lamp made of two conic, internally opaline coated fabric shades with a noiseless IGBT technology dimmer. Classic geometry combined with quirky lines create a real feature for any space. Unfortunately, I can’t find exact stockists in Australia, but it was featured at a Schiavello event and since they also stock her La La Stool, I am sure they could help you out.
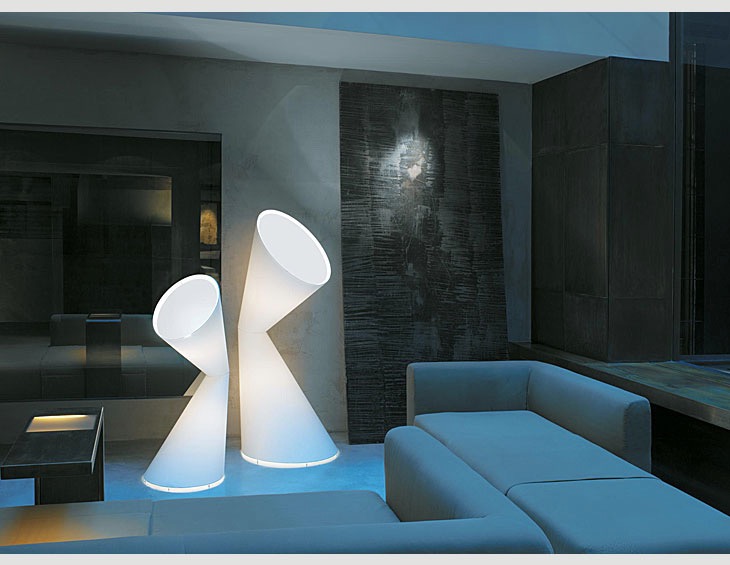
{La La Lamp for Kundalini Italy}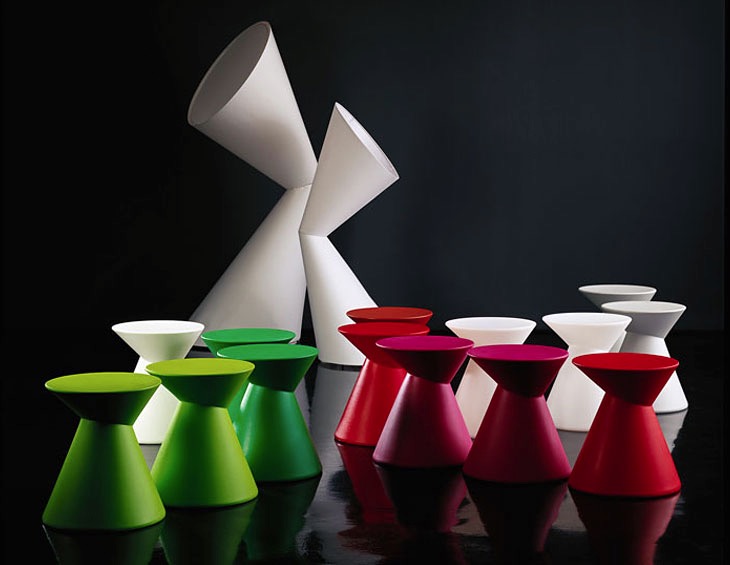
{La La Stool, Available at Schiavello}
The graceful lines and soft appearance of the Panier stool belies the fact that it is made from 100% recyclable Polyethylene and suitable for indoors or outdoors. Shortlisted for the best 'Object – furniture and lighting' in the IDEA Awards 2012 (to be announced November), this design highlights yet another triumph for Helen.
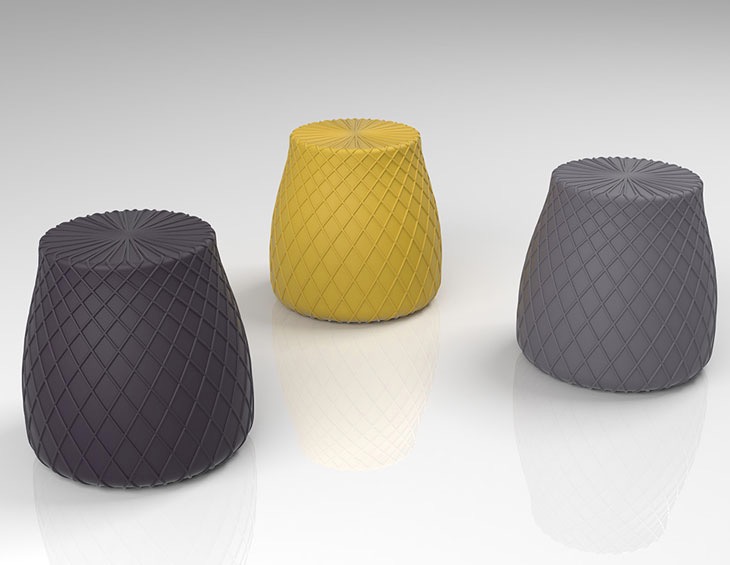
{Panier Stool, Available at Space}
I hope you enjoyed the first of what I hope will be many posts shining the spotlight on Australian Design.
Who is your favourite Australian Designer?
xo Romona
![]()
Rug update
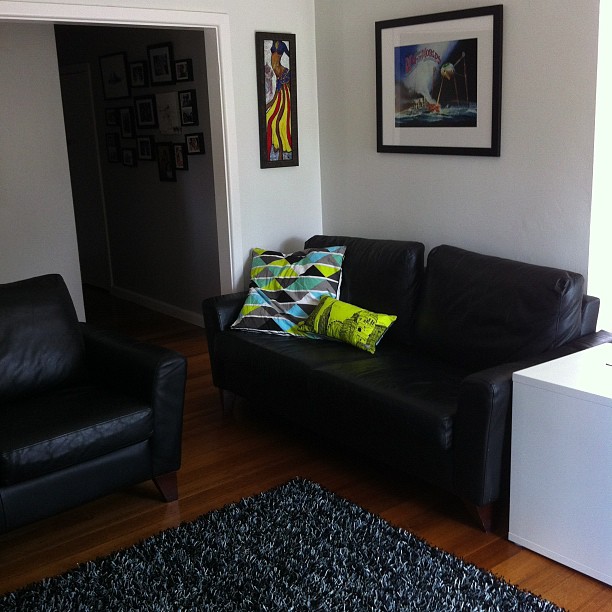
{Black and Grey Noodle-pile Artizen Rug from Carpet Court, in its new home}
Inspired by the new floor dressing (and big red sale signs), I had to nab a few new cushions to brighten the space and add a pop of colour. Glad I found these two (pictured above) at Adairs, combining the latest trends of geometry and neon, with an architectural twist, in Home Republic’s Sketchbook collection. Love it. Bye for now.
xo Romona
![]()
Sexy and Smart - LED Tech
LIFX is a WiFi enabled, multi-colour, energy efficient LED light bulb that you control with your smart phone. Developer’s boast “LIFX gives you unprecedented control of your lights, reduces your energy costs, lasts up to 25 years and delivers an amazing range of experiences we think you’ll love". They couldn't be more right - the response has been phenomenal. The innovative use of energy-efficient LED technology, combined with responsive smart phone tech that is so ingrained in our lifestyles now is irresistible, as evident by the amount of money raised, in such a small amount of time, from people wanting to get a hand on this new and exciting product.
Simply switch out your existing light globes and pop in these innovative new globes. Set your colour to any shade via your iPhone, to suit your mood or decor. Endless fun could be had with this feature - think of the parties, romantic evenings or even just for relaxing. With this, you are able to turn your lights on and off without getting up, or even being home - a plus when travelling. You can program the lights to a time schedule, as a wakey-wakey in the morning or to fade out slowly after an unnerving night of horror movies. I do also love the idea of a fading night light for the kiddies. An added brag, it has been designed, developed and manufactured right here in Melbourne, Australia!
I’m very impressed by the colour versatility, the programmable dimming and lighting up, not to mention being able to receive all your social media alerts with a flicker or colour change of the lights - say hello to the future! I'll take my drink in the VR room thanks, robomaid!
Unfortunately, the future doesn’t arrive until 2013 - and possibly a bit longer for those of us not lucky enough to have got in the early bidding. Maybe, with its popularity, the price can come down somewhat and it could be in stores next year.

{Image via Kickstarter}
For a full explanation, and some cool demonstrations, watch the clip below or for more info see the LIFX or Kickstarter websites. Enjoy.
xo Romona
![]()
Grand Designs Live
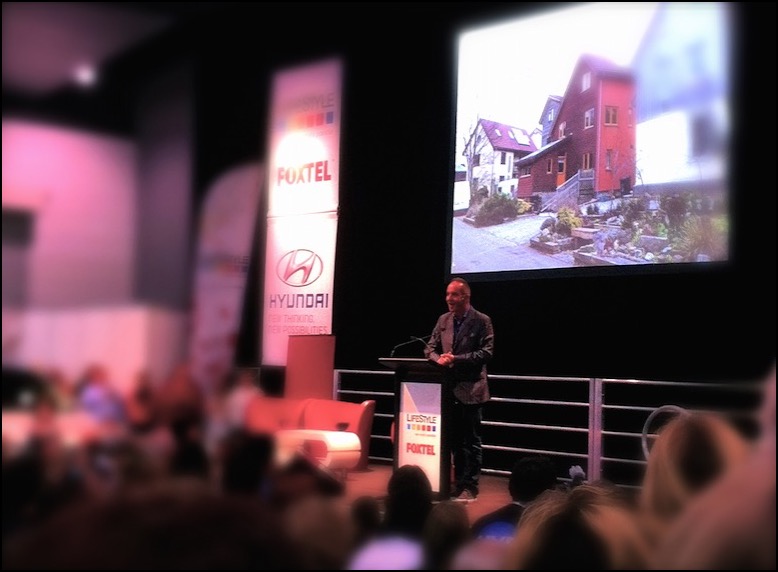
{Kevin McCloud - Grand Designs Superstar!}
While the highlight was obviously seeing the charming and witty Kevin McCloud speak, unfortunately, I don’t have many other great things to say. Maybe it’s design event overload, creative fatigue from the same companies obviously wanting maximum exposure. It feels like I have seen it all before and what is there is often not the cream of the design-world crop. Having said that, I did manage to snap a few interesting pieces, some now key items on my personal wish list.
Firstly, the incomparable Volker Haug. I definitely have a Design-crush on him. Probably since spying his recycled black leather and zipped up chandelier, Joker, a good many years ago at a trade event. I would happily incorporate any of his pieces into any room in my house. I think it would be great fun to start the creative process with one of his major pieces, like the massive OMG! shade, and go from there.
I liked this quirky little primary-coloured, almost diagrammatic, pendant light of his below. Simply called Cable Jewellery, you can pick and choose your components, S- or U-shaped, in a range of colours and lengths. You will have to excuse the pictures. They looked fine on my little iPhone screen but are a tad blurry up close - possibly a result of eyes darting around the room for the next design fix. There are much better pics on his webpage (with cool and quirky navigation and interaction too). He also had little terrarium light globes hanging that were so cute, as well as his aptly named Wow range.
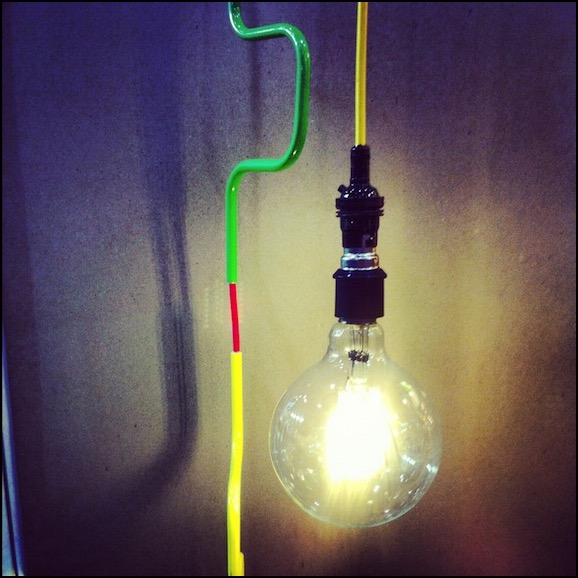
{Cable Jewellery from Volker Haug lighting}
Next, the Mokum stand stood out with Catherine Martin’s divine Art Deco inspired fabrics and wall papers. Fitting in well with husband, Baz Lurhman’s The Great Gatsby, these opulent designs are to die for. Beautiful metallics in hues of silver, champagne and gold. So very luxe and touchable. How great would it be to have a luxurious OTT bedroom in these fabrics and papers, maybe even with one of her divine Designer Rugs Australiana-inspired or Deco Collection rugs on display.

{Catherine Martin for Mokum Antique Lace Wallpaper - On the big, long wish list!}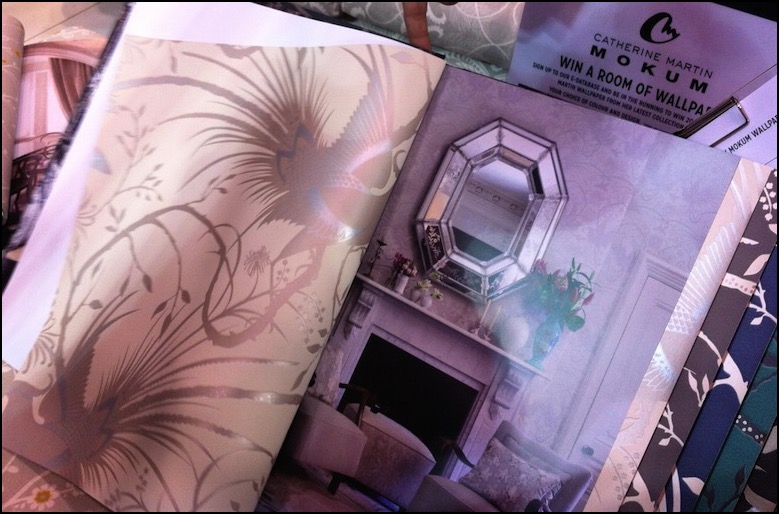
{Catherine Martin for Mokum Imperial Pheasant wallpaper on left. Apparently that’s her and Baz’s bedroom on the right. Not sure I believe that…}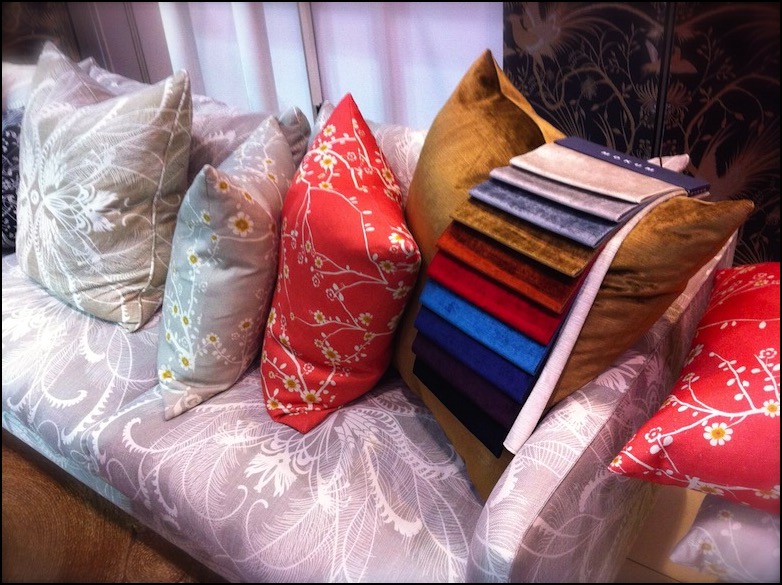
{Catherine Martin for Mokum fabrics on display. Feathers in powder blue on couch. Cushions from left Feathers in Linen, Blossom in Linen and Coral}
{Relaxed vignette with funky wire lights above}
Mobs of people and tantalising aromas drew us over to the Miele kitchen display. Forgot to actually look at the Miele products, which are always quite spiffy, because I was too engaged by Maggie Beer, laughing and having fun with the audience and fellow chef/cooks. The herb wall that they had set up was quite impressive. Yes, we’ve all seen them before and they seem to pop up everywhere now (I wish someone would do something a little more out of the box than the terracotta pots) but it is a good idea and nice gesture all the same.
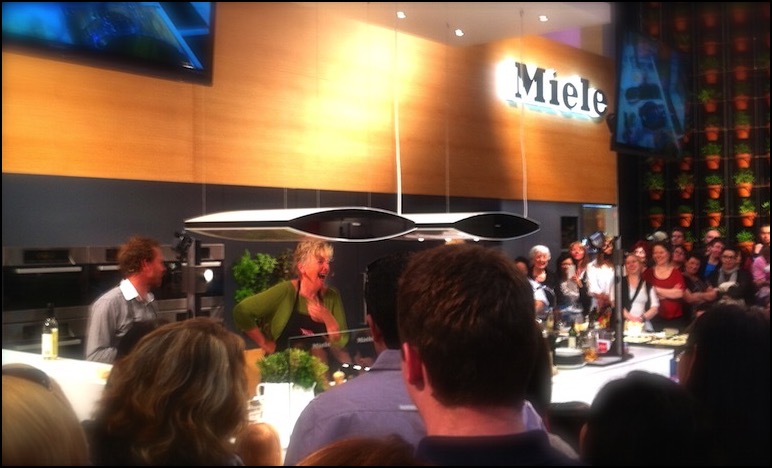
{The Scrumptious Maggie Beer cooking up a feast}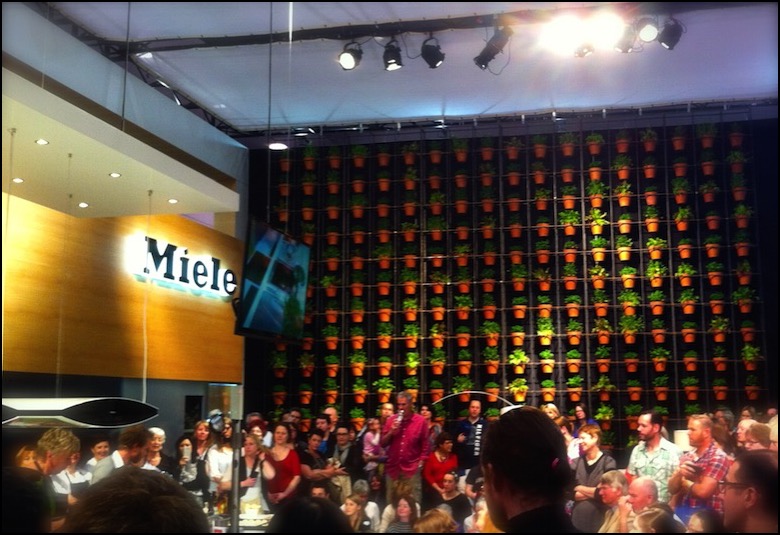
{Miele herb wall}
We did rush through quite quickly, being slightly put off by the vacuum cleaner displays and contoured pillows having a greater prominence than textiles or designer furniture. I have since seen on a few instagram and Facebook pics of others that there were a few sculptures in the garden section that might have been nice to catch, but other than that I’m hoping that the next one steps up its game to a level that the Grand Designs brand could be proud of, with a bit more architectural cred.
Let me know if you agree or disagree and what your favourite parts were if you managed to get there. Ciao for now.
xo Romona
![]()
Rug luck
While work at Woodhead in Perth was very rewarding in most ways, it also paid off with an employee of the month prize, giving me my first official free rug. A delicious turquoise shag rug. This rug is quite famous among family and friends. It has travelled the world. Tufts and strands and small samples of it were found in Paris hotels, Russian bars, our previous apartment’s lobby in Docklands, all around Perth and Melbourne and Sydney and Brisbane. Hitching a ride on shoes and suitcases and anything it can get on. Somehow, with all the fluff that we found around the place and in the vacuum cleaner, it still managed to survive and look quite fresh. Now ten years later, he has since moved on to another good home courtesy of Gumtree and is hopefully still managing to get in some travel.
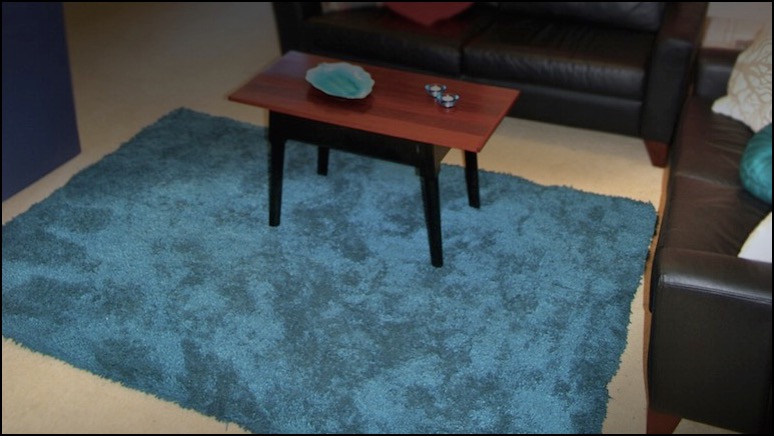
{First of the freebies: Turquoise Shag rug and Upcycled Coffee Table}
The next rug in the saga I am still desperately in love with. A competition entry (of which I am sure by now you have realised I am quite fond of) lead to me winning this beautiful rug from Designer Rugs’ Saffron Collection. I went to the showroom in St Kilda to pick her out. The smoky greys and stand-out teal of the Bowral (in cement) spoke to me. Loved the Asian and botanical influence in the pattern, without being too in-your-face florally. Although I am sure, if the budget of the prize had allowed, I would have gone for one of their stunning Akira Isogawa collaborations, but the quality and look of this rug is exceptional.
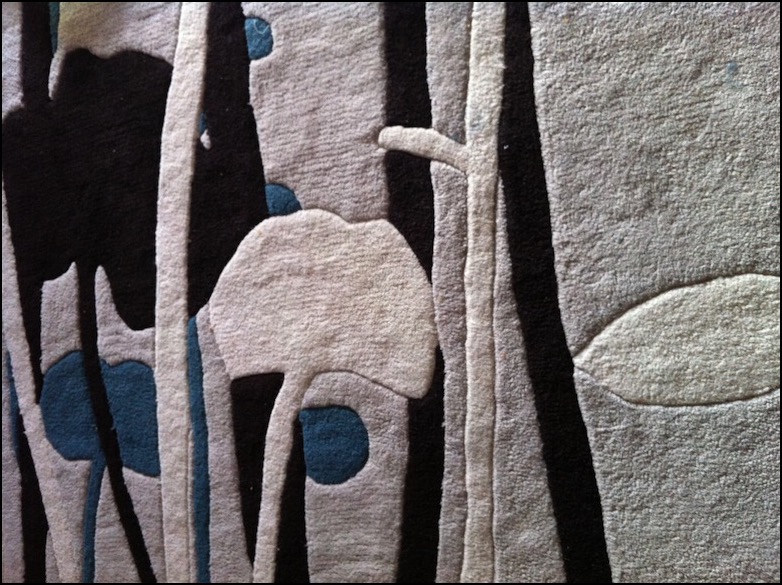
{Designer Rugs Bowral in Cement - close up of my baby}
Now to my recent win (yes I am a lucky b.arch when I see it summarised like this). Carpet Court’s love the look competition let me pick from their Artizen collection. It looks hardy and family friendly, without sacrificing style. With a two year old and a bub just starting solids, cleanability is a big plus. The below image is from their page, but I’ll post one in situ once I get it.
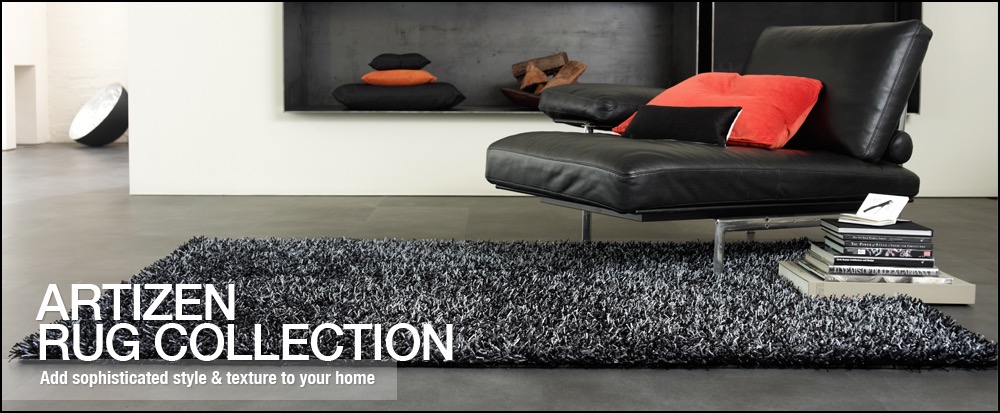
{Image courtesy of Carpet Court}
In revision, it reads like a brag board, all “look at me, how lucky am I”. But the point I was eventually going to make was that everyone can create style and beauty in their home without spending a lot of money. Sure, not everyone wins their furniture or accessories, but with bountiful resources out there like eBay, Gumtree and even curb-side pickups, there is no excuse not to be creative and have fun with your interiors. The gazillion tutorials on Pinterest and Youtube for DIY of Ikea and other similarly cheap starting blocks, means that anyone can now have a designer home.
The coffee table in the first photo with our since-passed turquoise rug was made from a found and refurbished hall table cut down to size, then re-topped with sanded, buffed, polished and varnished jarrah fence pickets. My eldest has a cool industrial hanger for his jackets (yes plural, at least ten that fit - he is a Melbourne boy!) from another curb-side pickup find, relieved of its rust and sprayed fire engine red. Our outdoor table is someone’s old dining table sanded and oiled, with legs painted a bright Santorini blue. Actually, looking at the photo again, I think its time to stain the top of that outdoor table - or stop ignoring the tired old decking and give them a good oil too.
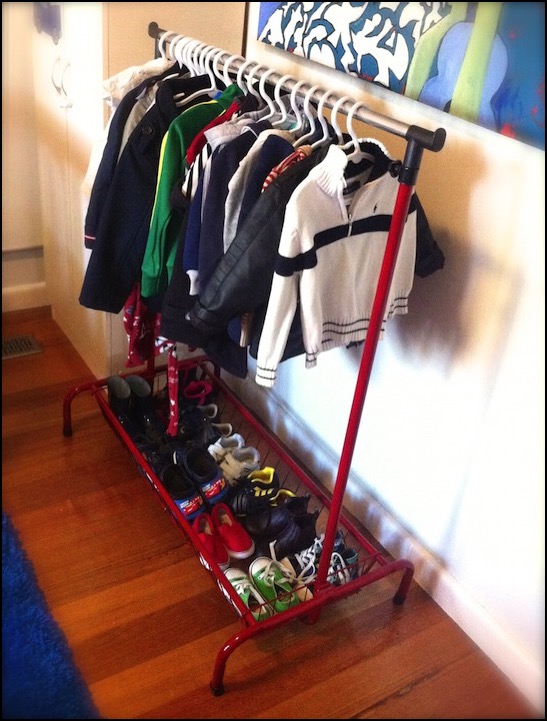
{Upcycled Coat Rack - Refurbished Road Side treasure}
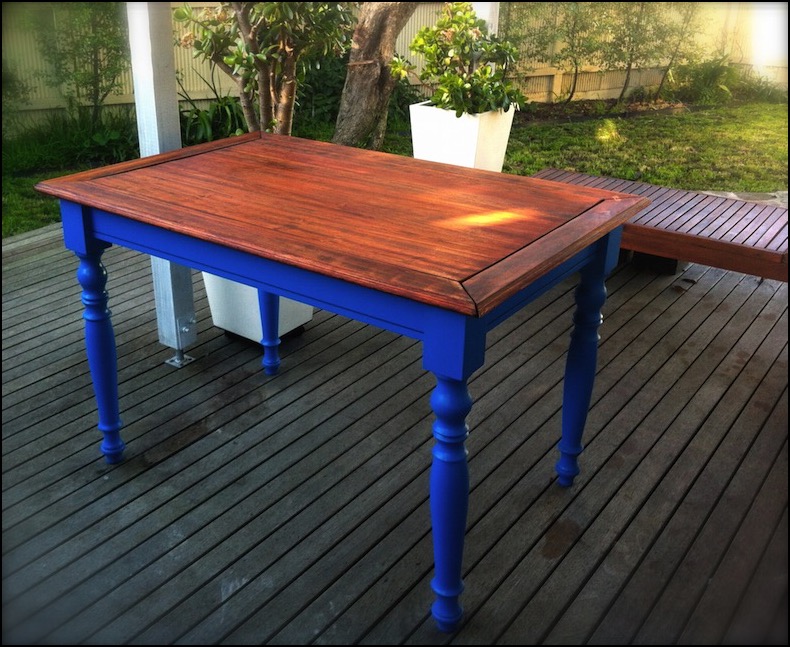
{Upcycled Outdoor table - Refurbished Road Side treasure}
With a bunch of cool finds, a little inspiration and a bit more perspiration you can create almost anything. Also, when you’ve paid nothing (or next to nothing) for it, you’ll be less precious about mixing it up and changing things around every so often.
And if all else fails, enter a few competitions and see how you go. You can’t complain if you don’t give it a go.
xo Romona
![]()
I'll be back
It’s been a little bit, and will still be a bit more, before another post, sorry. I’m transitioning between my current non-supportive program (won’t go into details — its reeeeeaally frustrating!) and a new program (not decided on as yet).
Just a small shout out this week: a big thanks to Carpet Court and their Love the Look competition. It is actually worth entering these things because, yes, you can win - I did! A gorgeous new rug soon to be delivered. Jealous? I am still holding onto the hope that I might win the grand prize of a $10,000 room makeover with fab Interiors Darren Palmer or Stacey Kouros. One can dream.
Just wanted to make sure that you, yes you, the three people reading this, still know that I appreciate you popping by and will endeavour to bring you much improved delights very soon. Until then, enjoy my Tweets, pins and FB posts.
Hope to speak to you from here very very VERY soon.
xo Romona.

![]()
Unearthing Treasures
Inspired by Carpet Court’s new Love the Look competition (How hard is it to choose between team Darren and team Stacey!), I went rummaging through my boxes of trinkets and collected items from my travels and explorations. You know the ones - the pieces you’ll put up in your one-day house (the one with room to spare - a library, a sitting room, a chic powder room off the entry foyer, maybe even a gift-wrapping room à la Martha Stewart). The piece that caught my eye was right there on my bedroom wall. The exquisite hand-painted Indian wedding ceremony on a government stamped paper that I found in a market in Jaipur, India.
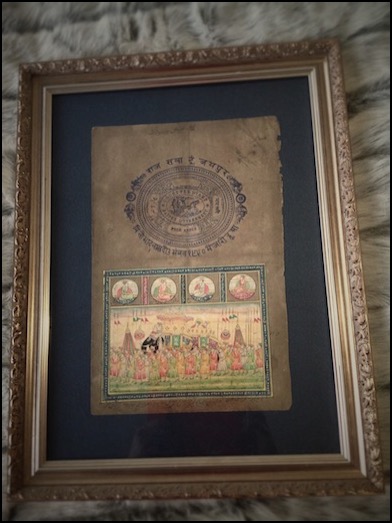
{Indian Government Stamp and painted Wedding Ceremony Artwork, from a market in Jaipur, India}
Another work from the same market is the black and white elephant heads (below right). Until I photographed them for this competition, I had forgotten how much I liked looking at all the scribbly detail in them.
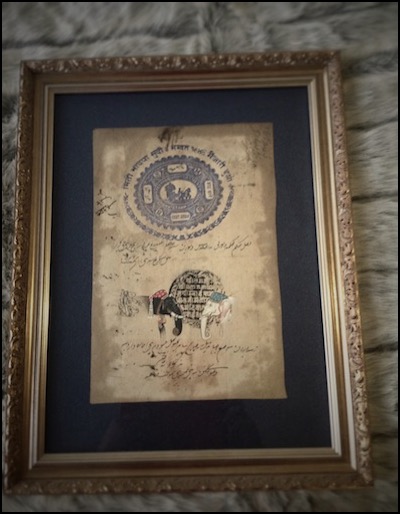
{Indian Government Stamp and painted Elephant head Artwork, from a market in Jaipur, India}
They are totally out of place in my current bedroom. As it stands, it’s a mismatched explosion of objects - and not in a good way (thus the desire to refurb it, stat!) I love mixing vintage with contemporary, but the pieces have to be right and I feel it has to be done with a cautious hand and keen eye.
I had been meaning to reinvent my bedroom into a palace worthy of old Hollywood. Glamourous crystal and blinding chrome. Tufted velvet and mirrored lucite-legged vanities. All look but don’t touch. Now though, I am having to remind myself that yes, although I love the look of these in magazines, could I live there? Especially with two young boys (one who likes to crawl into bed with us after pushing most things off the dresser with his cars, and another that I’m sure will do the same as soon as he is able to get out of the cot).
I’ve decided to go back to basics. Firstly, I have to decide what, if anything, I want to keep from my current room or if there is anything that I already own that I want to introduce into the new room (such as an art work or armchair). I think I will be keeping more than I’d like to (budgetary reasons), but upcycling is under-rated, so I’ll see how I can change the items that I can’t afford to replace, to fit the new style. If you follow me on Pinterest, you may have noticed that my DIY folder is getting more of a work out lately than usual. With two kids, and without the disposable income that we had before them, I can hardly do the complete Jonathan Adler meets Kelly Wearstler that I’d like to.
Secondly, research images that attract and excite me, and define what it is about that image that gets me going. Is it the whole package, a particular furniture item, the colours - warm or cool, the scale, the layout, the fact that its tidy, what? Then see how it can be applied or worked into the canvas that is my room. Again, Pinterest and Houzz are wonderful resources for finding inspiration and products. Of course, its always fun flicking through drool-worthy magazines like Belle, Real Living, Sanctuary and Home Beautiful when you can find the time. I embrace my iDevices, but I am not quite ready to part with my monthly deliveries of hard copies just yet, thank you.
Luckily time is on my side. With a bathroom renovation due in October, it may be a few more months before I have the spare coin to put towards the fabrics or wall paper that will make it really worth doing. There’s nothing wrong with taking time to make sure that you really do love that particular pattern you chose, and not just because its on-trend or was used in that house by that guy in that magazine, you know the one! For now, I am just trying to remind myself to keep the basics somewhat neutral, so I can really go nuts on the replaceable items like headboard fabric or bedding or window dressing.
OK, so I think I have successfully gone completely off topic. Maybe one day I’ll be able to do it with the charm and imperceptible manner of Ross Noble or Billy Connolly. Until then, I will just say that I will revisit the idea of finding hidden treasures in your home when inspiration strikes. I’m hoping to also bring you a little introduction to our planned bathroom reno coming up - I look forward to some peer feedback if you feel like it. Ciao for now.
xo Romona
P.S. (again) Sorry that comments aren’t allowed at the moment. I really want to hear any feedback you have but iWeb is disagreeing with me and I need to find a new program. Excuses, excuses!
Please feel free to email/tweet/FB post me - would love to hear from you!
UPDATE: Hopefully comments should work now….
![]()
Saturday InDesign 2012
I’m lucky to have been blessed with two very co-operative babies (my first was strapped to me in the same Baby Bjorn two years ago at the last Melbourne Saturday InDesign). Even so, it is a long day and if all things go to plan, I shall get to have my next one sans-bebe and stay for the inevitable evening festivities.
I love getting out and seeing the new products on offer, seeing other professionals and design enthusiasts cruising between show rooms with happy neon lanyards around their necks. Although it is a given these days for companies to have a wonderfully detailed and impressive looking website, there is nothing like running your hands over perfectly smooth and detailed timber or rough textural fabrics. Being stuck in the home most of the time, I relish the chance to get out to these events, and highly encourage it to all.
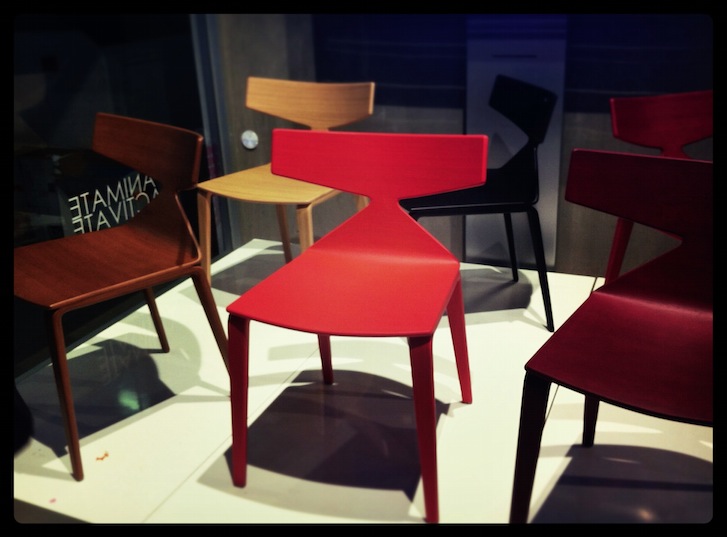
Our day started a bit later than intended (as usual) and the first stop was Zenith Interiors. Bright colour, neons and geometry were evident, on-trend in all things at the moment. The impressive Godfrey Hirst neon pink geometric-edged carpet was a stand-out for me. Pumping music and yummy cheesy pretzels lead the way to a visual treat in the form of the Zenith Design Competition display, featuring creative ‘outfits’ for the TIPO chair.
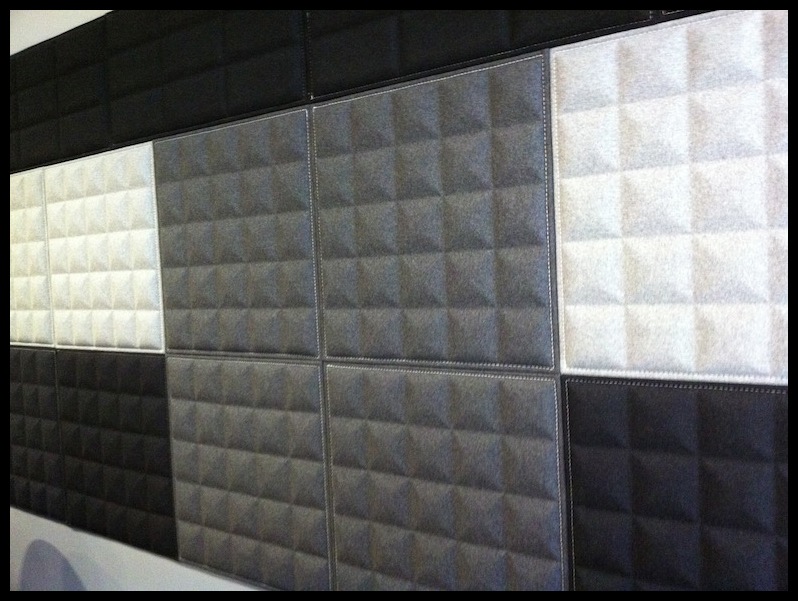
I also fell for their wonderful Buzzitiles 3d, recycled-content wall panels (below) - Although I’ve only ever specified similar for commercial fit-outs, I’m hoping to form them into a headboard for our bedroom. Love that mid-grey pyramidal form creating depth and texture.
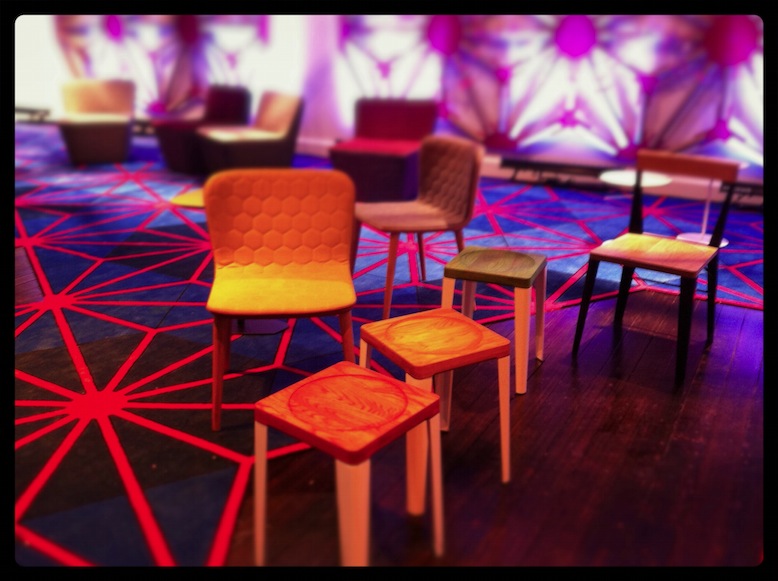
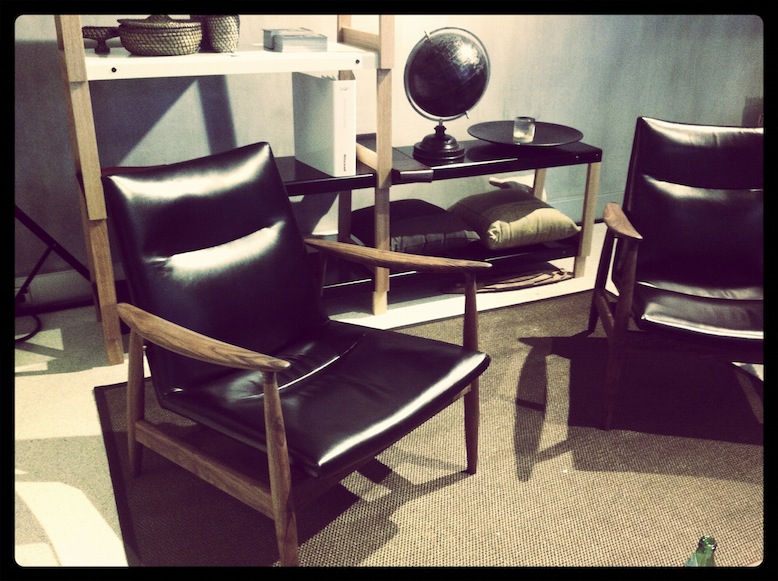
A few quick pop-ins along the way to the next destination, Stylecraft, to catch up with a friend over from Radelaide. Love when events drag people to Melbourne from all over the country! She did a great job simultaneously catching up, pouring us champers, snagging the delectable little soft shell tacos and showing off their new and current products. The styling and quality that they displayed throughout the space was first class. My mum (Artist and Designer from Perth, Melva Babarskas) was about ready to snatch the striking orange chair from the entry, while I was coveting the rich black leather armchair and its surrounds.
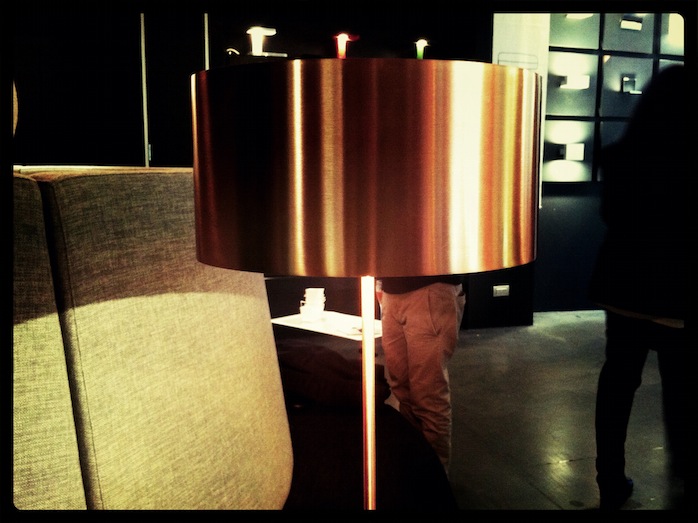
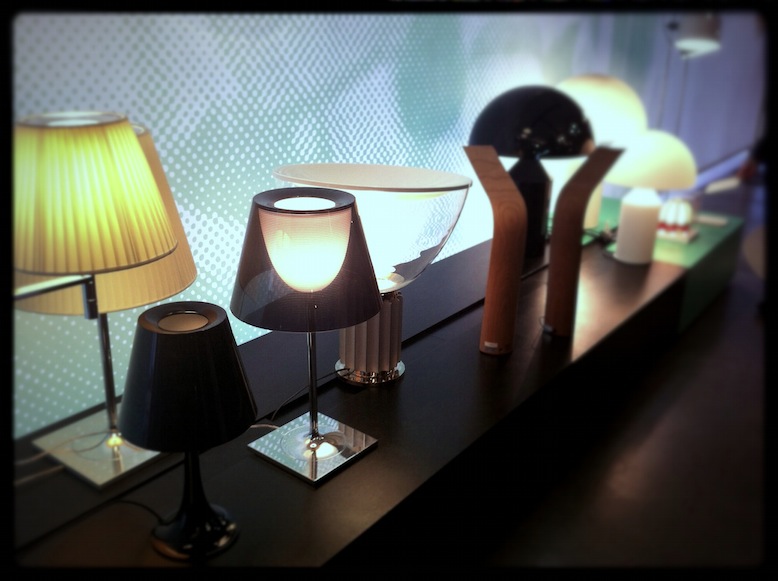
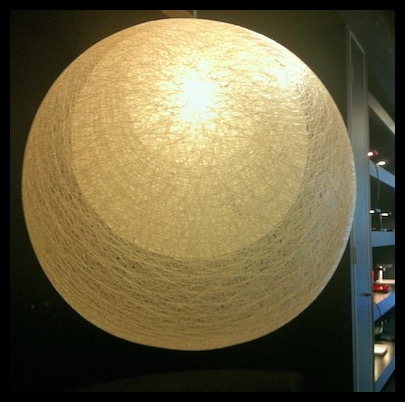
The last few locations were all about lighting, lighting, lighting. Euroluce’s display was fantastic as usual. De De Ce also presented a classy exhibition. Again, my impending bedroom refurb was front-of-mind, so the selection of lamps in metallics and gloss were particularly appealing. Copper and Bronze are everywhere at the moment. It’s a nice break from the chrome/silver world - still up there with gold in luxuriousness, but not quite as cocky. Yamagiwa’s Mayuhana pendant by Toyo Ito at Euroluce was a glowing beacon in the corner and would look impressive in almost any space.
A tired and hungry baby put an end to the days festivities, although it must be said that he was exceptionally well behaved for most of it. Had a great day, met wonderful-beautiful people and definitely got my design-fix for the week.
Hope you enjoyed my second post and hopefully enjoy more to come.
xo Romona
![]()
Planning + Procrastination
Being a scaredy-cat one is even harder.
I've been delaying this blog for some time now, determined to have at least a few months of posts planned, laid out and prettified. I had planned to post my thoughts and highlights of several Home shows, Decoration + Design, Furnitex, Green Building Conferences, Design Made Trade, Saturday In Design... using any trade event to get motivated to finally post my first entry. With two boys under three and running my own business from home this has been pretty unsuccessful, and I think missing the point of why I wanted to have this blog in the first place.
So what is my aim? I guess I am still trying to figure that out, but here's a start.
A record of my experiences and inspirations;
A gallery of my personal style, tastes and influences;
A silent venting arena for my design goals, successes and failures;
And an excuse to have at least a few minutes quiet-time away from my two little boys and one big one.
I'll try and keep it short and sweet although I am not really known for that, as you may already be able to tell. 'Be Succinct' was constantly in bold red pen on my high school English Literature Essays. Never quite mastered that.
I hope to bring you a little bit of design, colour and visual delight each week. I will try not to let my nerves get the better of me - with so many wonderful architecture, interiors, art, design and décor blogs out there, I doubt any one will be reading this little one yet anyway.
Next post – a quick highlight of my Saturday In Design runaround over the weekend, with a few happy snaps. Hope you enjoy.
xo Romona